Cogging Compensation
Feature Overview
Motor cogging, also known as cogging torque or detent torque, is a phenomenon in permanent magnet motors where the rotor tends to lock or settle into a preferred position due to the magnetic attraction between the permanent magnets on the rotor and the iron “teeth” of the stator. This attraction can create a jerky or notchy sensation when rotating the motor shaft resulting in an uneven torque delivery from the motor when it is powered. This is purely a magnetic phenomenon that appears in slotted motor architectures and is independent of the winding of the motor. Torque ripple is often used interchangeably with cogging torque but the two are not the same. Cogging torque is a positional effect characterized by the interaction between the magnets on the rotor and the slots on the stator, while torque ripple is a dynamic effect occurring while the motor is rotating. Torque ripple is characterized by several different things including cogging torque.
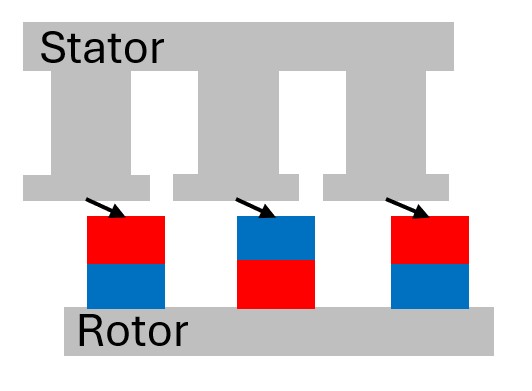
Illustration of Cogging Effects in a Motor (Simplified)
Cogging compromises the smoothness and precision of a motor’s operation affecting various aspects of your motion assembly. The jerky motion caused by the stickiness between the rotor and the stator of the motor lead to poor performance of the motor at lower speeds and positioning errors. Hindering the operational speeds of some applications as well as the precision/accuracy it can deliver. Additionally, the oscillations in the torque can cause mechanical issues in your system by creating vibrations increasing mechanical wear. Lastly these torque fluctuations can affect the efficiency of your system and increase heat generation as overcoming these parasitic magnetic forces causes the motor to operate in a state of less-than-optimal efficiency.
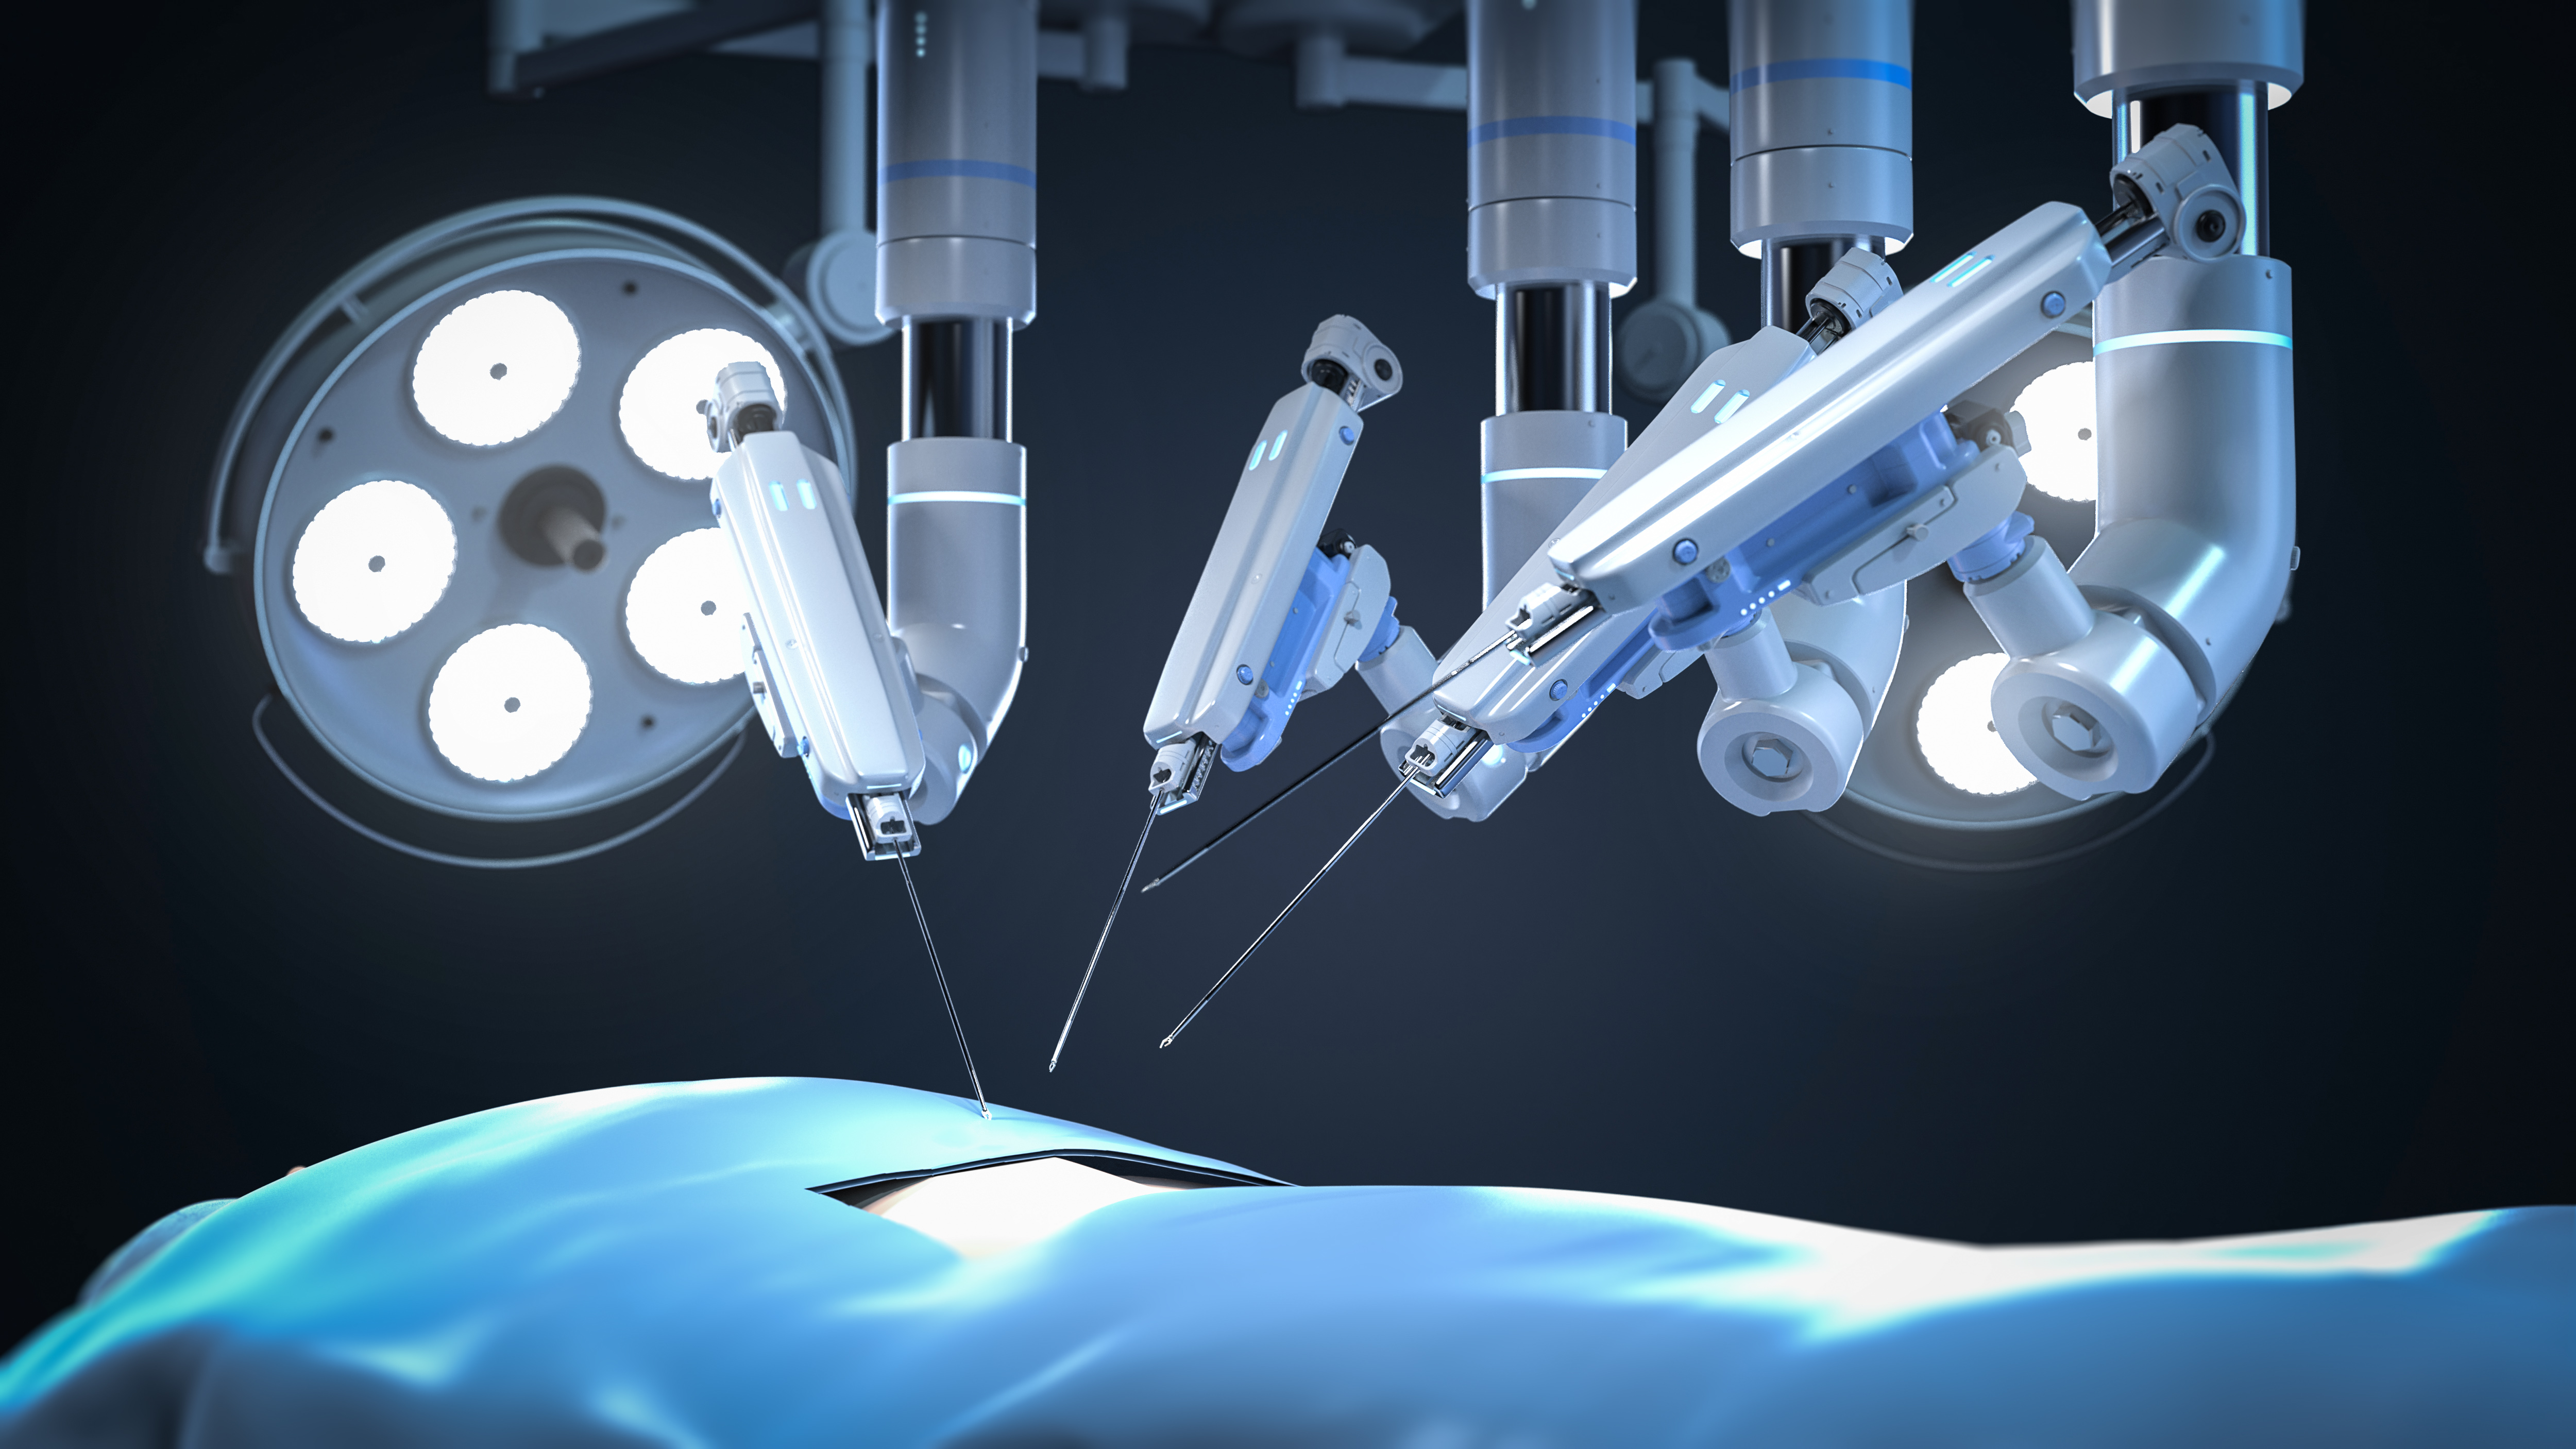

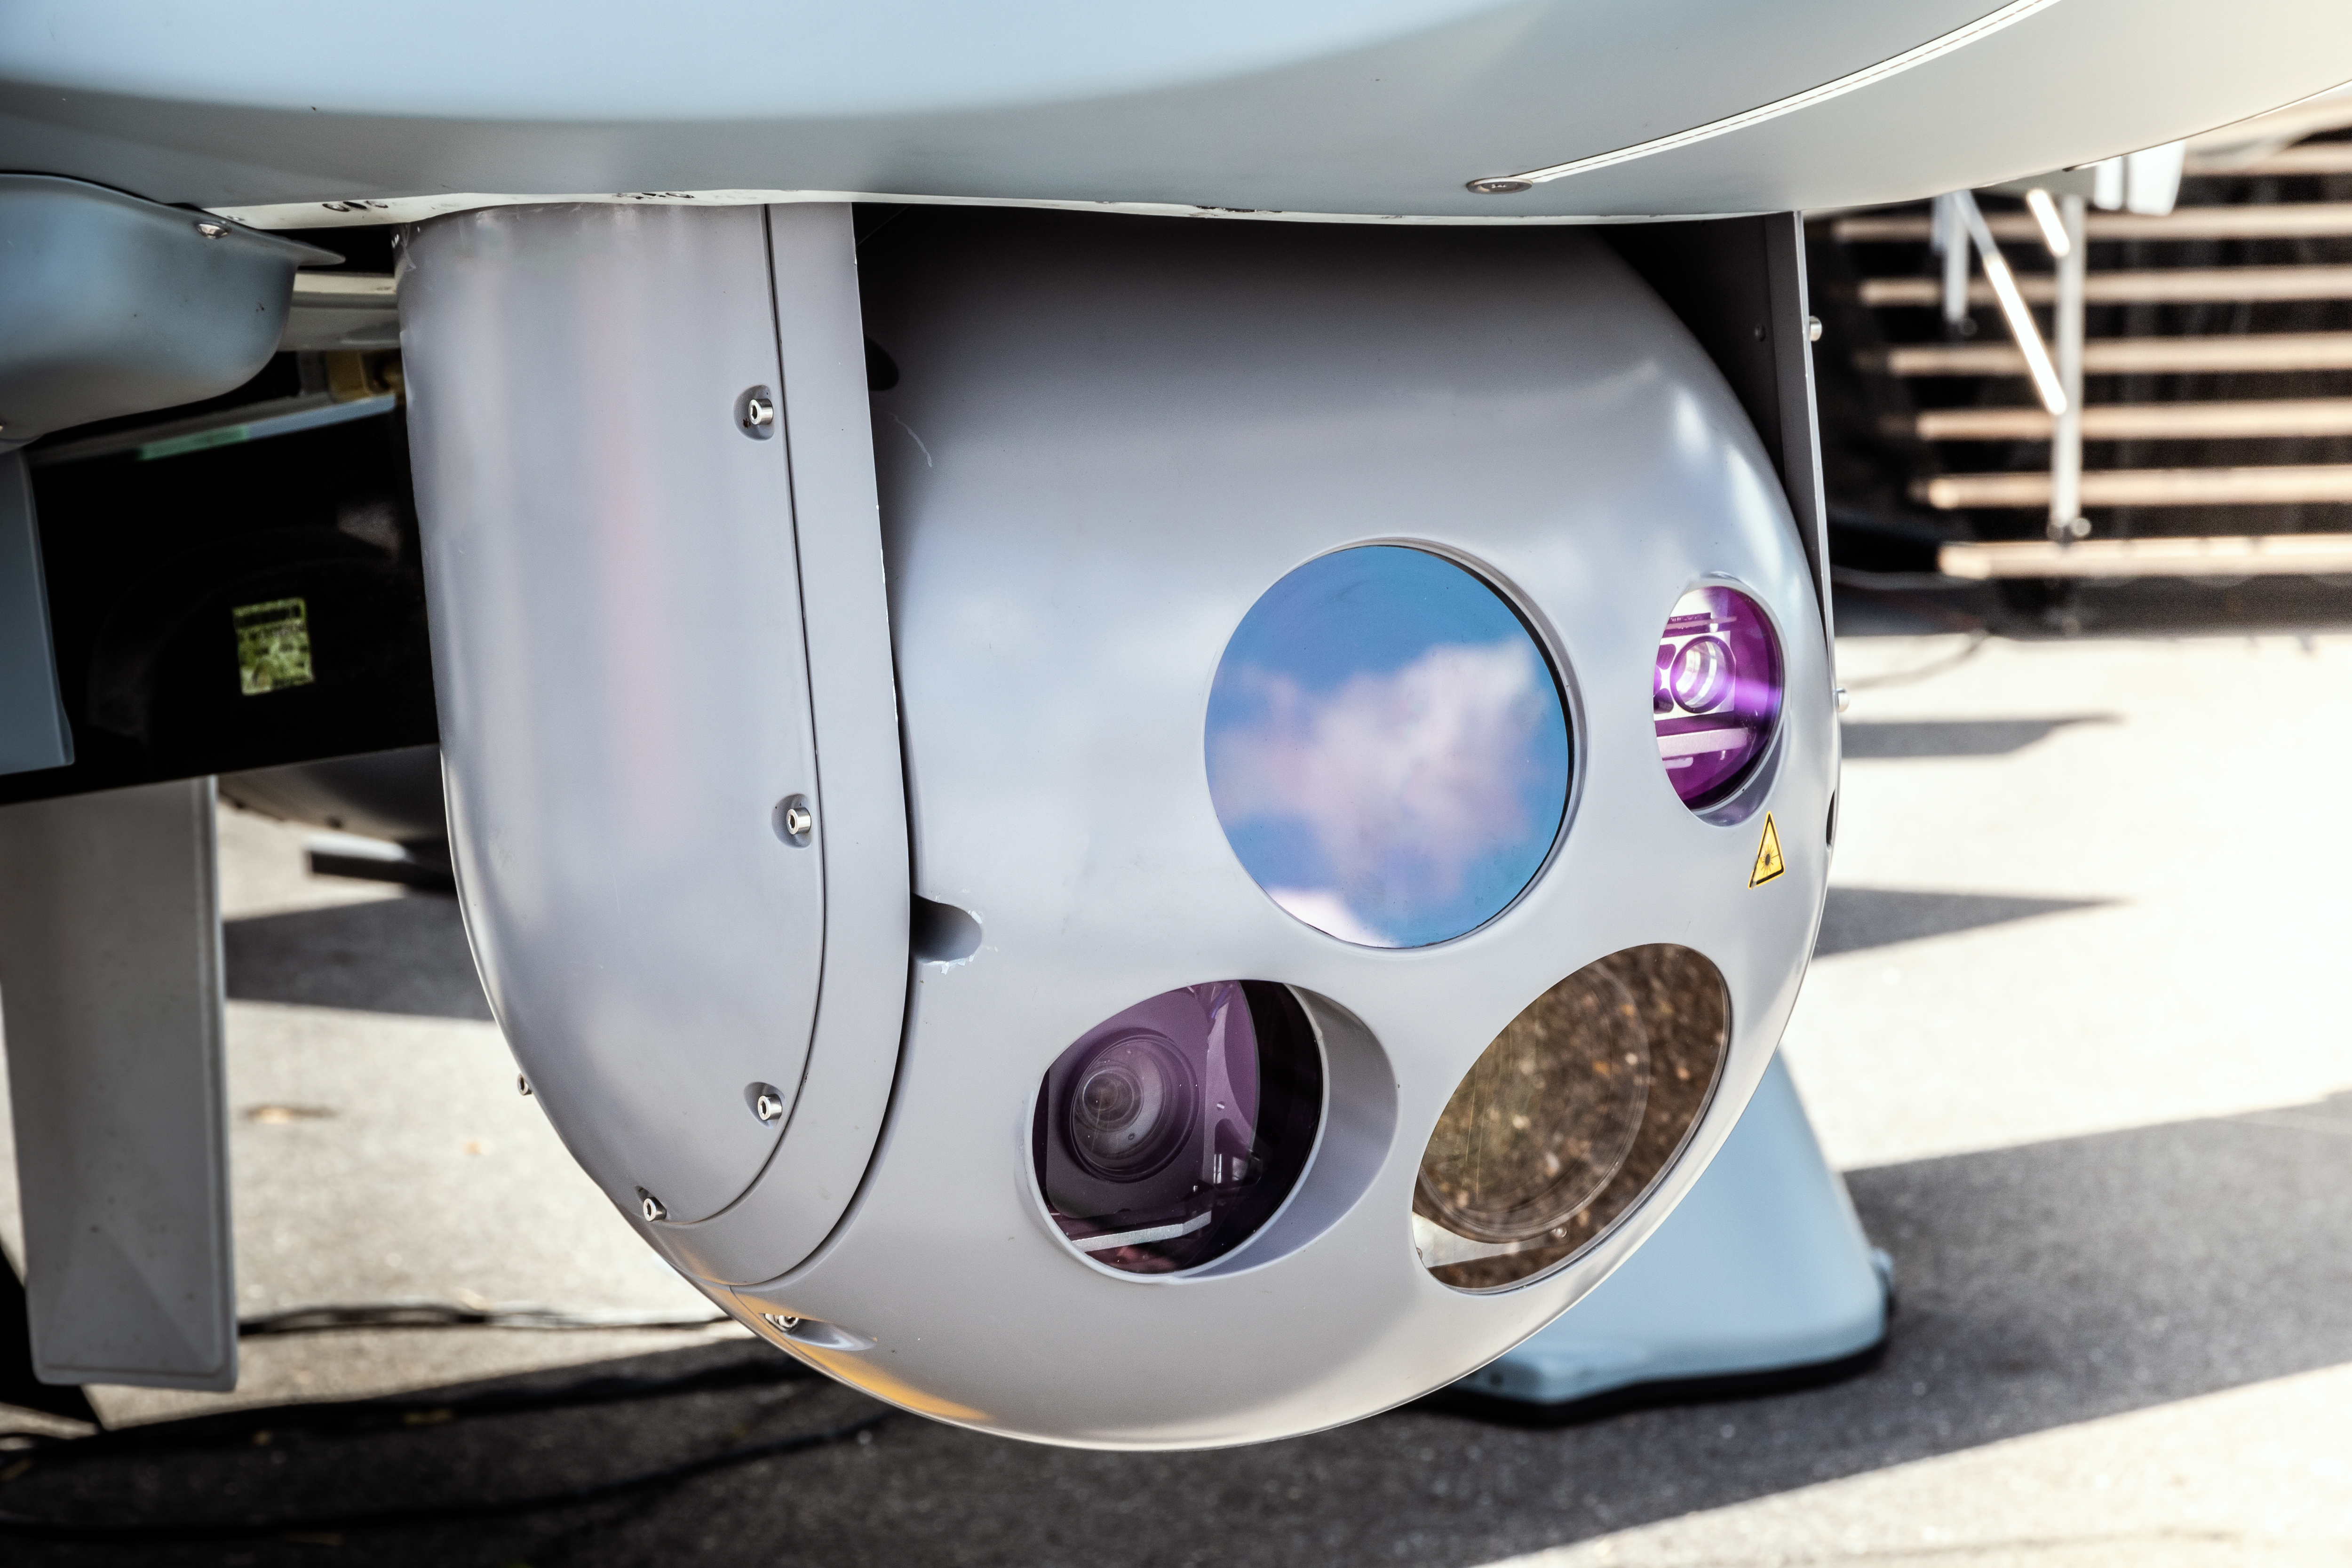
Sample applications that could benefit from cogging compensation include humanoids, surgical robotics, and optronic systems.
Cogging compensation is a software-based techniques used to cancel out the motors inherent cogging torque by actively injecting equal and opposite torque into the motor. When properly implemented cogging compensation can improve performance at lower speeds, where cogging torque is most prevalent. It can also improve precision by eliminating the locking between the magnets and stator teeth, allowing for more repeatable and accurate position. Lastly by smoothing out the torque output of the motor, vibrations can be reduced cutting down on wear-and-tear of mechanical components in the system.
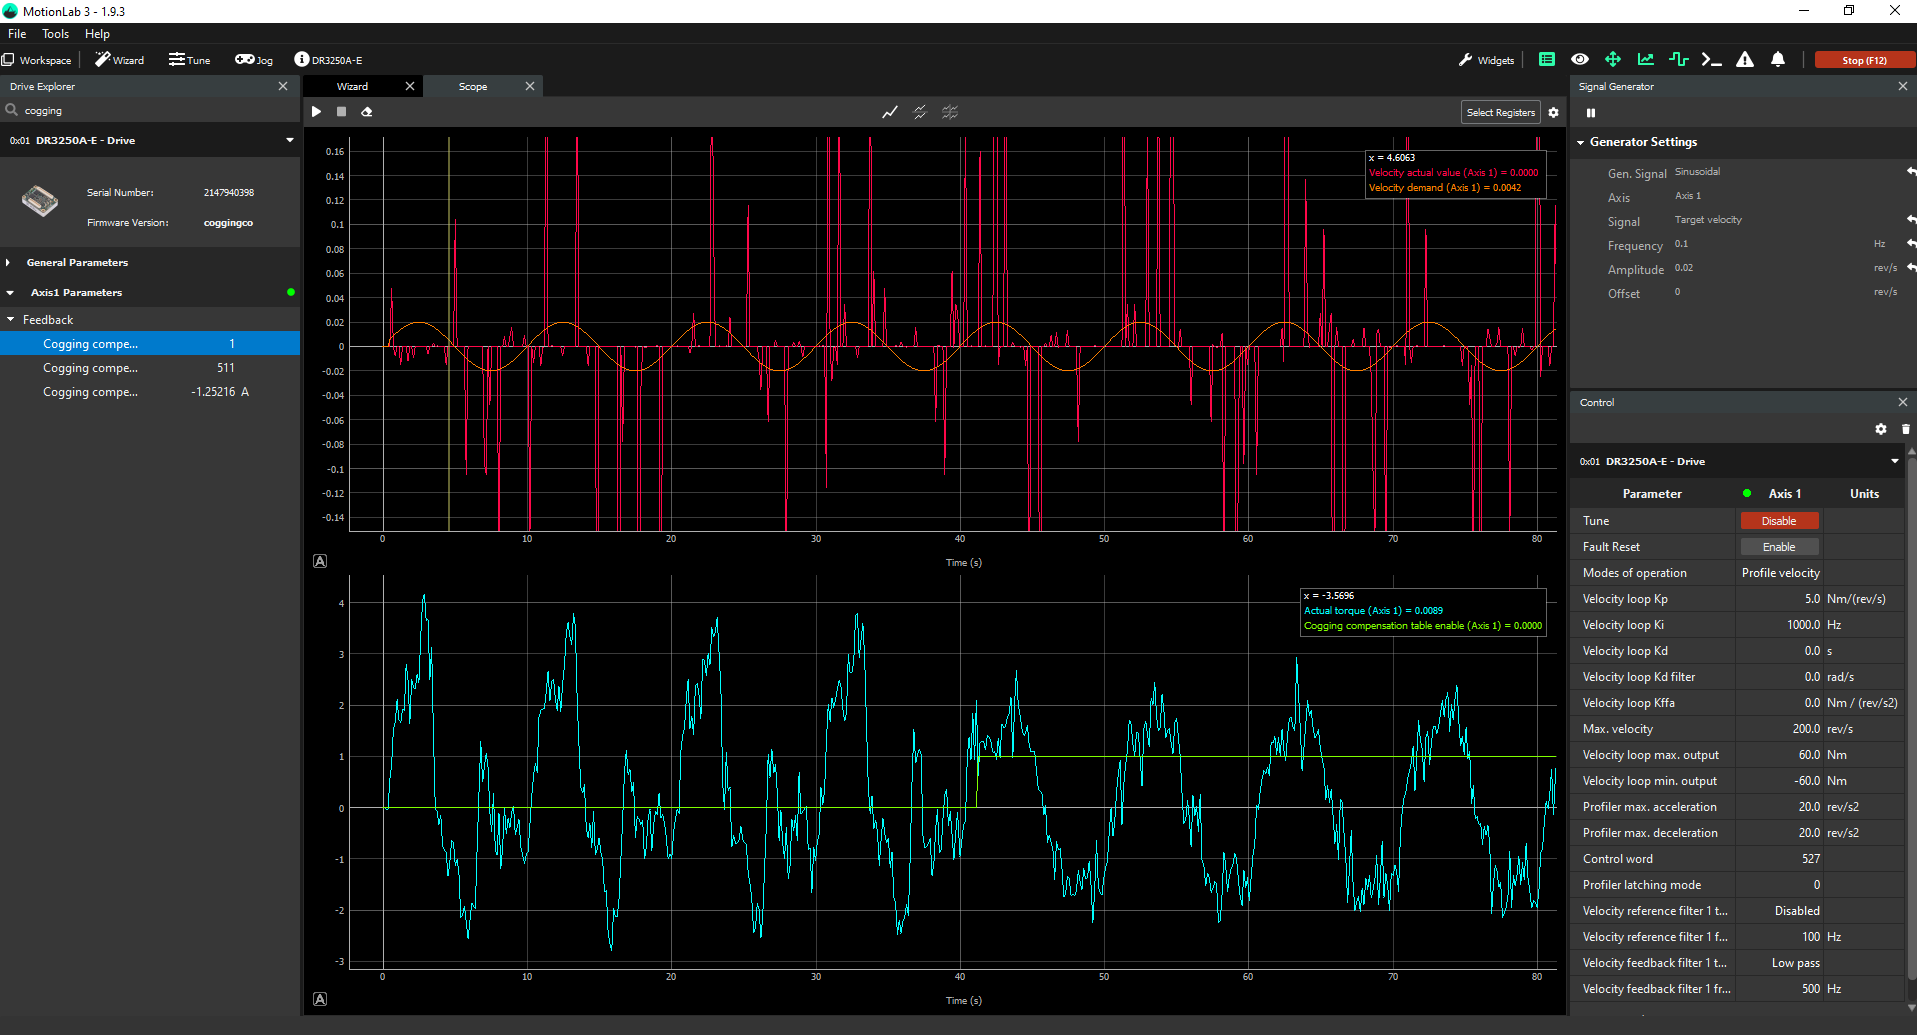
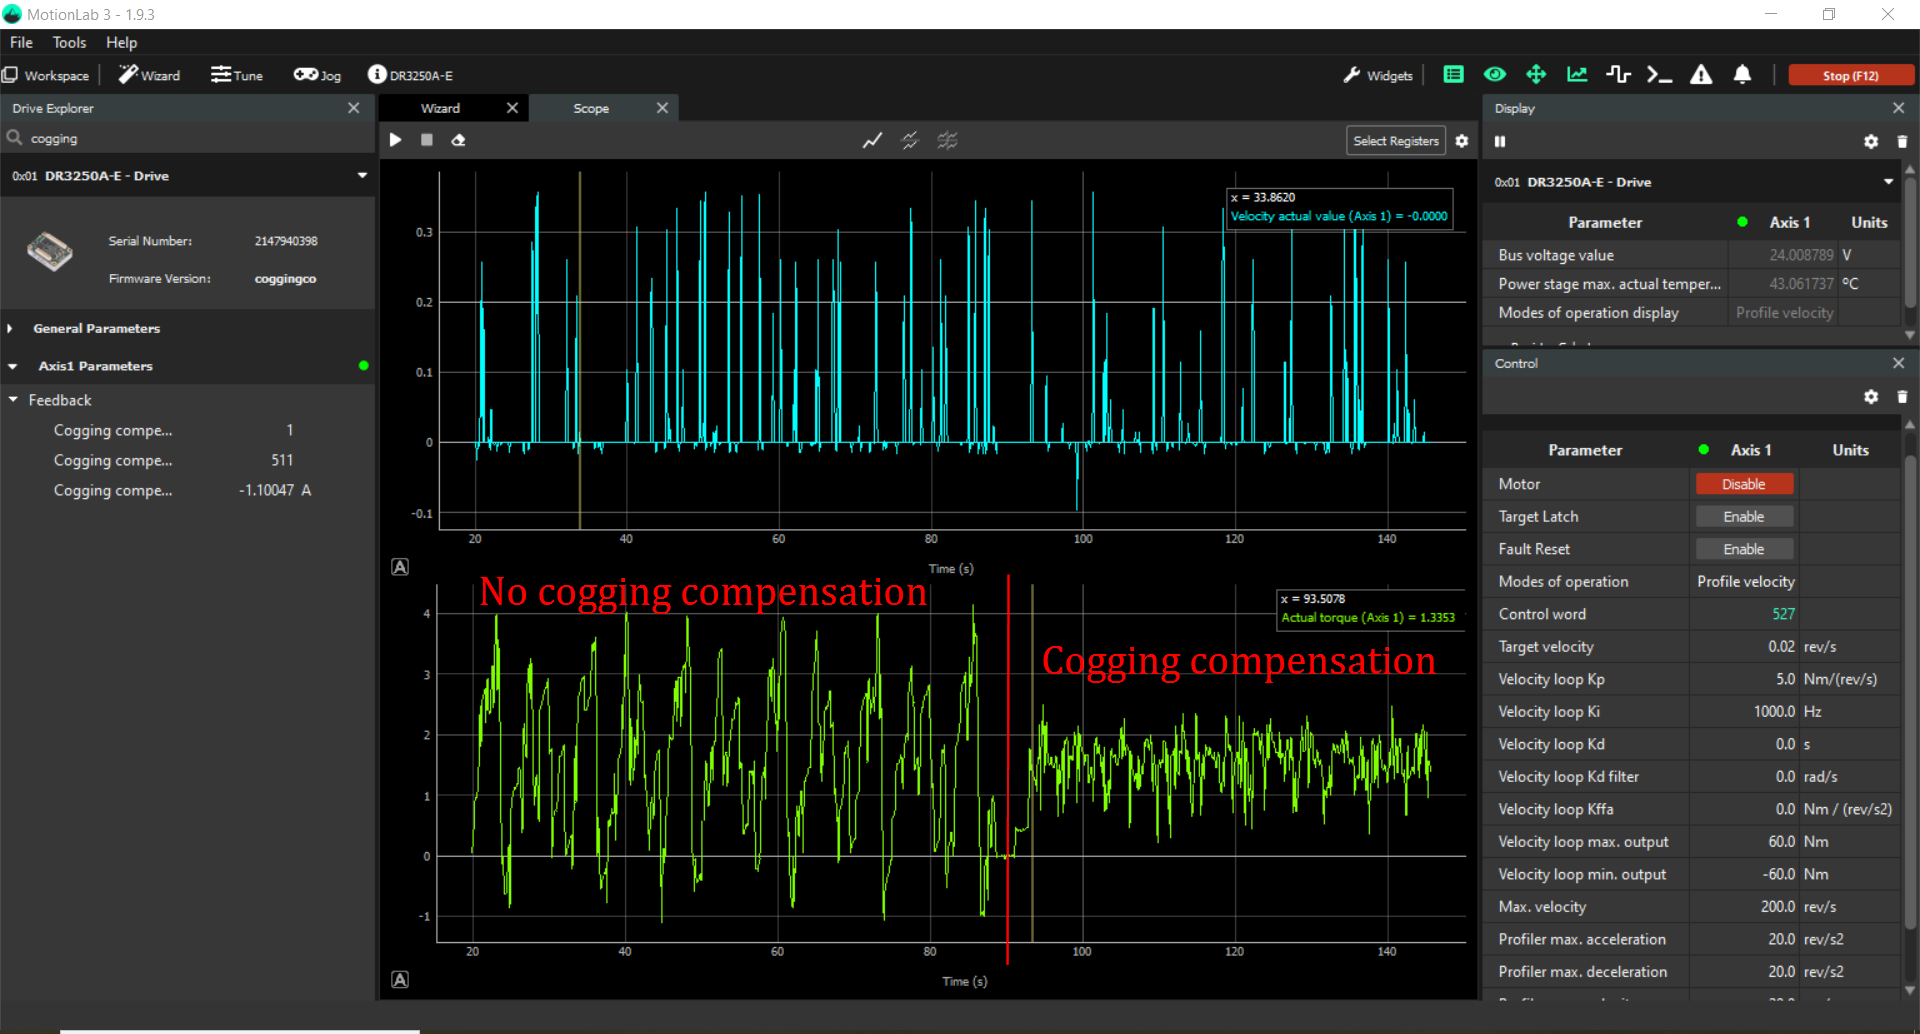
Example of the improvements that cogging compensation can have on a motor with high cogging torque.
Technical Implementation
Cogging compensation is a LUT (Look-up table) that uses the electrical angle as a selector of the index:
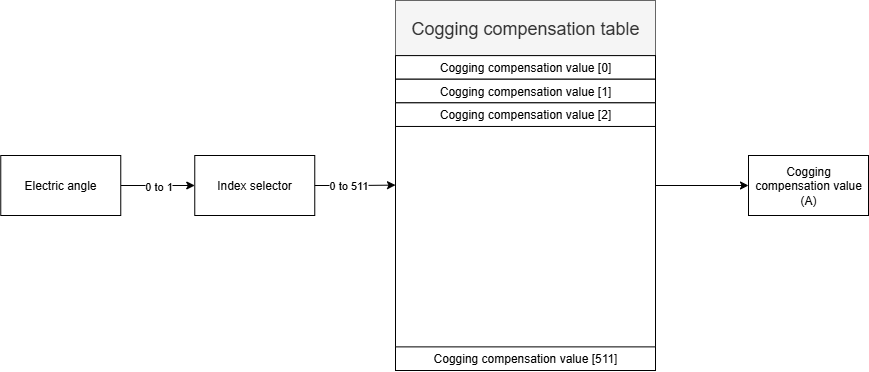
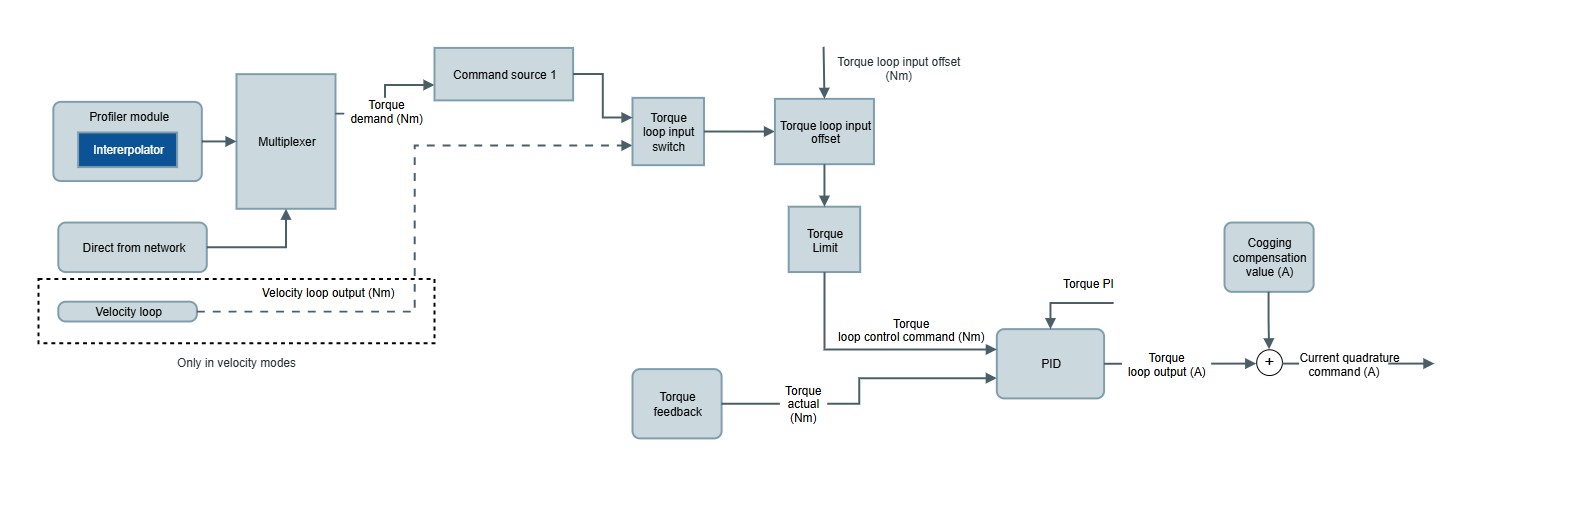
When enabled, the values from the table [units of Amperes] are directly injected as an offset in the Torque loop output as a compensation for the cogging torque of the motor. See the following diagram:
The register to enable/disable the cogging compensation feature is the following:
0x2306 - Cogging compensation table - Enable
The registers to fill the table are the following:
0x2307 - Cogging compensation table - Index
0x2308 - Cogging compensation table - Value
Implementation
There currently is no MotionLab3 GUI for implementing cogging compensation (as of MotionLab3 v1.10.0), so we have provided an example python program that will walkthrough the process of acquiring the cogging data from the motor and generating a table file that can be implemented in the compensation table on the drive. Please note that this program is not a “One-Size Fits All” program as you might need to make adjustments in the code to account for test velocity (Velocity_SP) and minimum test duration (Min_Test_Duration). This program uses Ethercat to connect to the drive so some modifications might need to be made for CanOpen drives.
Before proceeding with a cogging compensation test, please ensure that you have walked through the MotionLab3 configuration wizard and have, at minimum, a tuned velocity loop. A well-tuned velocity loop with stable low speed velocities will yield the best results
Cogging Compensation Program - Bitbucket
Once the program has been properly created and installed you can go ahead and run the program. For additional steps on how to install the program properly please see the Appendix section.
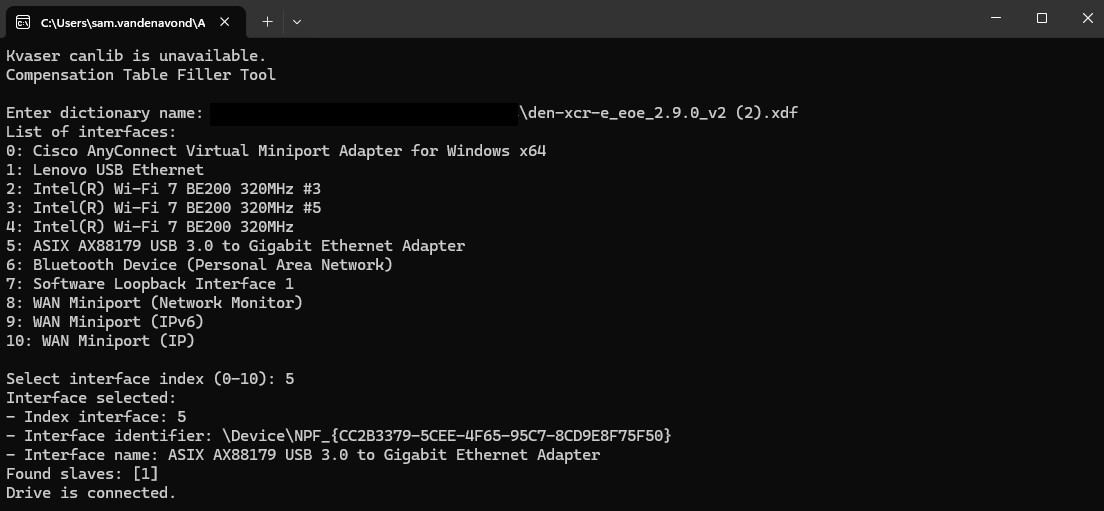
The program will first prompt you to point to the dictionary file of the drive you are connecting to.

It will then prompt you to select the interface that you are using to connect to the drive. In this example, we are using a USB-C to Ethernet Adapter named “ASIX AX88179…” or Option 5.
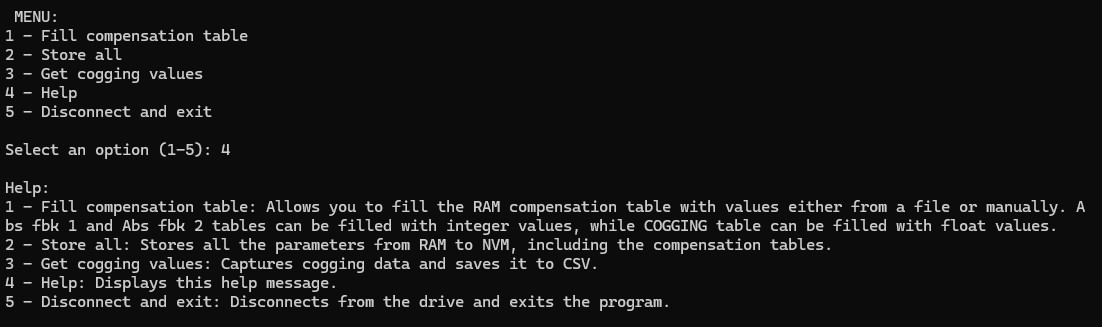
Once connected the program will show the menu options that are available. These are listed and described below.
When starting from scratch, we will select option 3 to start acquiring the cogging values. The program will then prompt you to input the duration of the cogging test and then it will check the commutation and phasing of the motor. Once completed the cogging test will automatically start by spinning on one direction at the directed speed for the directed duration and then run the test in reverse.

Once completed the program will generate a number of graphs showing the data it has collected and the counter cogging values it has calculated. Once you have clicked through those pop-ups allowing you to observe the data and calculations done, it will ask if you want to proceed with data it has collected. By selecting “yes” the program will automatically upload the generated .csv file of cogging data into the drive. Selecting “no” will send you back to the menu. To ensure values are stored to non-volatile memory you perform a “2- Store ALL” before disconnecting from the program.
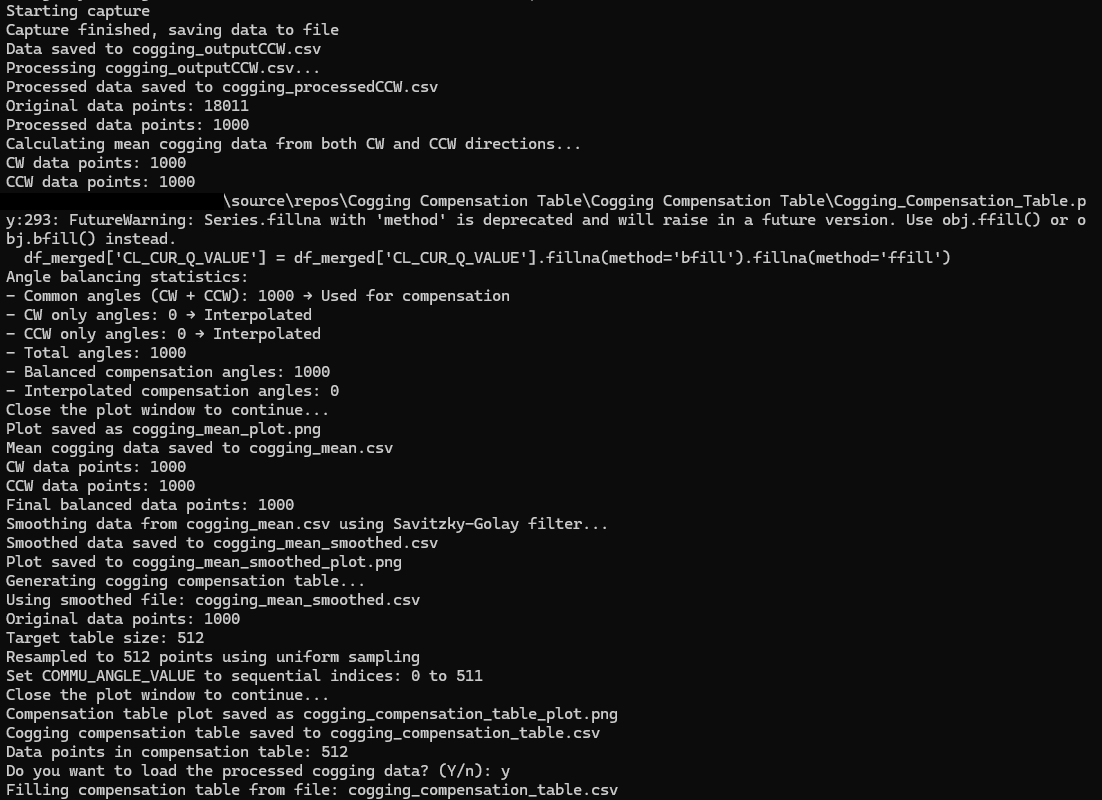
Once the process is complete it will return to the standard menu page where you can perform a 2 - STORE ALL function to store this new cogging data into the non-volatile memory of the drive.
Please note that this program will generate both .csv files and .png files for all the data it has collected for further analysis or later upload via the “1” option in the menu.
Below is an example of how cogging compensation can improve the performance of a motor with high cogging.
Appendix
How to install the Cogging Compensation Table Program into Visual Studio 2022
Open Visual Studio and select the Clone a repository option from the start window.
In the "Clone a repository" window, paste the HTTPS URL you copied from Bitbucket into the Repository location text box.
Specify a local path where you want the repository files to be stored in the Path section.