Control
What is Control?
This widget is used to modify the value of any parameter added by the user. It is displayed as a table where each row is a different parameter and only the used axes are shown as columns.
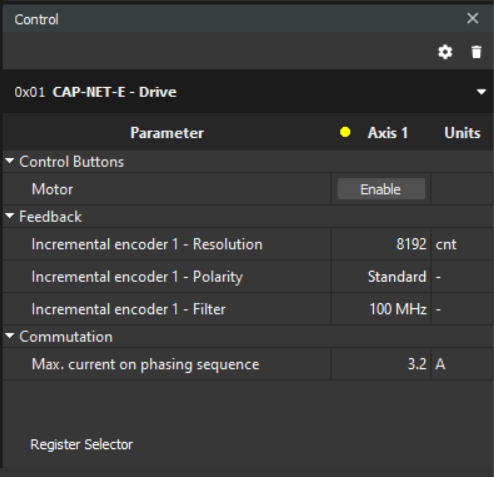
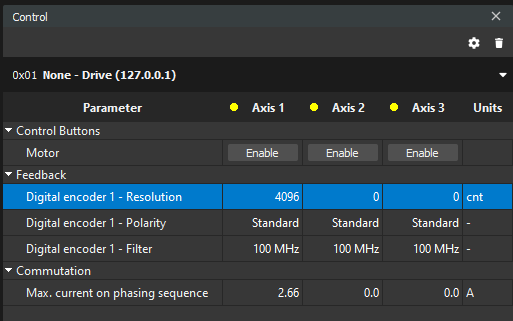
If the user clicks on the displayed value, an input value box appears, allowing them to change it.
The parameters will be automatically saved to the drive after pressing Enter.
Configuring and working with the Control
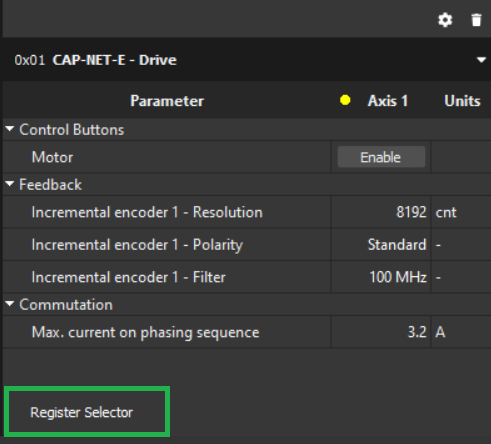
Add registers with the Register Selector
Click the Register Selector button to open the pop up.
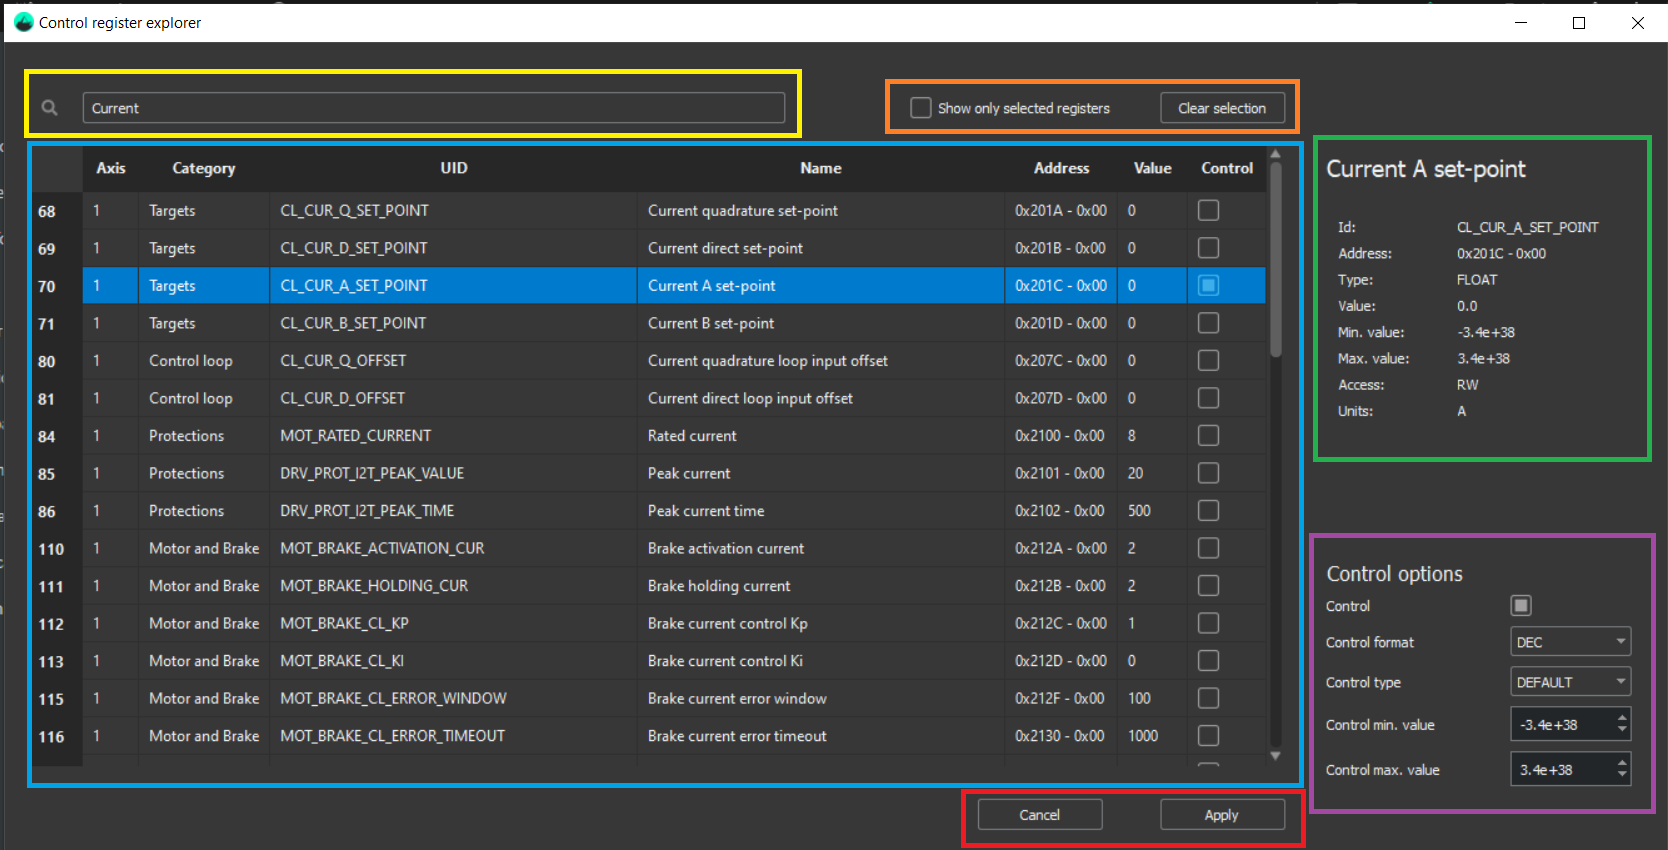
Register Selector pop up has the following parts:
Registers table (blue rectangle above): Contains all the registers available for the Control widget. A register can be selected in the table to show its data on the right side (green and purple rectangles above).
The visible register data is:Axis: axis related to the register, '-' if it’s a general register (not related to any axis).
Category: subgroup where the register is categorized.
UID: Register unique identifier, used by Ingeniamotion python library.
Name: Human-readable name.
Address: Register address. An address for Ethernet and EoE, Index and subindex for CANopen and CoE.
Value: last value read by MotionLab3. Warning: it can be an old value.
Control: checkbox to add the register into the Control widget.
Search bar (yellow rectangle above): Used to filter by any register field.
‘Show only selected registers’ checkbox and ‘Clear selection’ button (orange rectangle above): Check box to show only the selected registers and a button to deselect all the registers.
Register data side panel (green rectangle above): All the selected register data.
Control options (purple rectangle above): Selected register control configuration. See details in Control register configurations section.
Cancel and Apply buttons (red rectangle above): Press Apply to accept the changes, otherwise, press Cancel.
Control register configurations
Control format: The user can choose whether to display the register in decimal or hexadecimal representation.
Control Type: The user can choose how to display the register to edit.
The options available are:Default: Displayed in this example as an input value box to edit it.
Slider: Displays a slider with the range available for the register. More details in the Sliders section.
Minimum and maximum values: The range of possible values allowed to the register.
Precision (only in Slider type): If the selected register supports float values, this setting determines the number of decimal places.
Overall Control configuration
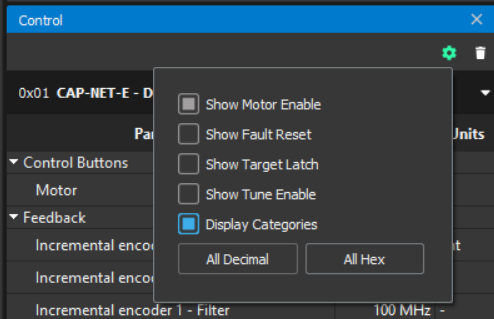
Show Motor Enable: Show or hide the button to enable motor.
Show Fault Reset: Show or hide the button to reset fault state.
Show Target Latch: Show or hide the button to target latch.
Show Tune Enable: Show or hide the button to enable tune.
Display Categories: Classify the registers by their categories or show all of them as a raw list.
All Decimal / All Hex: Show all registers in Decimal or Hexadecimal representation.
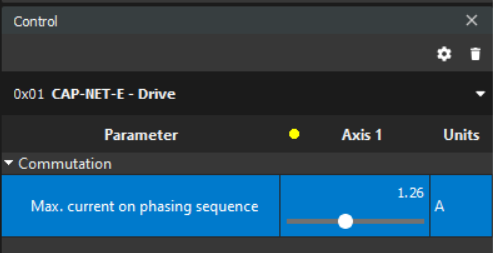
Sliders
This type of visualization is only possible for registers that have numeric values (not enumerations).
Slider type is a mode of representing parameters added in the Control widget. It allows setting values dynamically sliding the stepper over the allowed range.
Additionally, the precision can be set from 0 to 6 decimals for float values (2 by default).
In the default representation, if the user clicks on the displayed value, an input box appears to allow them to change it, and the stepper automatically updates to the new position.
Removing registers from the Control
There are three options to remove registers from the control widget:
Right-clicking the register and selecting "Remove from control".
Click the garbage can icon to remove all the registers.
Open Registers Selector and deselect the register.
This action will remove all the axis added of the parameter at Control, the whole row will disappear.
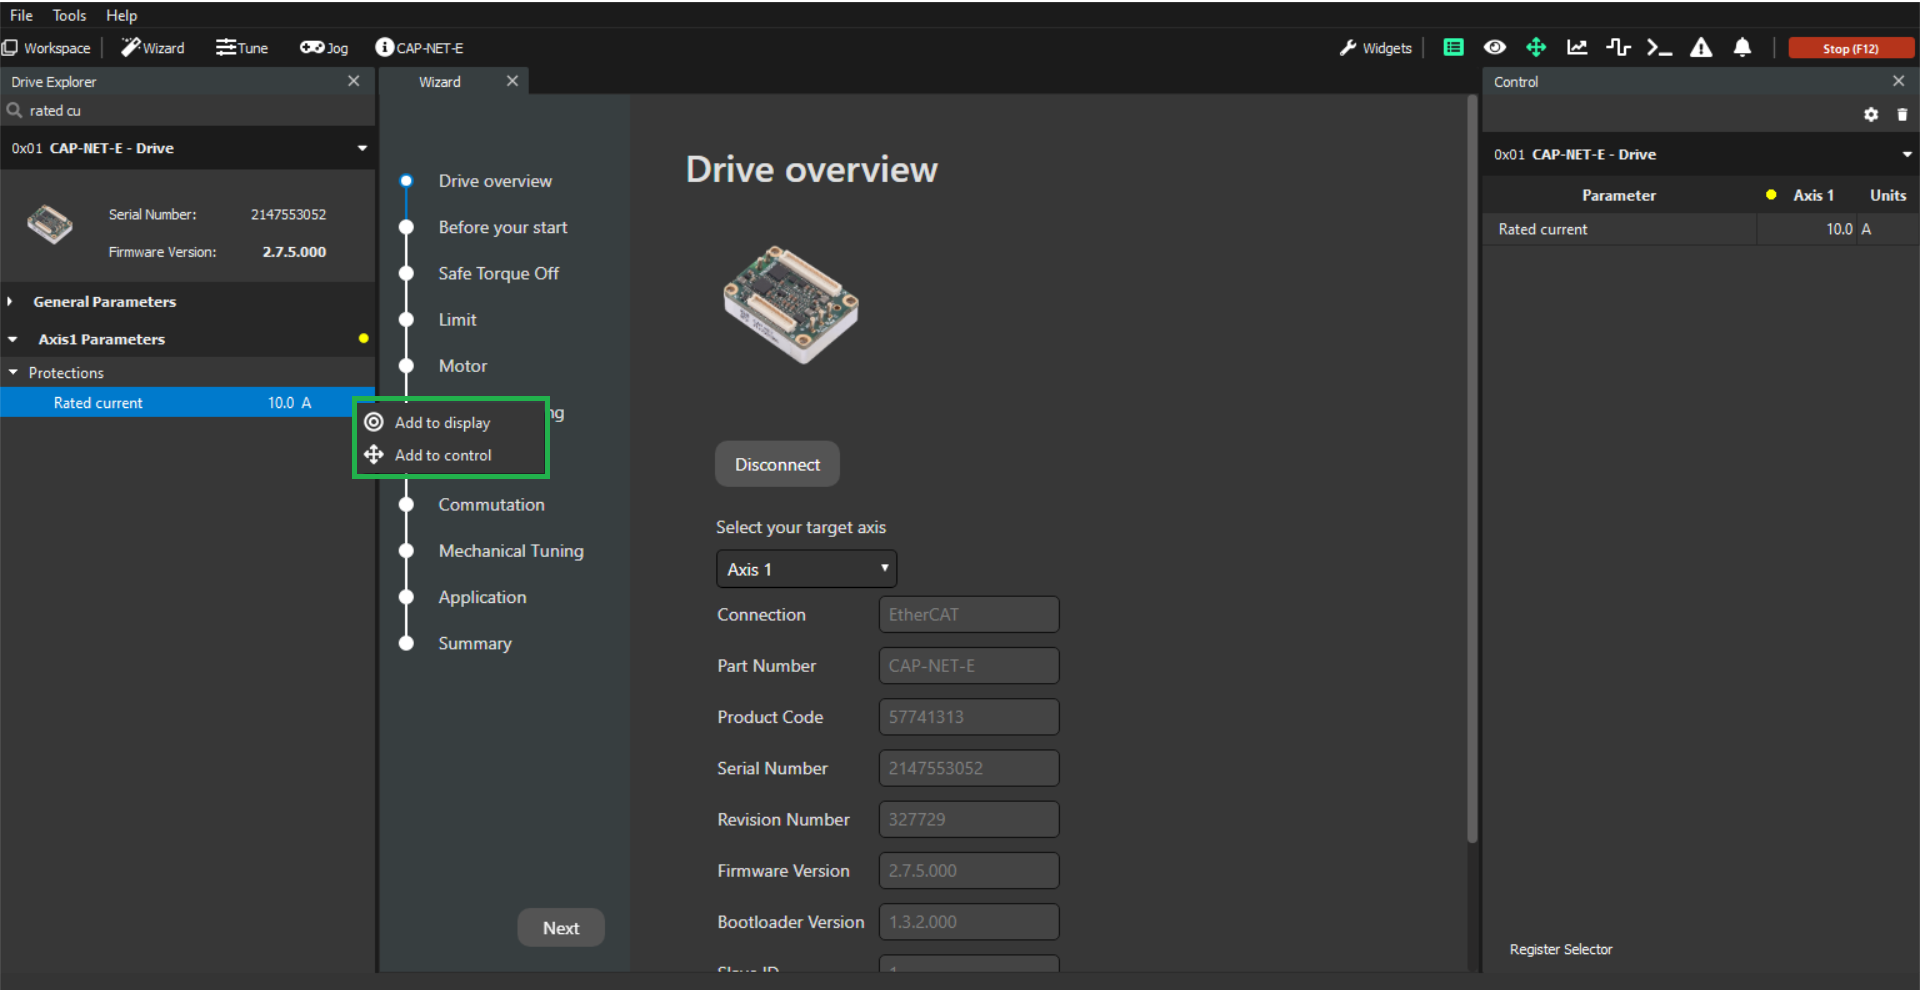
Adding registers from Drive Explorer to Display/Control
Another way of adding registers to the Control and Display widgets is from the Drive explorer. By right-clicking on the registers displayed in the Drive Explorer widget, you can add them to the Control/Display widgets, depending on the register type (RO, WO or RW):
RO (Read Only) - Can only be added to the Display widget.
WO (Write Only) - Can only be added to the Control widget.
RW (Read / Write) - Can be added to both Display and Control widgets.