Connecting COM-KIT to a PC
Installation
Install INGENIA MotionLab3 - User manual software which can be downloaded from Downloads .
Ethernet configuration
Before starting
This tutorial assumes that you have connected your CORE drive to an external DC power; and the Commissioning Kit between your computer and the drive.
In order to use Ethernet connection between the PC and the COM-KIT we need to set the Network Card in the same subnet than the COM-KIT. By default, COM-KIT comes with the IP set to 192.168.2.22.
Please, find below a step by step guide on how to configure the Network Card and how to connect to the driver using MotionLab3.
How to configure the Network Card
Open Windows settings and choose Network and internet options
Click on Change adapter options
Right-click on the Ethernet connection to the drive
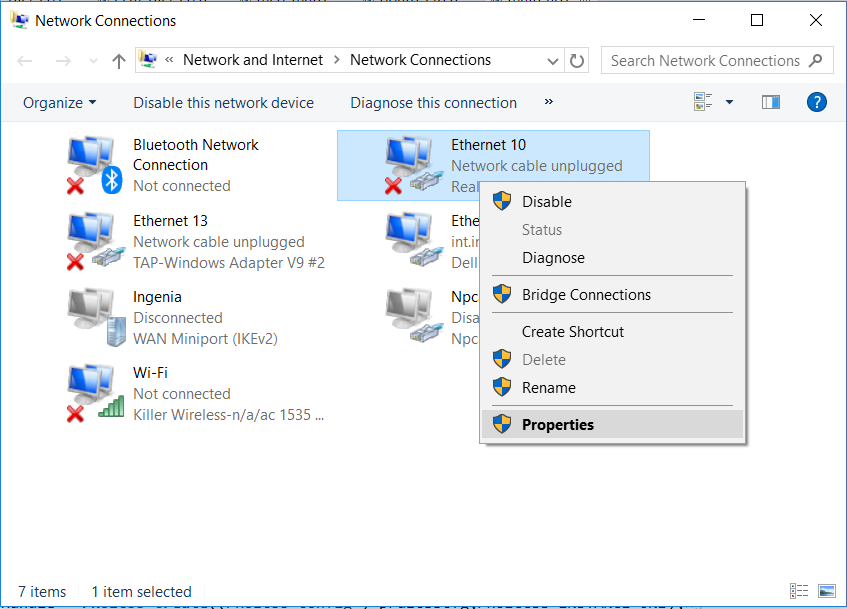
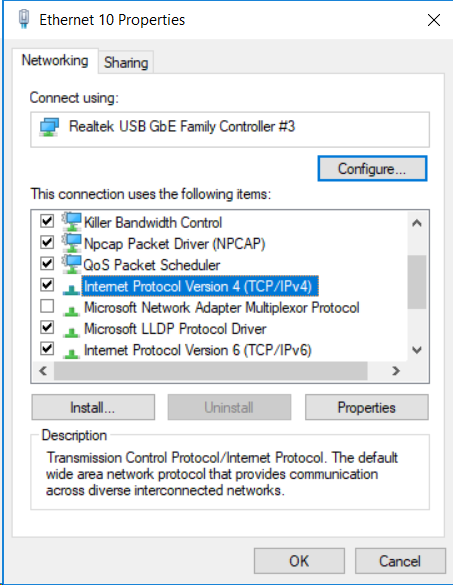
Click on option "Internet protocol version 4 (TCP/IPv4)", and click on the Properties button
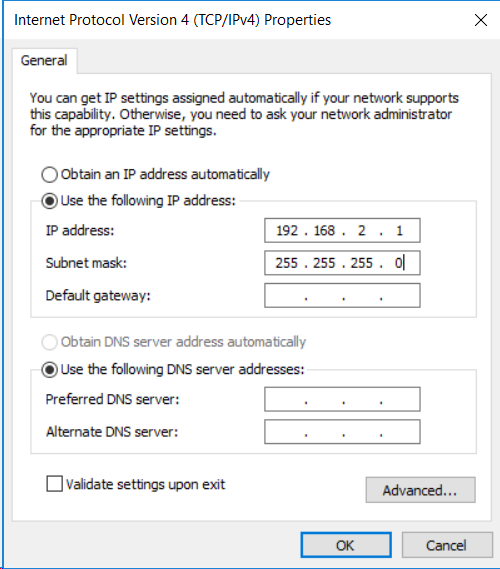
Set IP 192.168.2.1 and network mask to 255.255.255.0. Click "OK"
How to connect to the driver using MotionLab3
Older versions of MotionLab3 (1.7.X or lower)
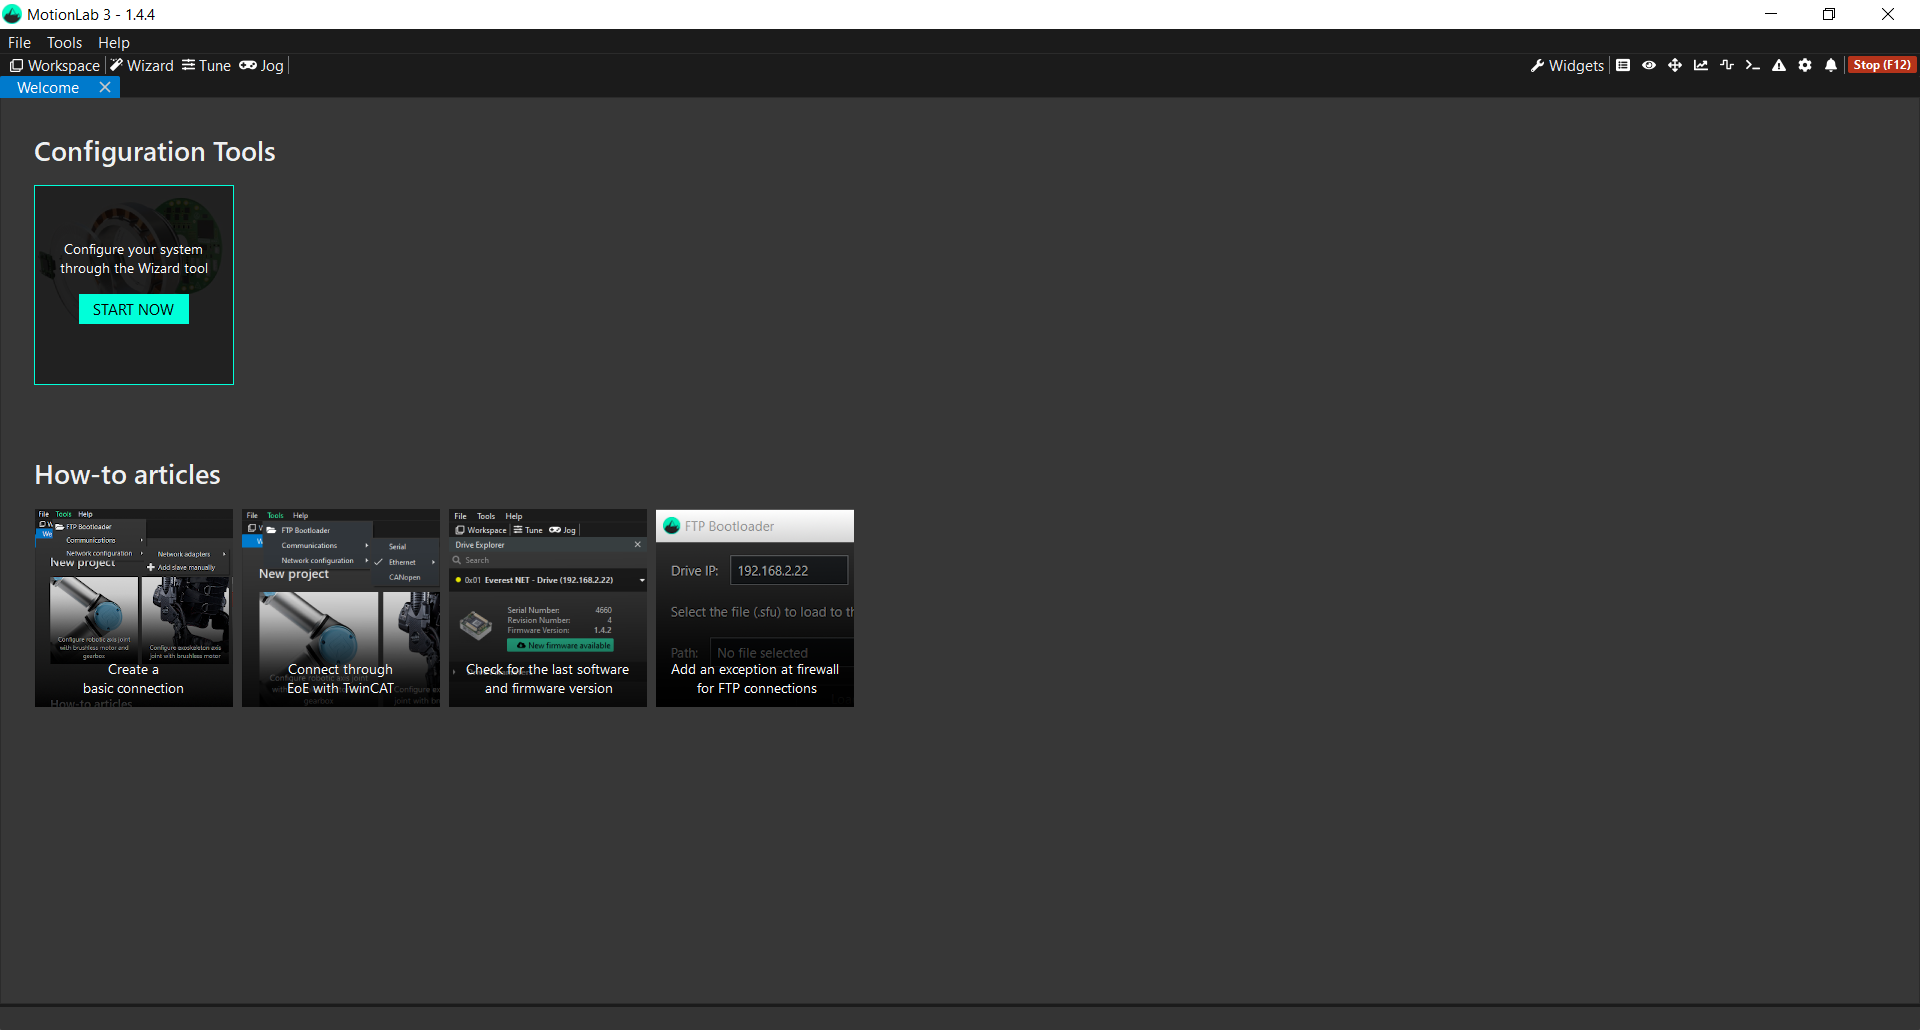
Open MotionLab3.
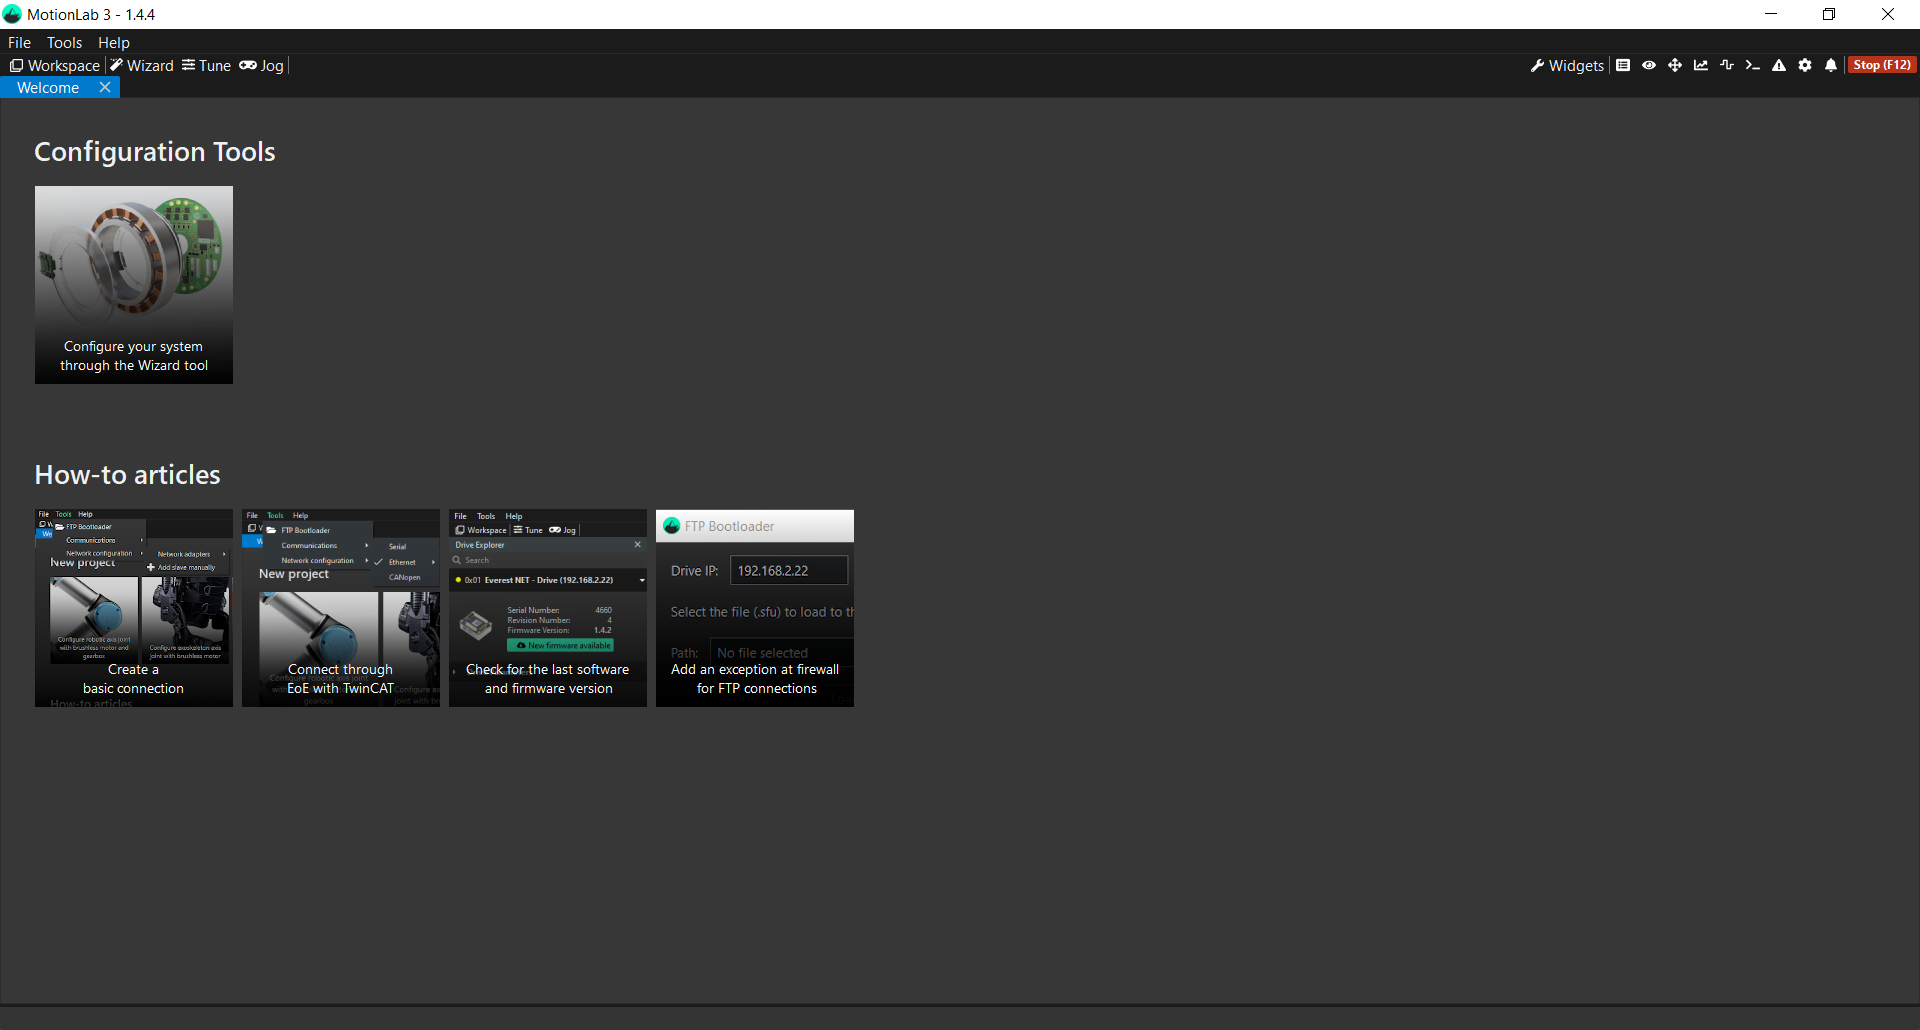
Click on "Configuration Tools" > "Configure your system through the Wizard tool
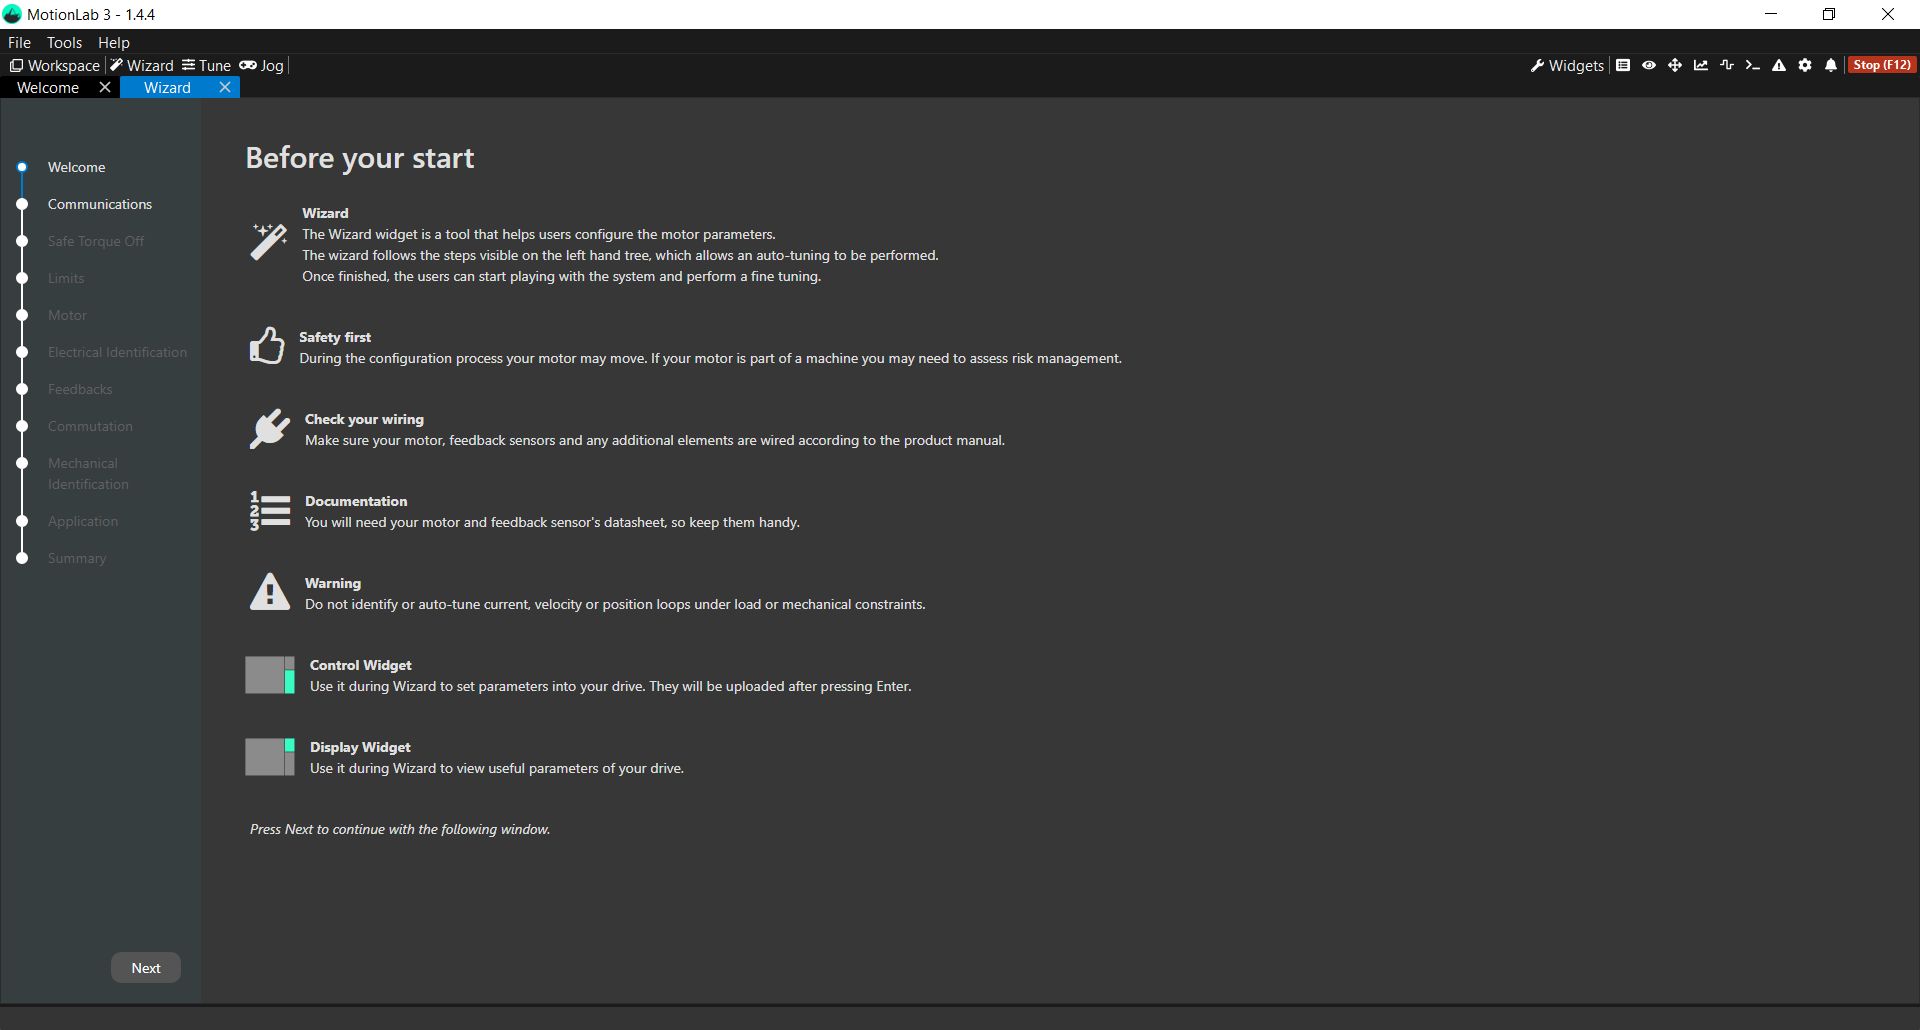
Once the Wizard starts press Next to go to Communication page
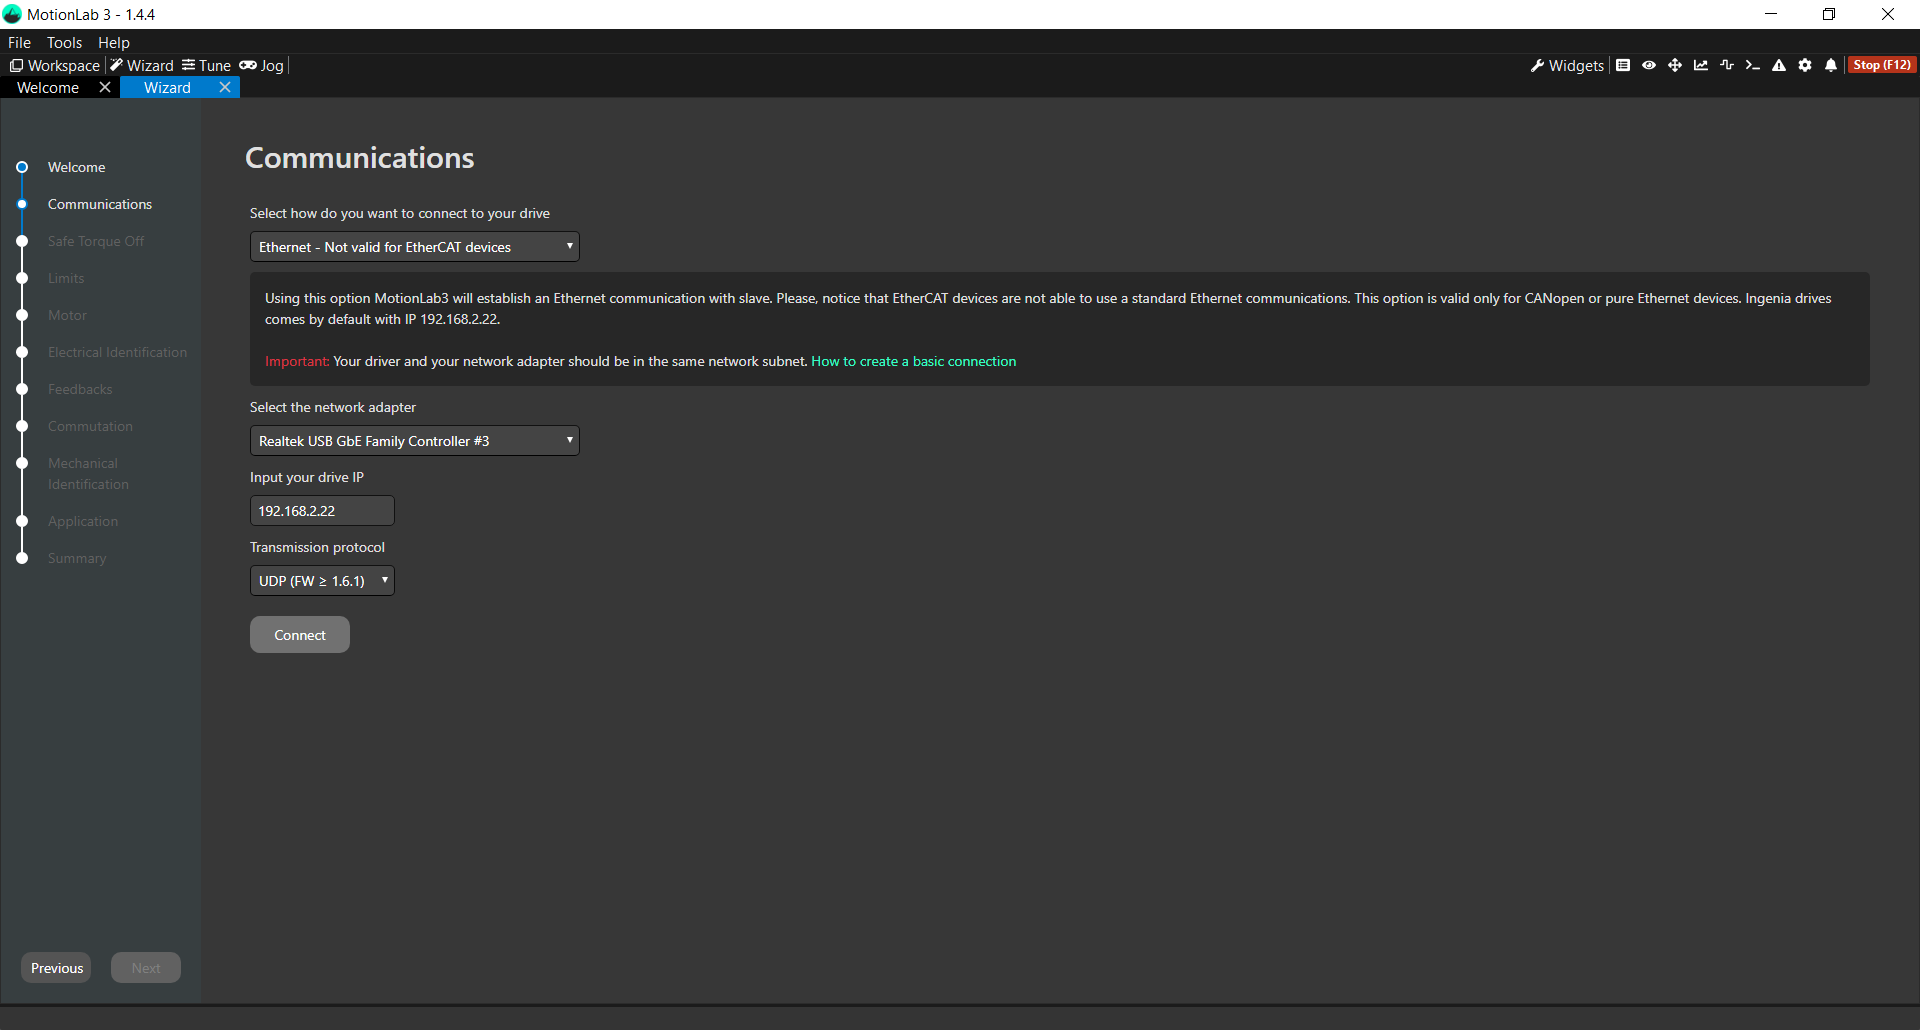
Select "Ethernet" connection, choose the network adapter where the driver is attached, enter the IP 192.168.2.22 and press "Connect".
After that, your target Drive description together with the COM-KIT will appear on Drive overview page. You have been successfully connected to your drive!
The following image shows an example of a COM-KIT connected to an Everest Core driver.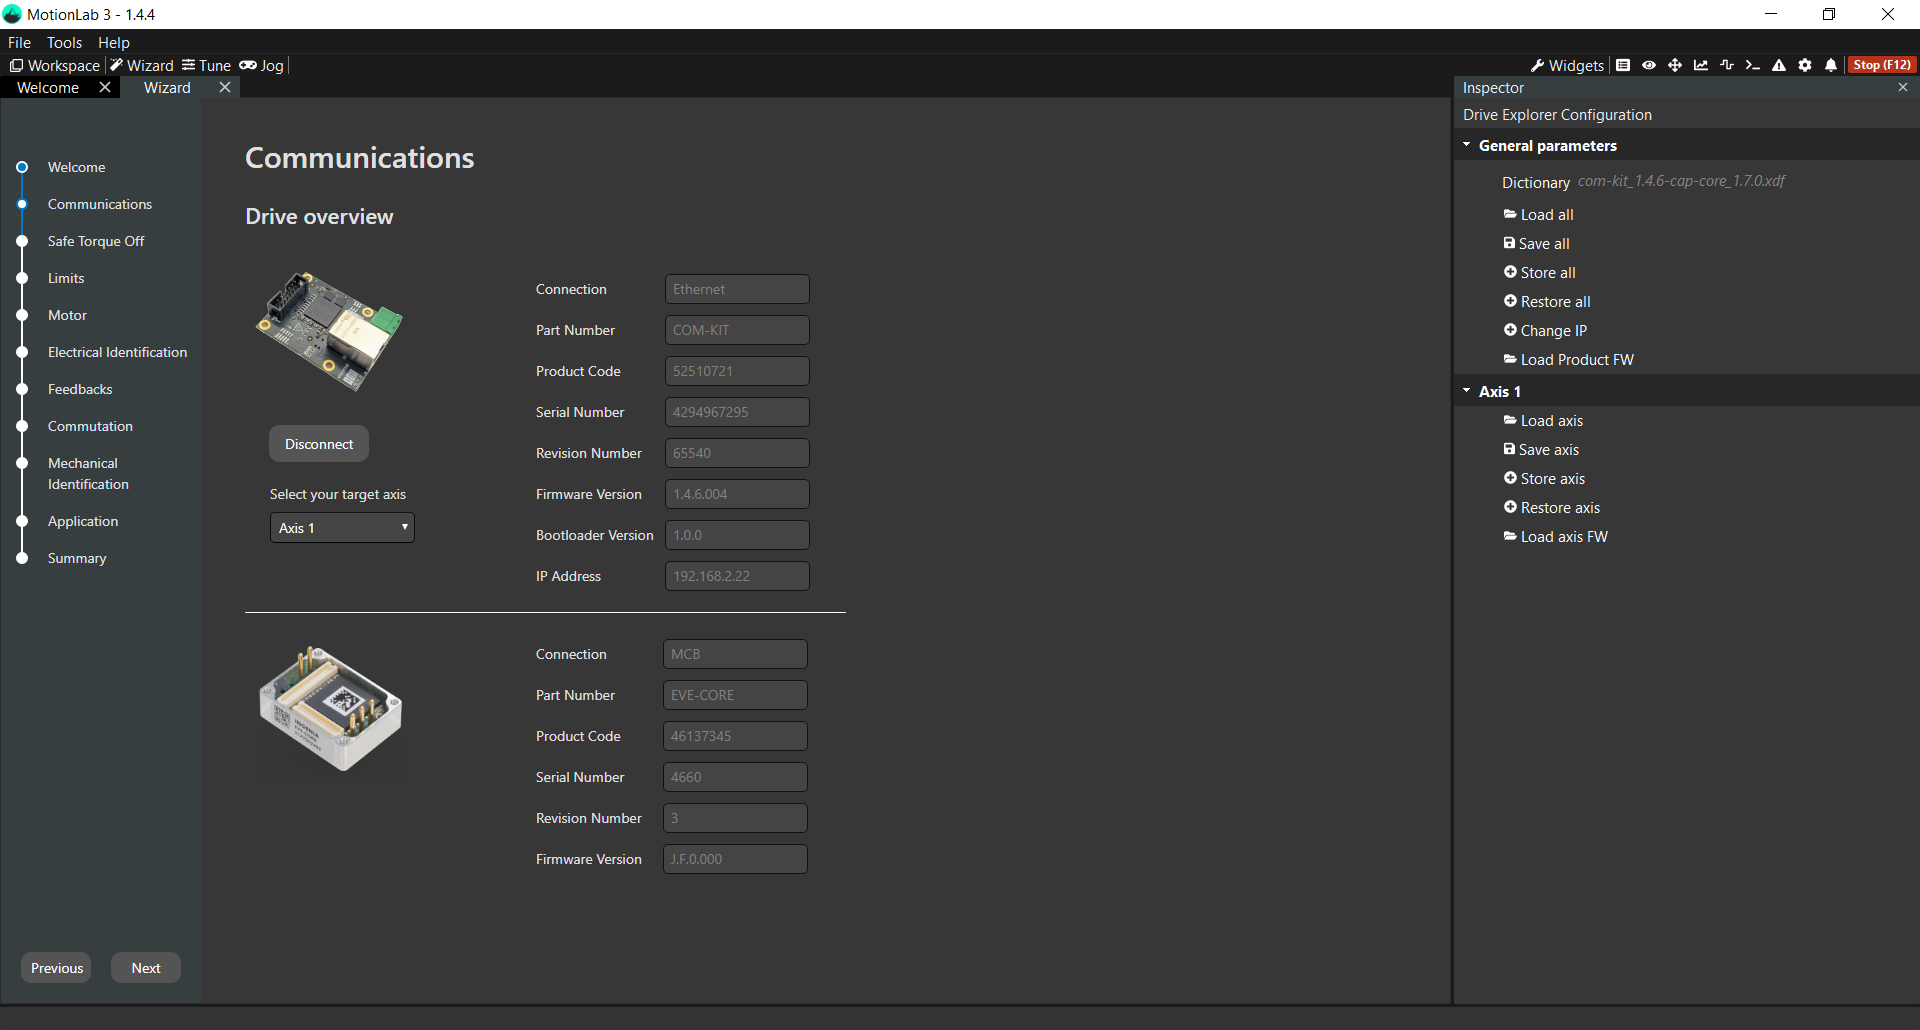
In order to only configure Core driver's parameters use Axis1 information on the right hand toolbar (Driver Explorer Configuration). If complete set-up parameters need to be configured, use general parameters' information.
Newer versions of MotionLab3 (1.9.X or newer)
Open MotionLab3.
If the drive gets automatically detected, hover over it and click on “Connect".

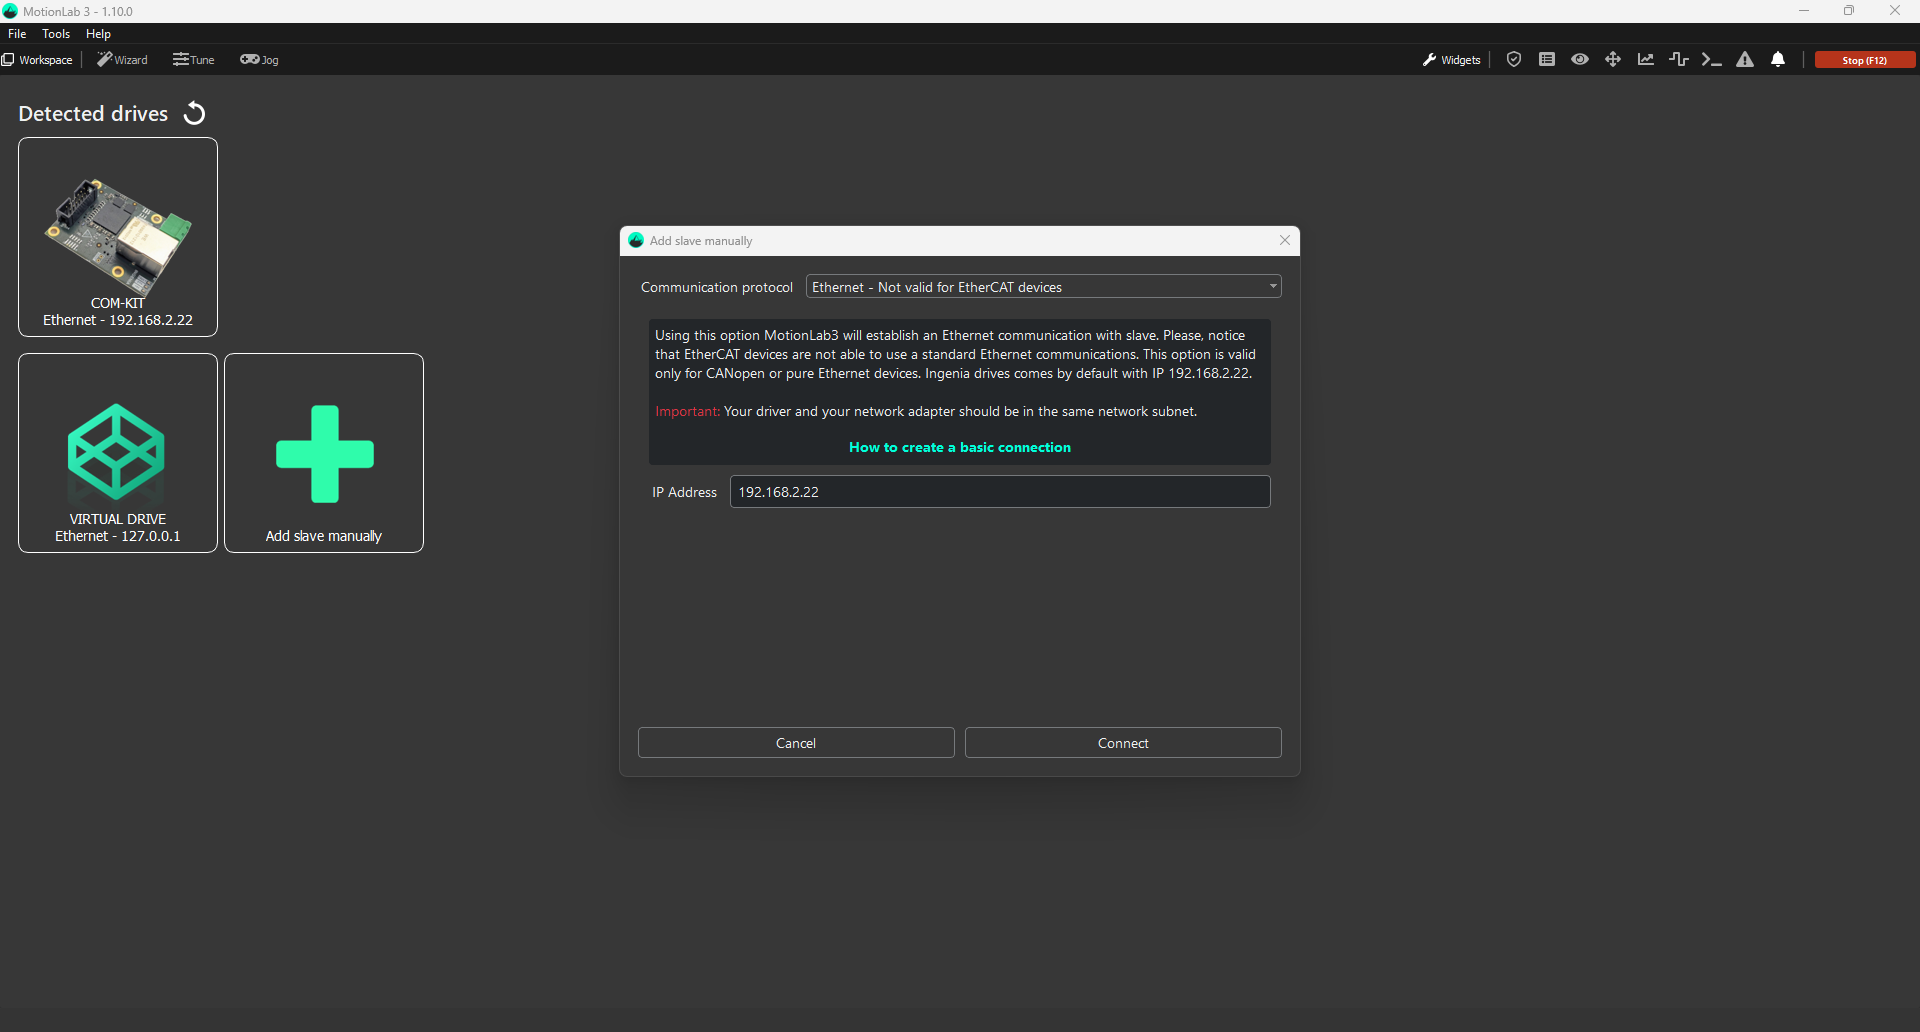
If the drive does not show automatically. Click on “Add slave manually“, set “Ethernet” as the communication protocol and the proper IP Address and click on “Connect“.
Once connected. your target Drive description together with the COM-KIT will appear on Drive overview page. You have been successfully connected to your drive!
The following image shows an example of a COM-KIT connected to an Everest Core driver.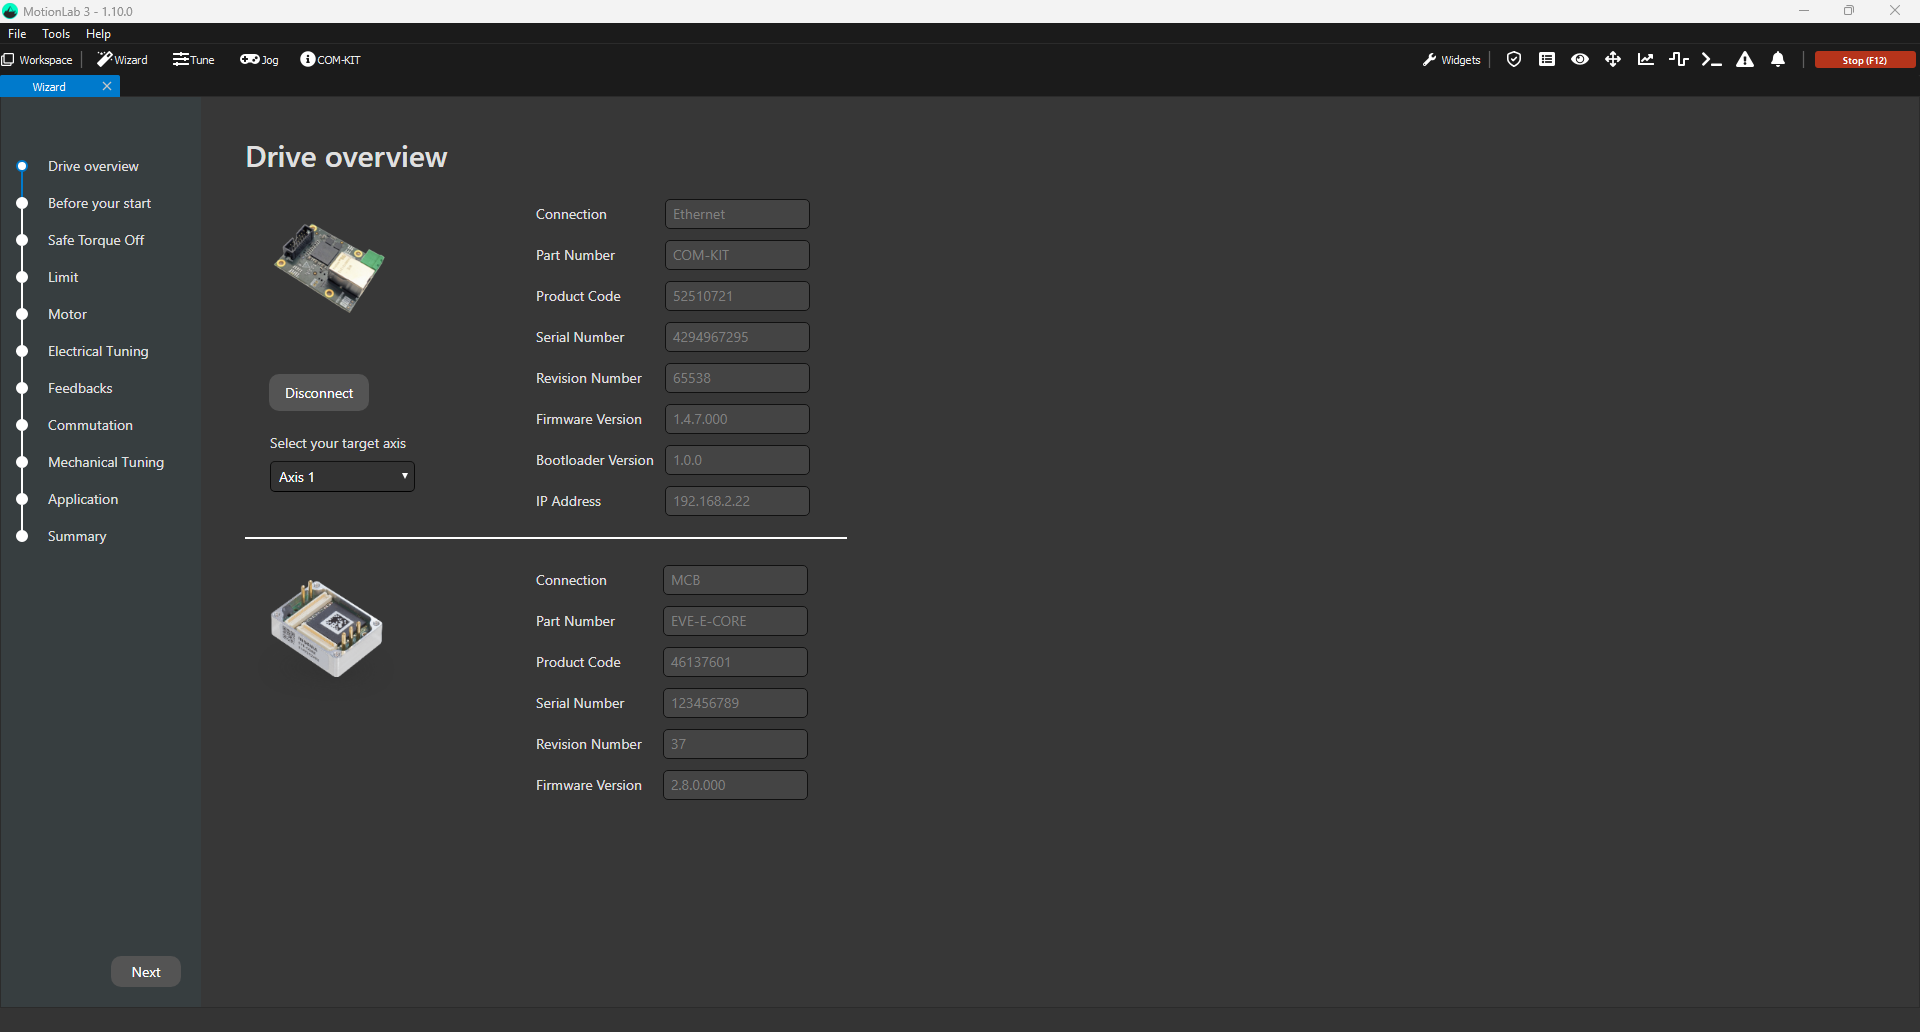
In order to only configure Core driver's parameters use Axis1 information on the right hand toolbar (Driver Explorer Configuration). If complete set-up parameters need to be configured, use general parameters' information.