Connect PC and servo drive
Install the INGENIA MotionLab3 software. You can download it here: Downloads.
This process also installs the necessary drivers.
Please use the contents menu below to choose the correct connection method for your drive:
Connect through Ethernet (CANopen drives)
In order to use Ethernet connection between the PC and the drive, we need to set the Network Card in the same subnet as the drive. Remember that the drive comes by default with IP 192.168.2.22. Please find a step-by-step guide on how to configure the Network Card here: Configuring a network adapter for Ethernet connection.
Before starting
This tutorial assumes that you have connected your drive to an external DC power source inside the allowed voltage range and to an Ethernet cable between your computer and Port ECAT0 (if you do not know which port is ECAT0, please refer to the Connectors Guide section of the manual of your product).
Manual connection
If the drive was not detected or you want to adjust the connection parameters for some other reason, you can connect to your drive manually following these steps:
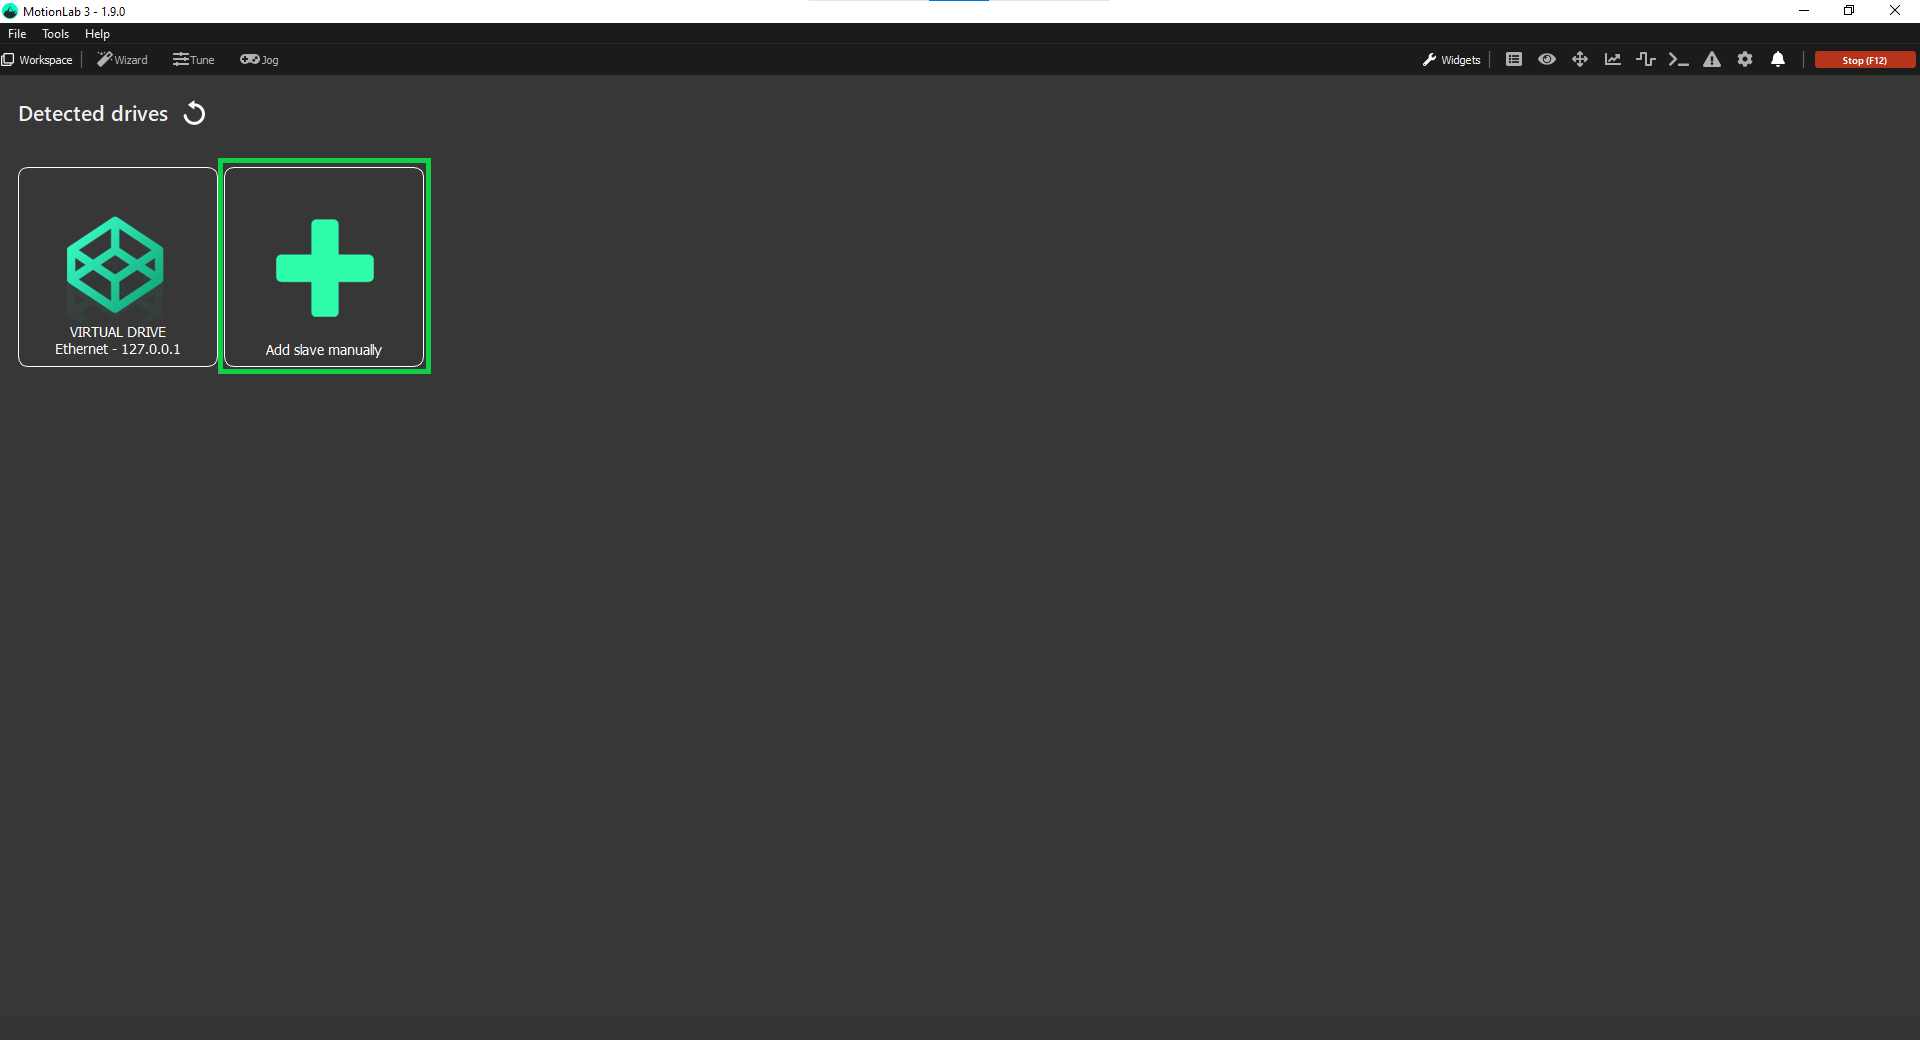
Open MotionLab3 and press the Add slave manually button:

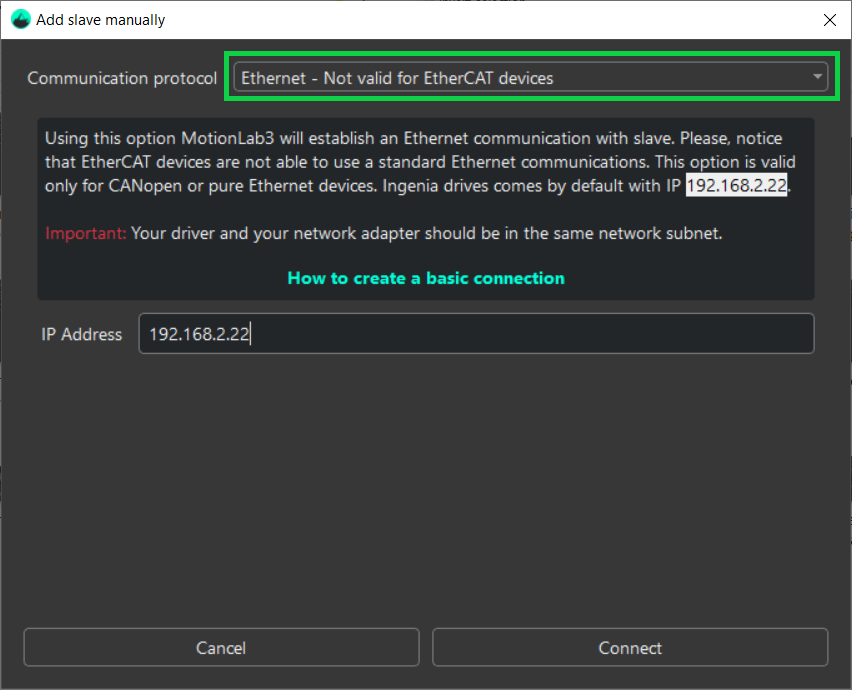
Select the communication protocol you would like to use from the dropdown (in this case Ethernet - Not valid for EtherCAT devices):
Enter the IP 192.168.2.22:
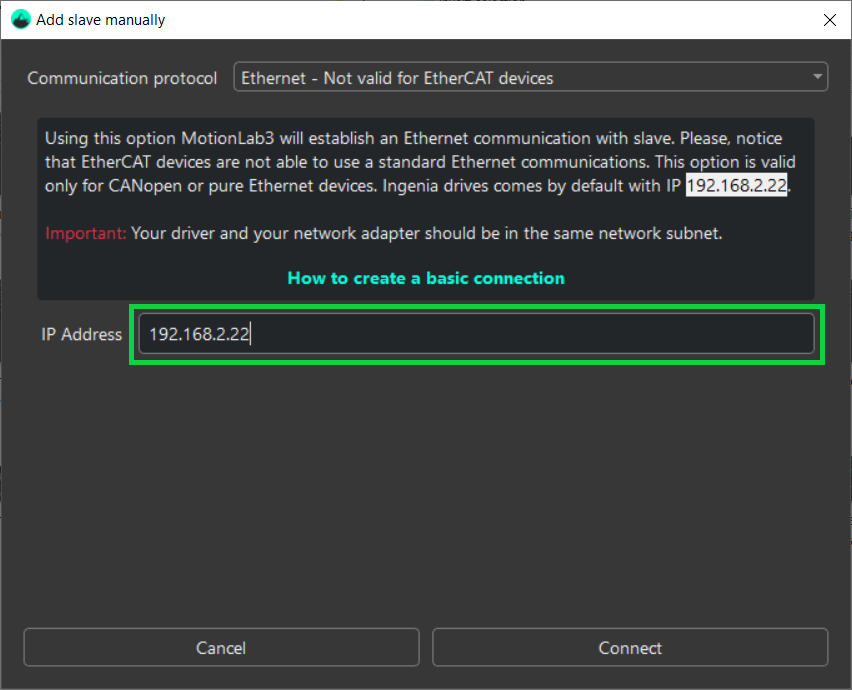
Important
Your driver and your network adapter should be in the same network subnet.
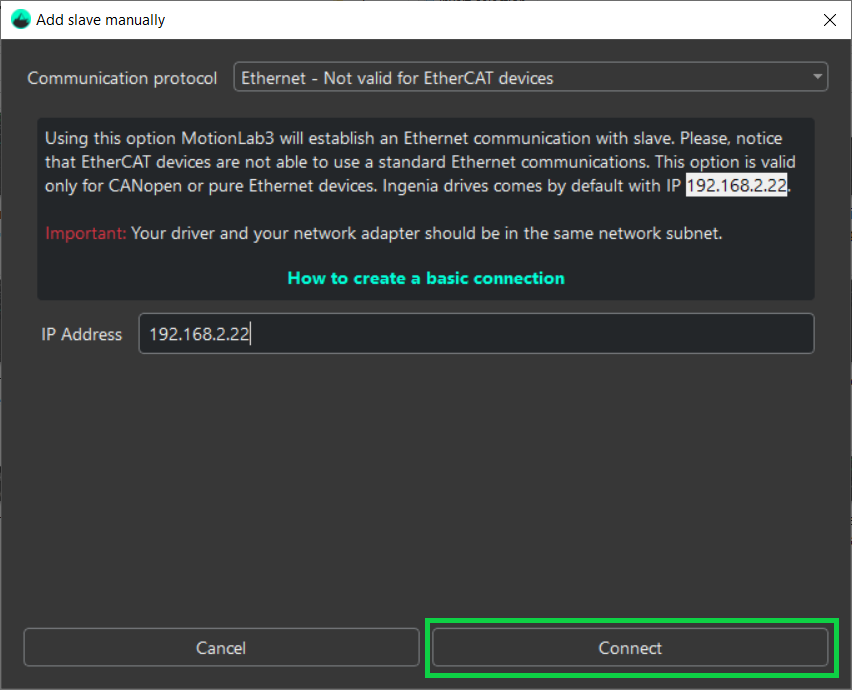
Press the Connect button:
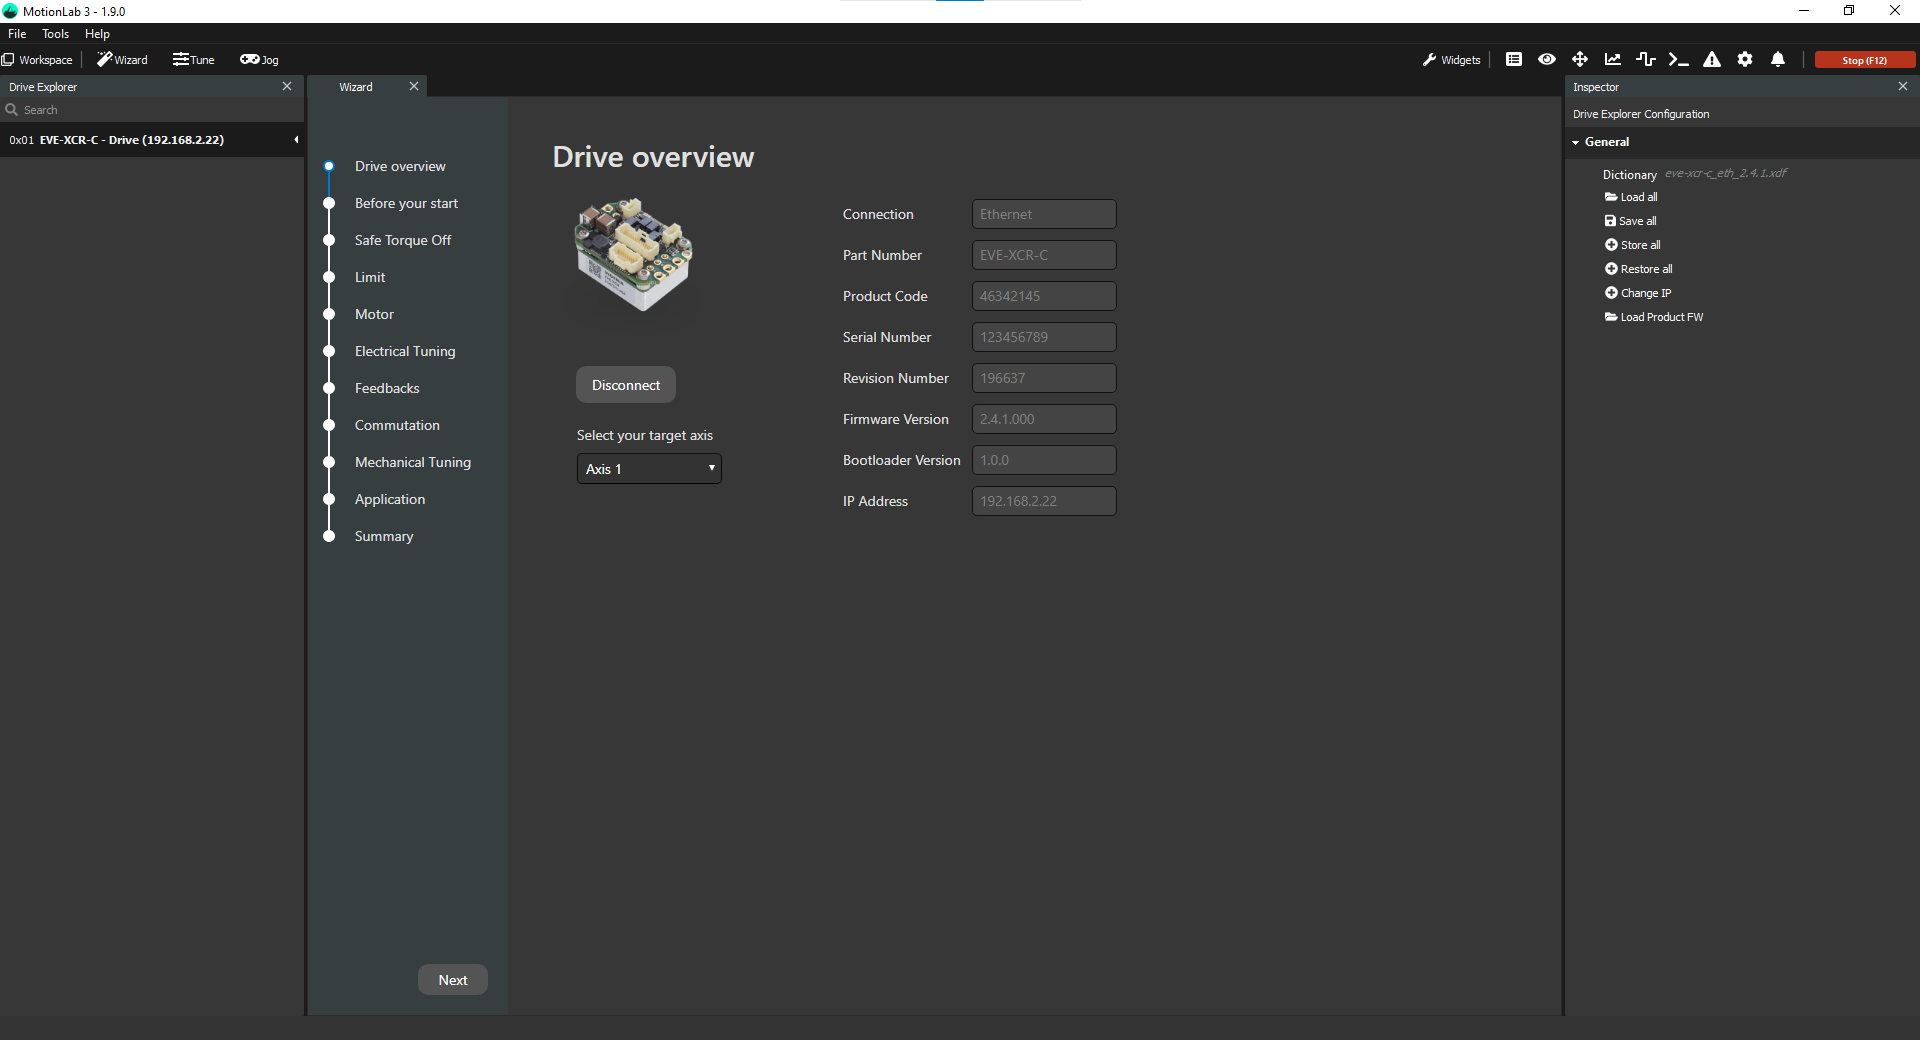
MotionLab3 will now connect you to the drive:
Connect through CANopen (CANopen drives)
Automatic connection
Upon opening, MotionLab3 will scan the network and attempt to automatically detect your drive which makes connecting to it as simple as pressing a button.
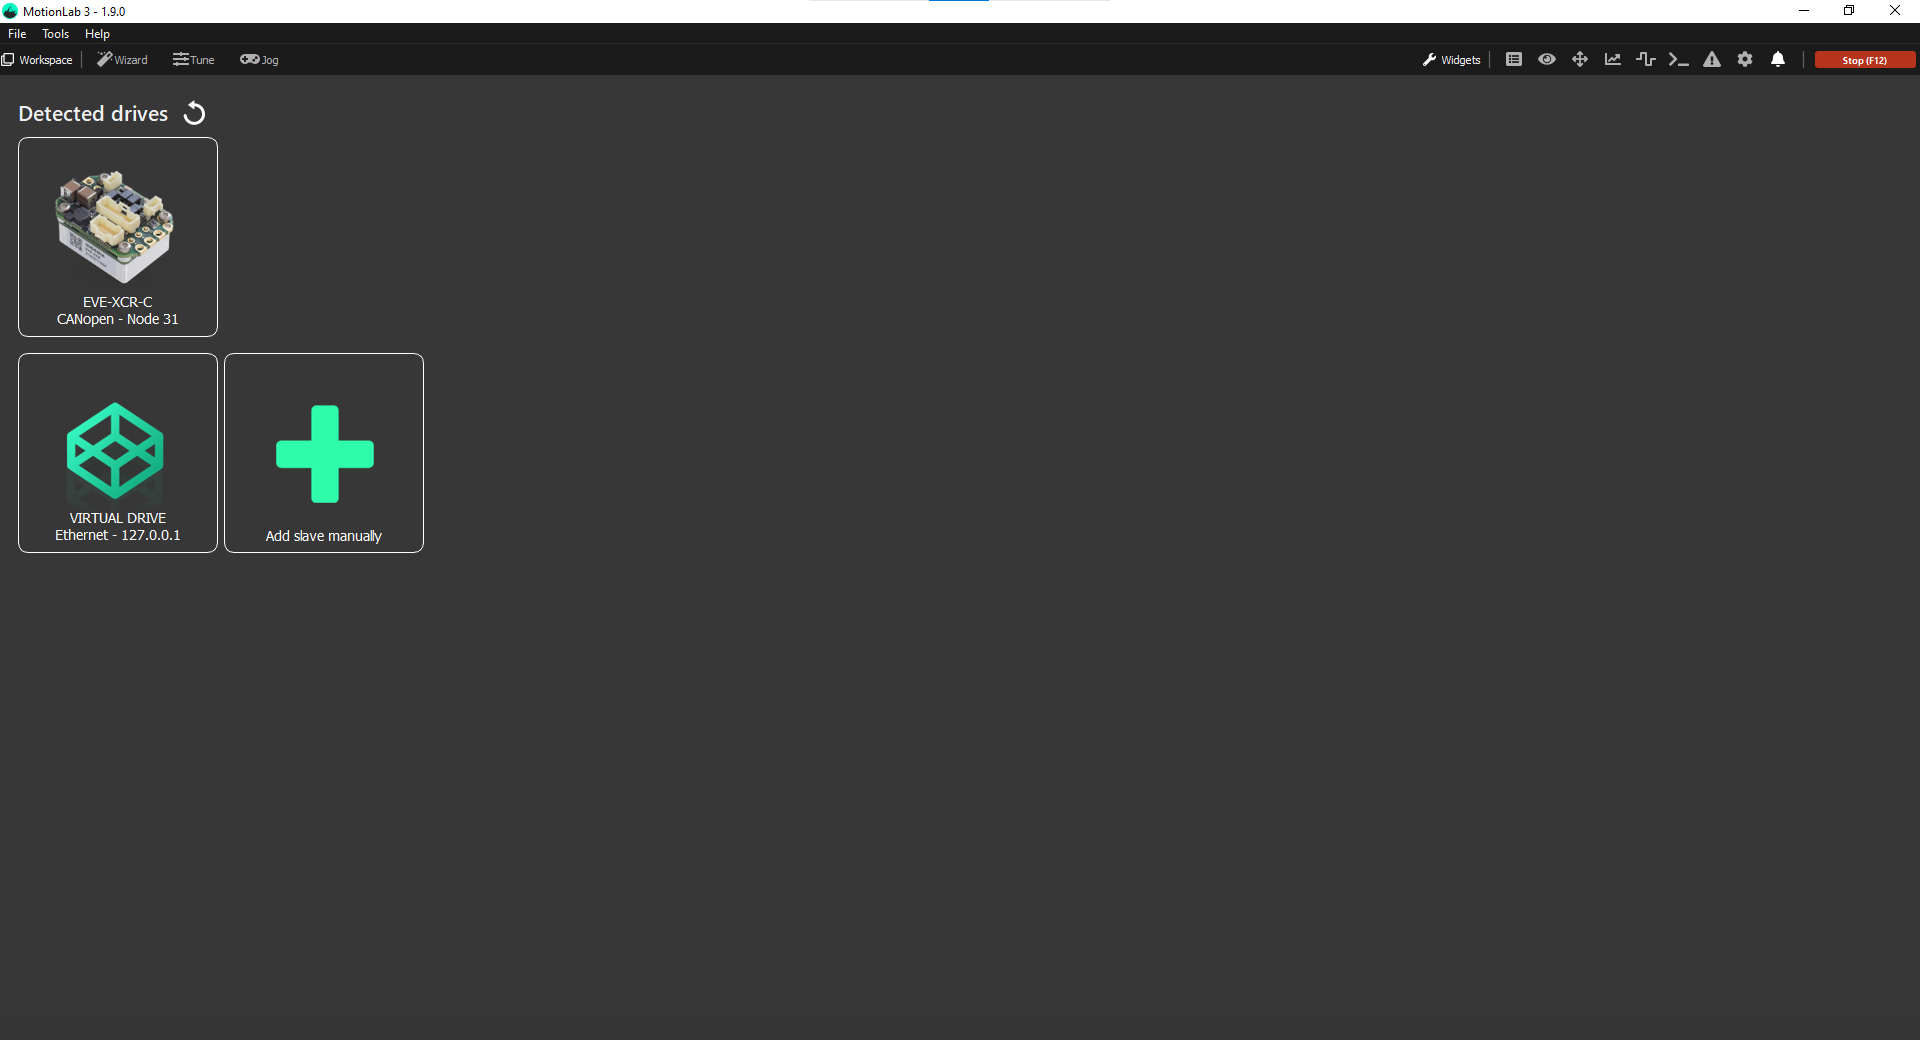
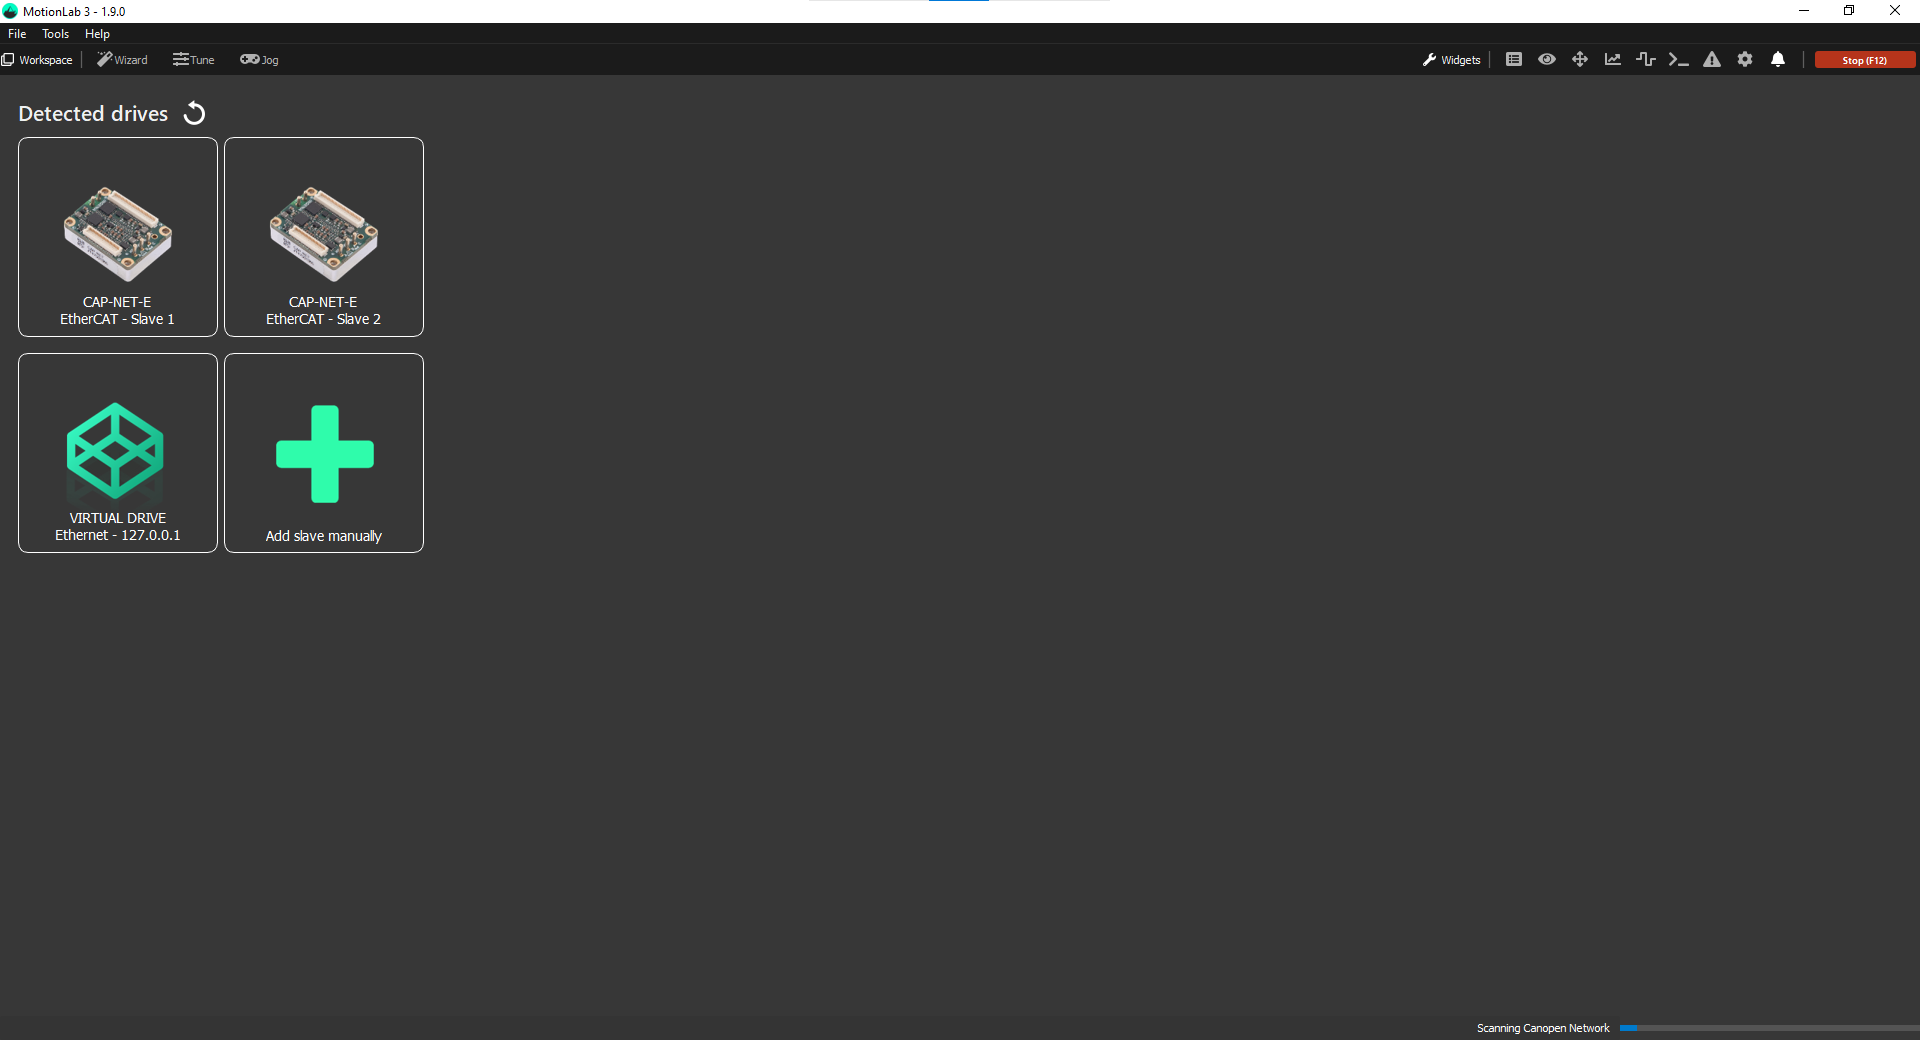
If a drive was found, it would be displayed in the main window:
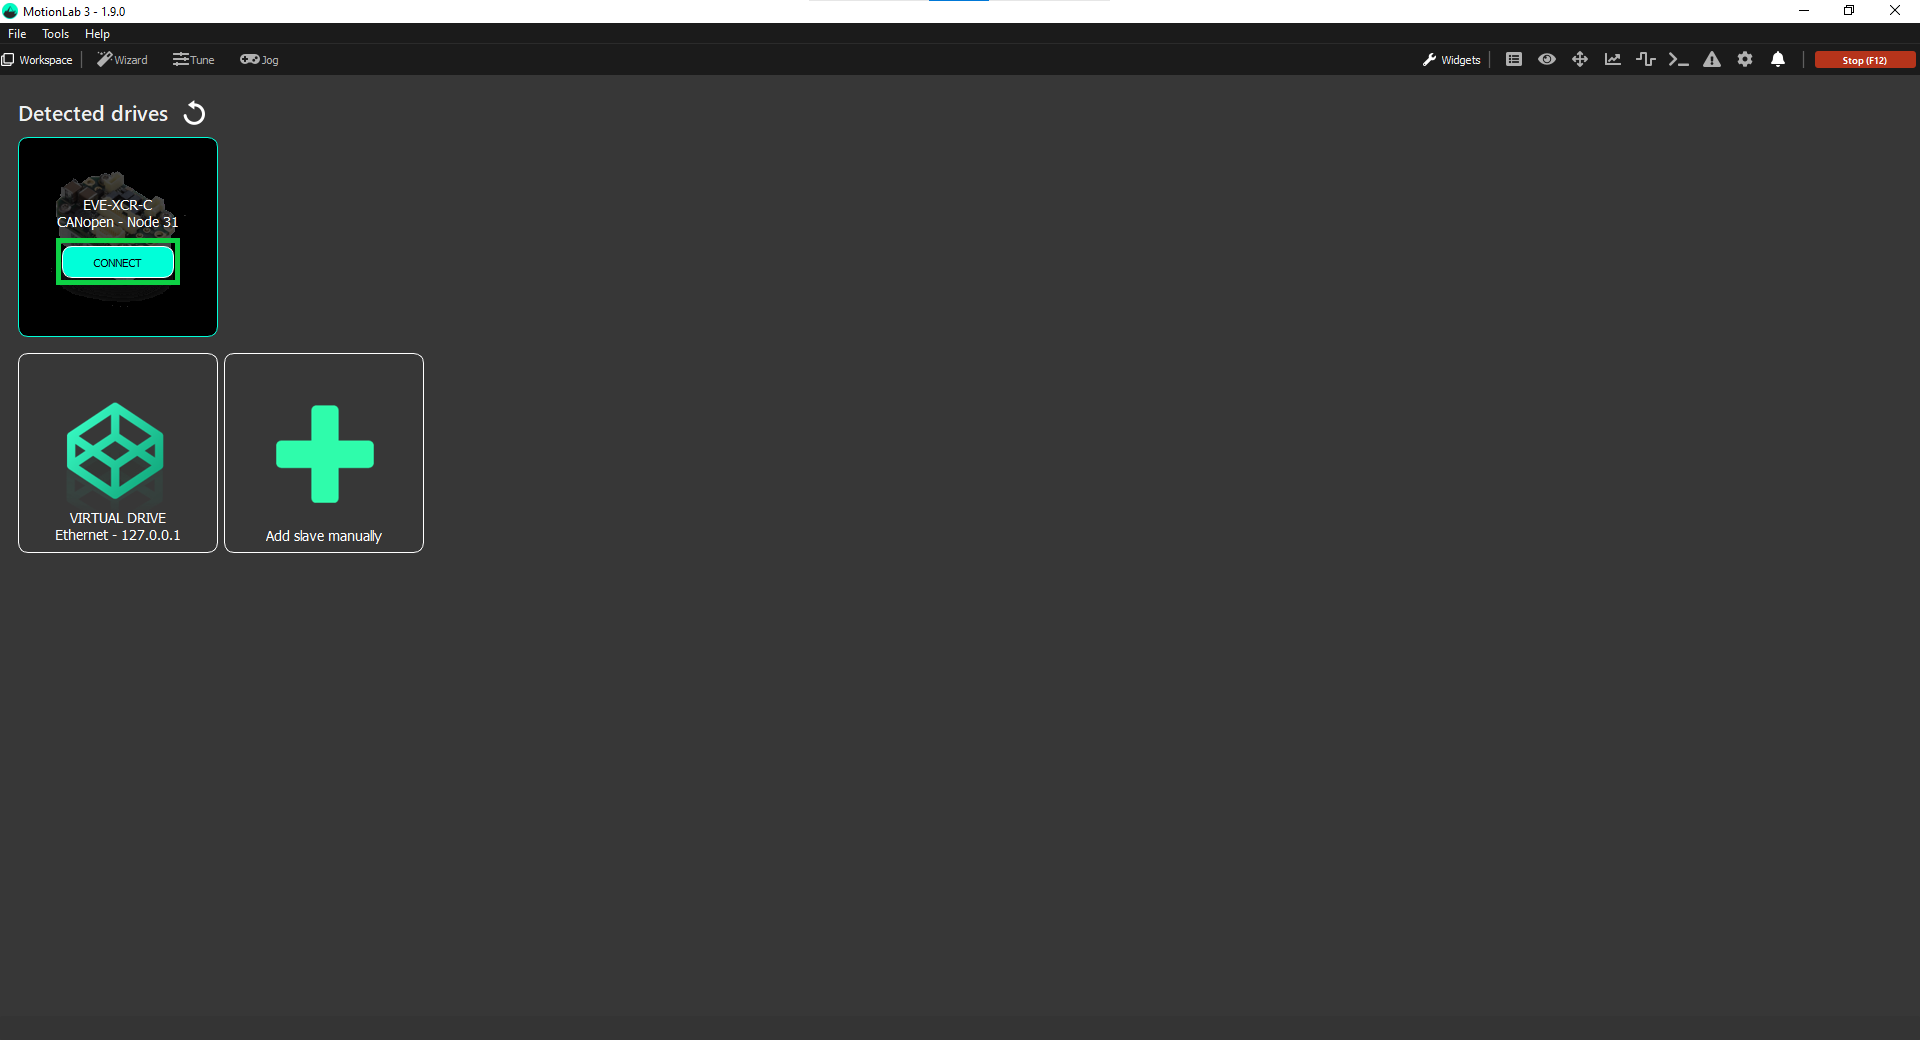
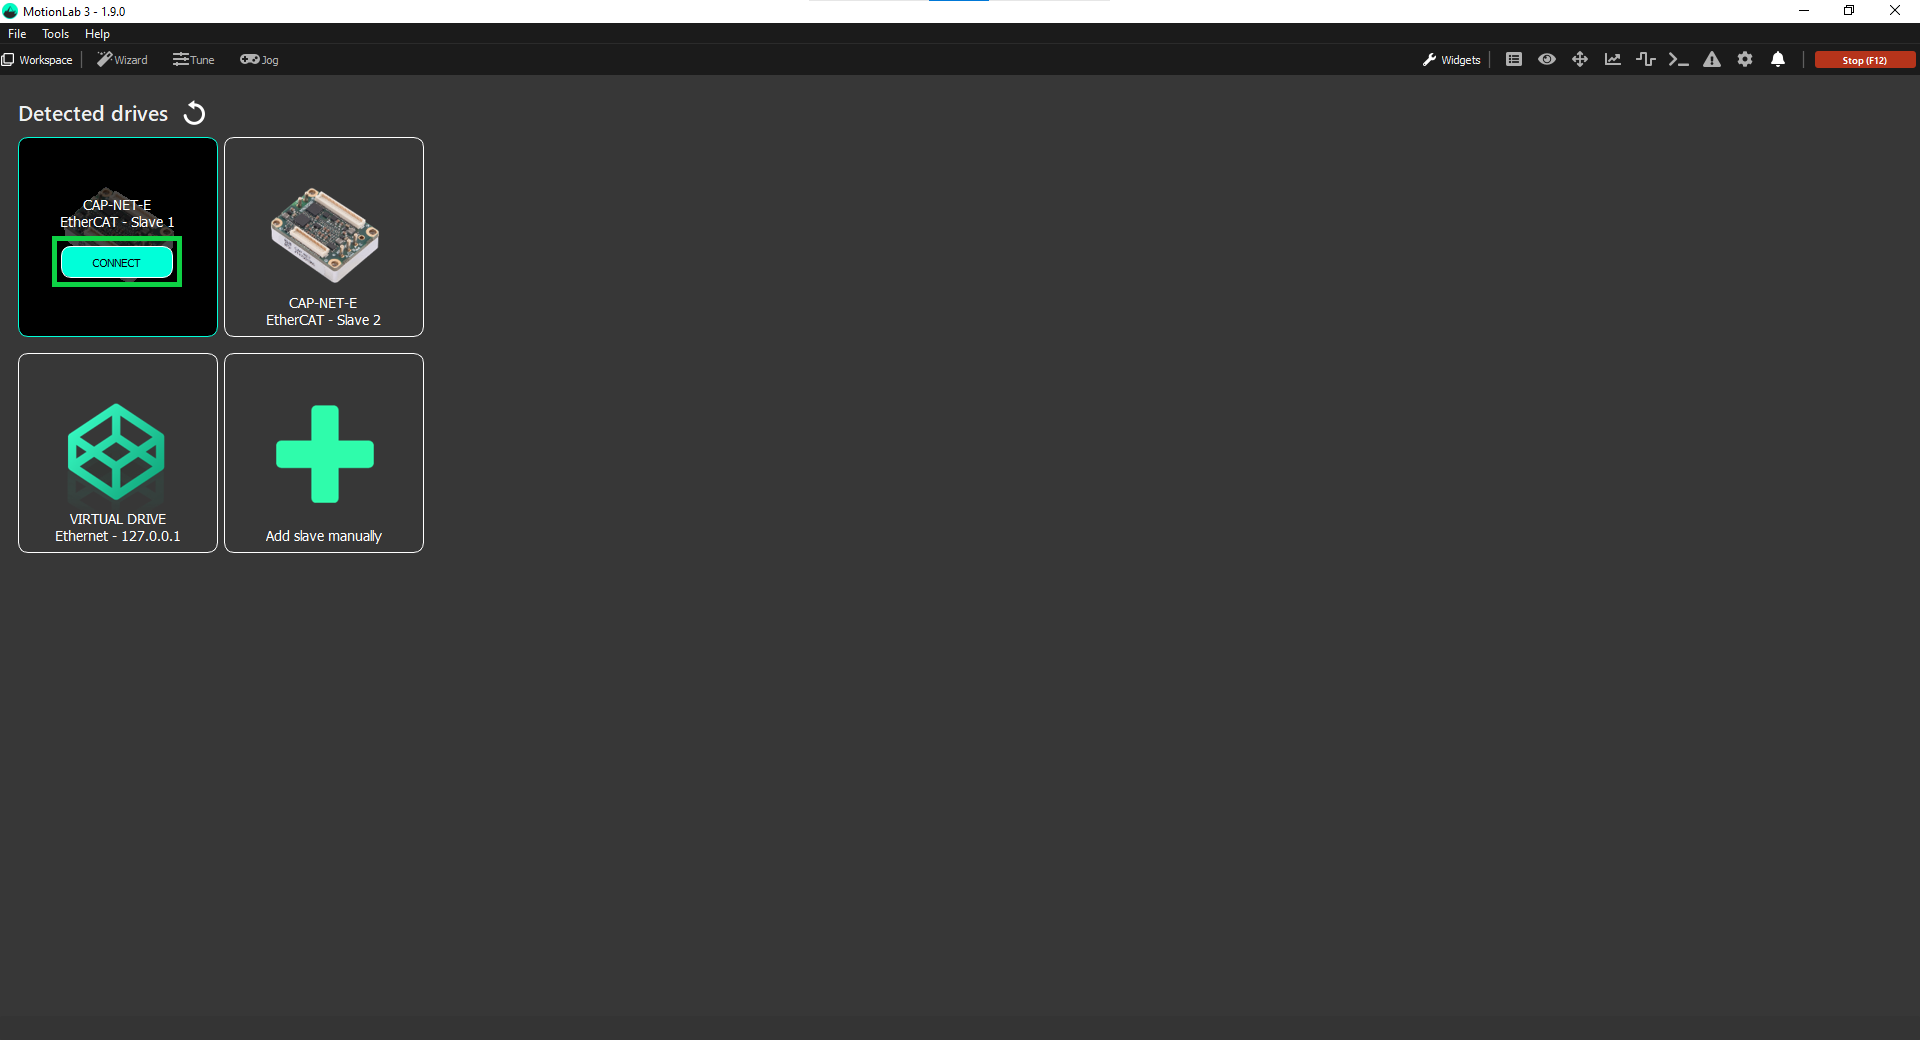
Hover the drive and press the Connect button to make the connection:
You can press the refresh button (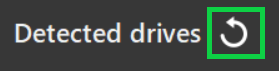 ) to manually trigger another network scan if the drive was connected after MotionLab3 was launched.
Manual connection
If the drive was not detected or you want to adjust the connection parameters for some other reason, you can connect to your drive manually following these steps:
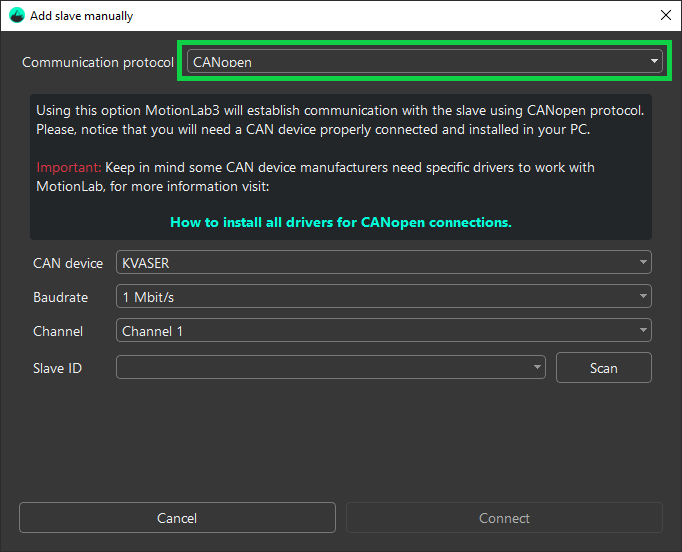
Open MotionLab3 and press the Add slave manually button:
Select the communication protocol you would like to use from the dropdown (in this case CANopen):
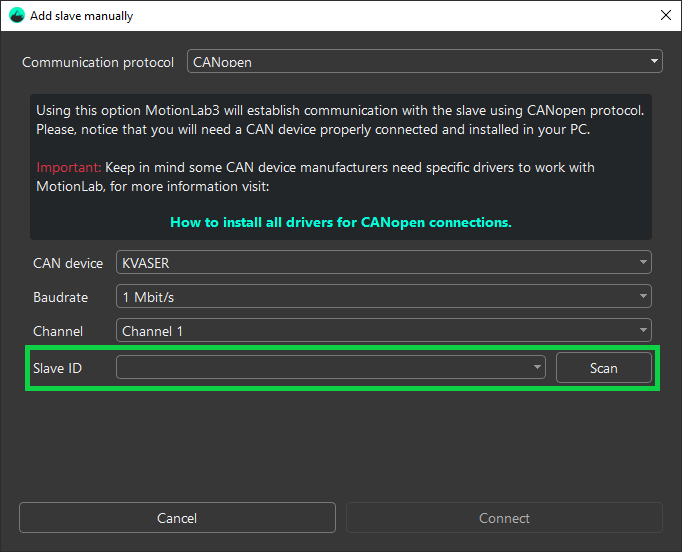
Adjust the connection parameters:

Scan for the slave in the network or manually enter its ID:
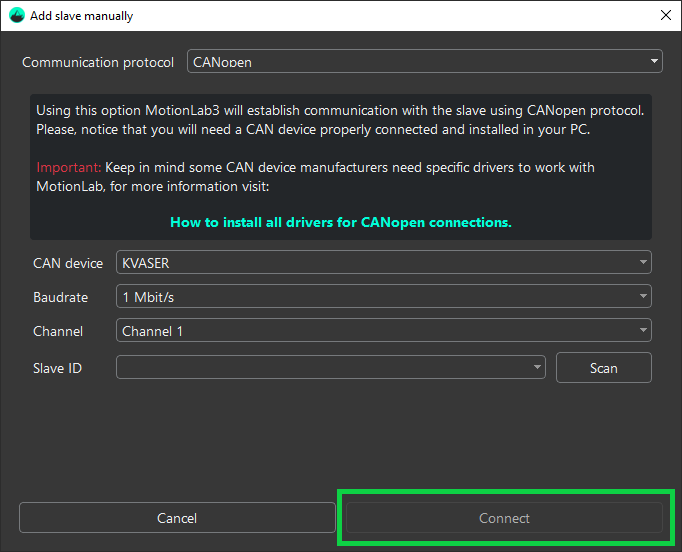
Press the Connect button:
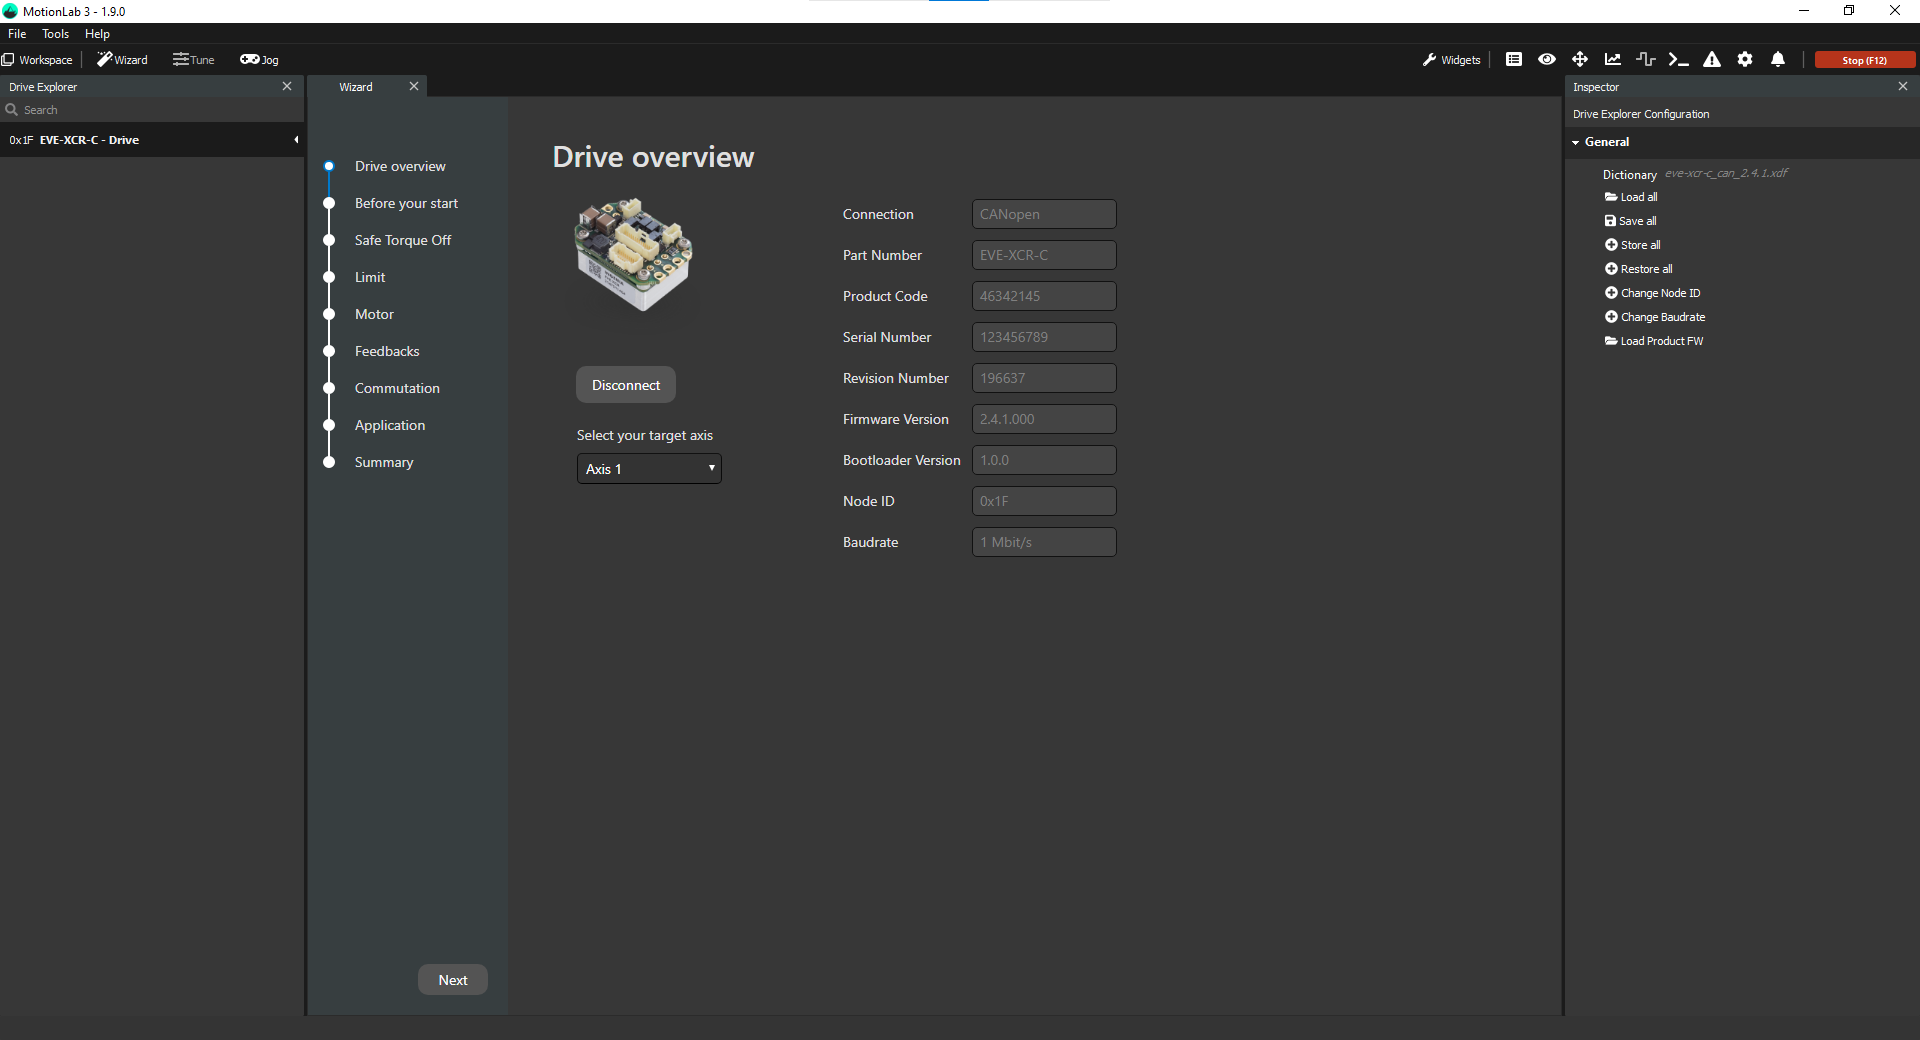
MotionLab3 will now connect you to the drive:
Connect through EtherCAT (EtherCAT drives)
Connect through EtherCAT using CoE
In order to use Ethernet connection between the PC and the Driver you need to set the Network Card in the same subnet than the Driver. Remember that the Driver comes by default with IP 192.168.2.22. Please find a step by step guide on how to configure the Network Card here: Configuring a network adapter for Ethernet connection
Automatic connection
Upon opening, MotionLab3 will scan the network and attempt to automatically detect your drive which makes connecting to it as simple as pressing a button.
If a drive was found, it will be displayed in the main window:
Hover the drive and press the Connect button to make the connection:
You can press the refresh button ( ) to manually trigger another network scan if the drive was connected after MotionLab3 was launched.
Manual connection
If the drive was not detected or you want to adjust the connection parameters for some other reason, you can connect to your drive manually following these steps:
Open MotionLab3 and press the Add slave manually button:

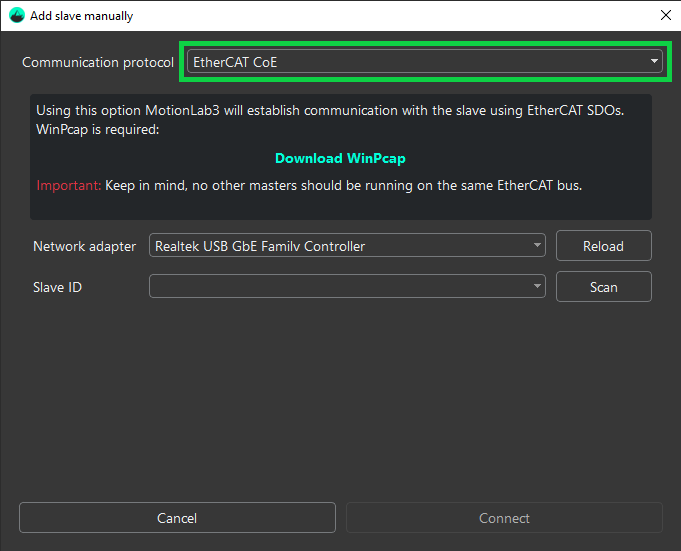
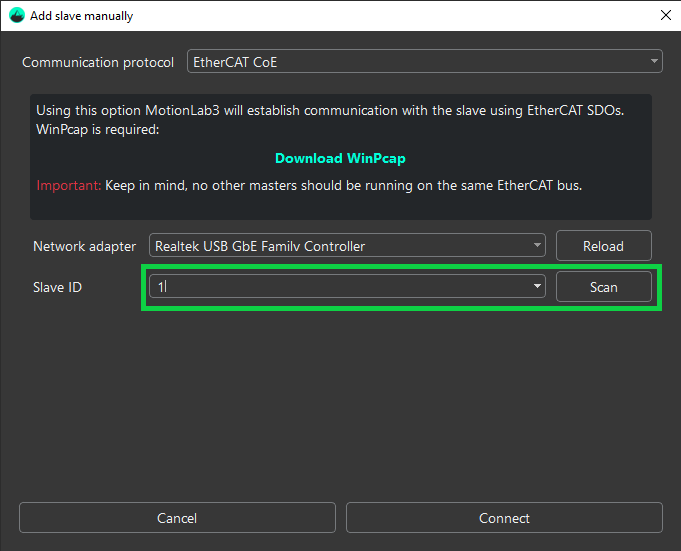
Select the communication protocol you would like to use from the dropdown (in this case EtherCAT CoE):
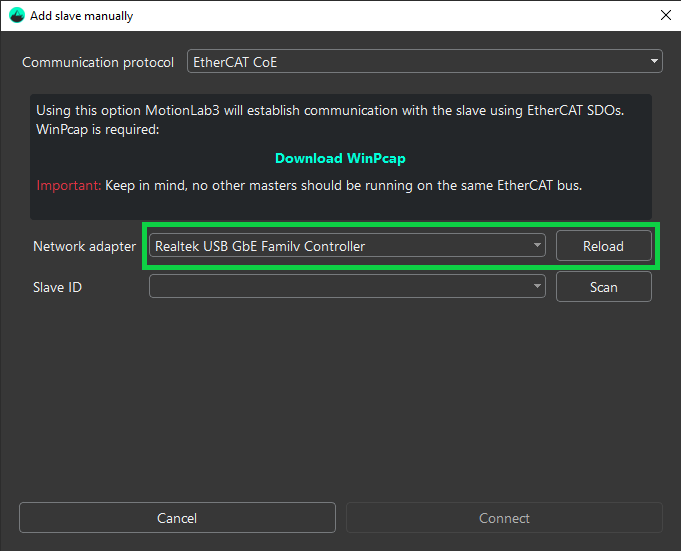
Select the Network adapter you would like to use. The Reload button can be used to check if the available adapters have changed since MotionLab3 was launched:
Important
Your driver and your network adapter should be in the same network subnet.
Press Scan - ECat drives connected to the target adapter will be detected. You can also manually enter the Slave ID if you wish:
Press the Connect button:
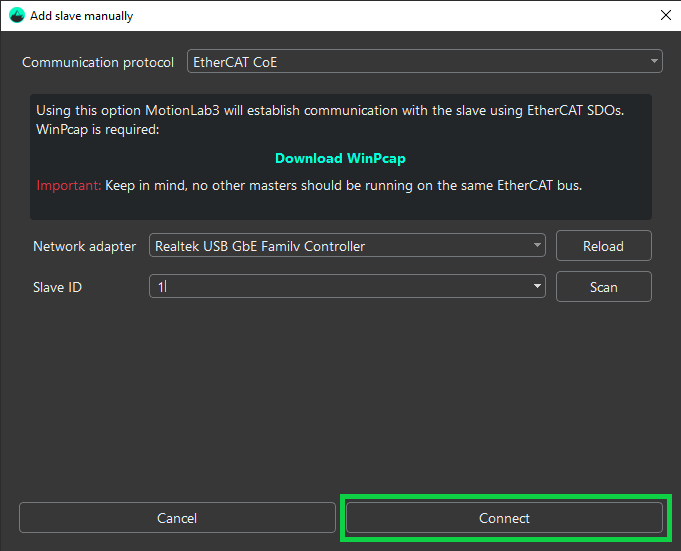
MotionLab3 will now connect you to the drive:

Connect through EtherCAT using the EoE Service (BETA)
In order to use Ethernet connection between the PC and the drive, the network adapter must be on the same subnet as the drive. Remember that the drive’s default IP is 192.168.2.22.
For network adapter configuration instructions see: Configuring a network adapter for Ethernet connection
This is an advanced connection mode via EtherCAT that requires additional setup. For a simple approach, see Connect via CoE.
Beta version
This is a feature still under development and it may contain issues.
Possible issues when connecting via EoE service
Ensure the EoE service is running with administrator privileges.
Verify you have selected the correct network adapter.
You do not need to configure a static IP address on the network adapter used to connect to the EtherCAT slaves.
Ensure that no EtherCAT master is running in your PC (TwinCAT, Acontis...).
WinPcap must be installed before using the EoE service.
Other software, such as antivirus software, may block communications. We recommend using Windows Task Manager to find suspicious processes that may block them.
Open MotionLab3 and click Add slave manually:

From the dropdown select the “EtherCAT EoE (using EoE service) - Beta” communication protocol:
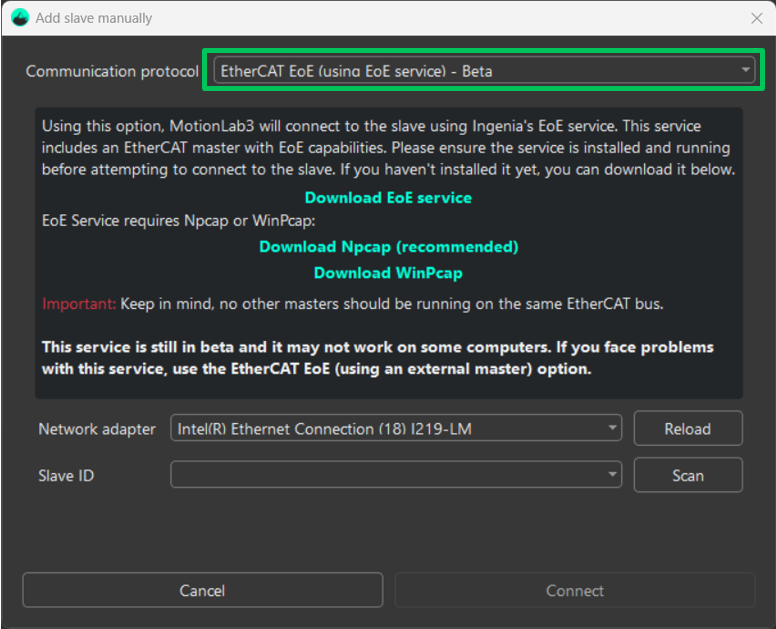
Click “Download EoE service“ to access the download website where the EoE .zip can be downloaded.

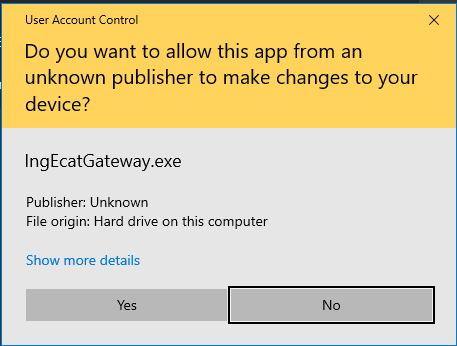
Extract the archive from the .zip and run the executable to start the EoE service.
If a pop-up asking for admin privileges appears, enter admin credentials if required and press Yes.
The EoE service will start in a new window.
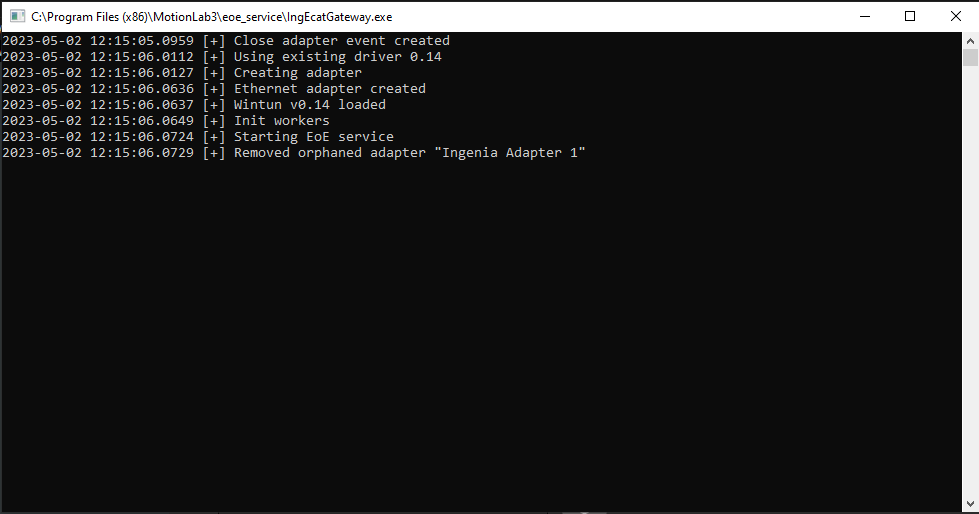
The EoE Service runs independently of ML3. Closing ML3 will not stop the EoE Service.
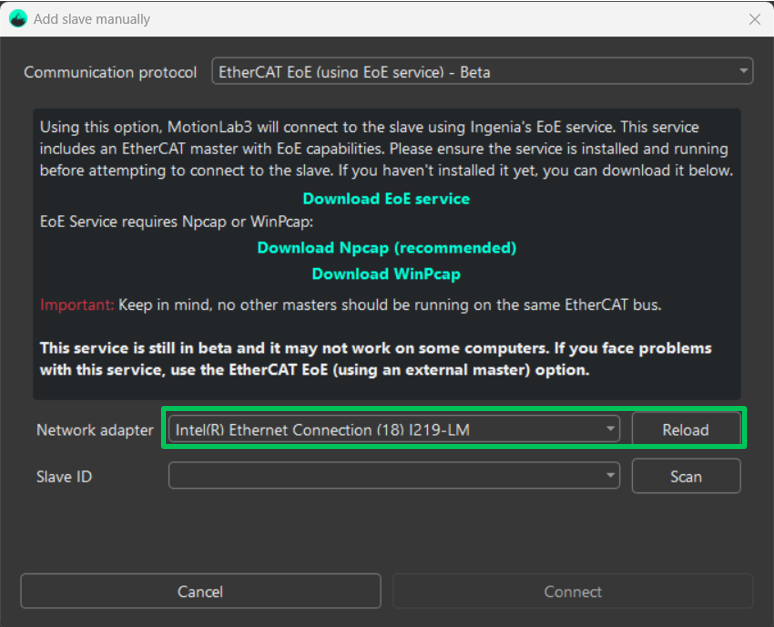
Return to MotionLab3 and select the network adapter connected to the drive. The Reload button can be clicked to refresh the adapter list if needed.
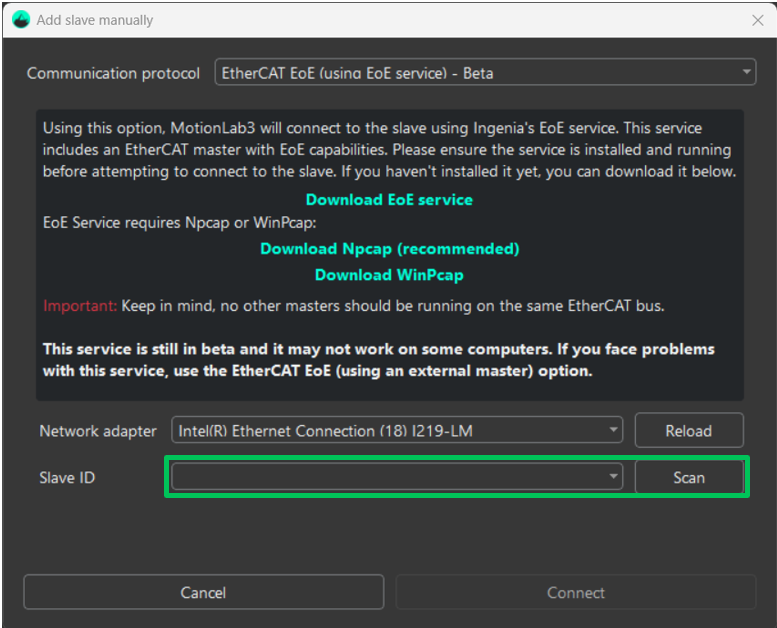
Press Scan. EtherCAT drives connected to the target adapter will be detected. Alternatively you can also enter the Slave ID manually.
Press the Connect button:
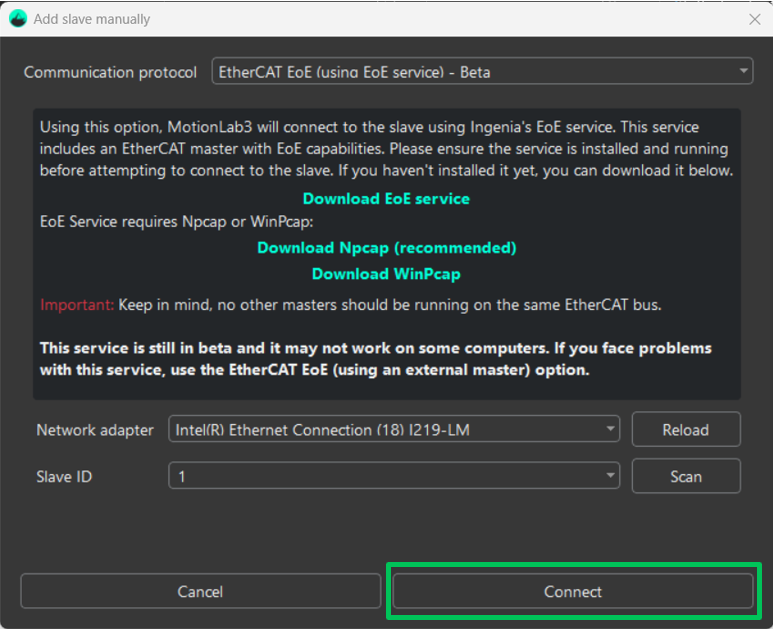
MotionLab3 will now connect you to the drive:
Connect through EtherCAT using External Master (TwinCAT)
Install the Novanta Motion MotionLab3 software. You can download it here: Downloads.
This process also installs the necessary drivers.
In order to use Ethernet connection between the PC and the Driver you need to set the Network Card in the same subnet than the Driver. Remember that the Driver comes by default with IP 192.168.2.22. Please find a step by step guide on how to configure the Network Card here: Configuring a network adapter for Ethernet connection
This is a step-by-step guide to configure the servo drive using MotionLab3 through an external master (TwinCAT).
This is an advanced mode of connecting via EtherCAT that requires more setup and additional steps. For a simple way to make a connection, refer to the page on how to connect via CoE.
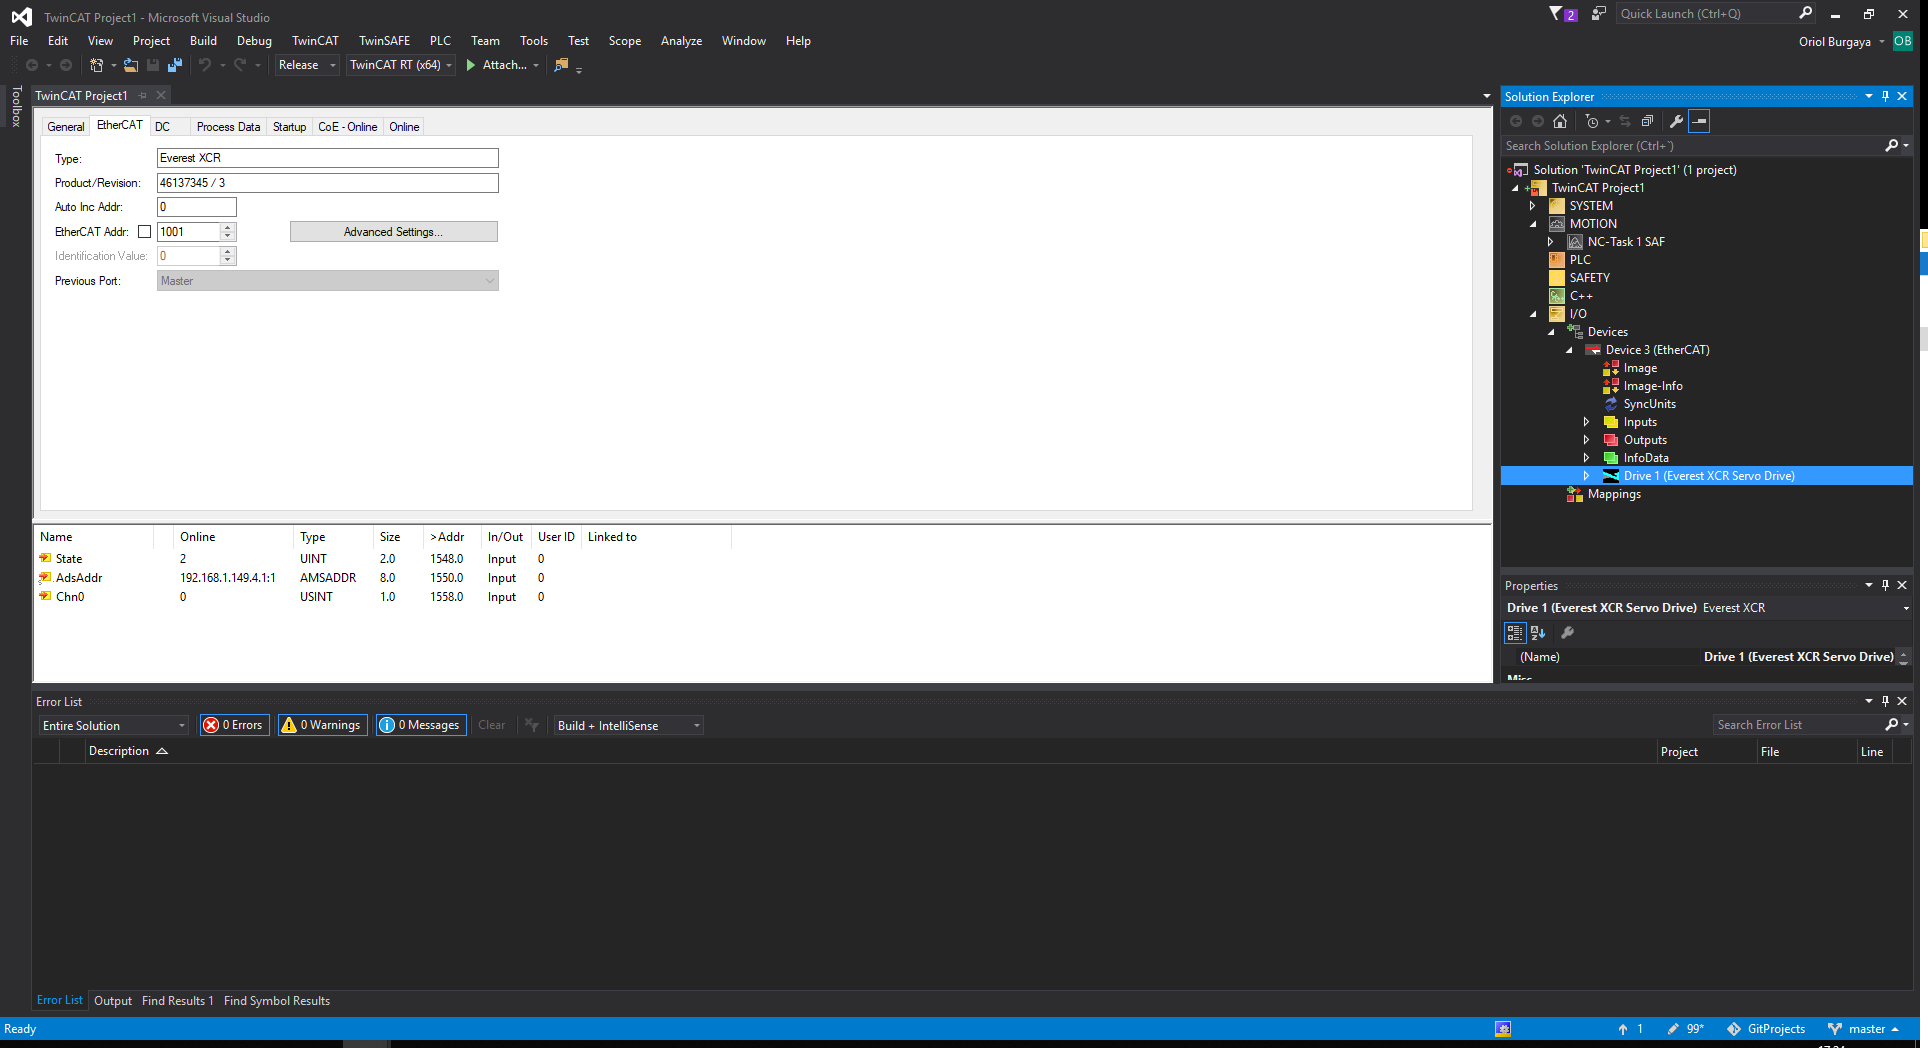
Follow the steps in the link to connect the Novanta drive to TwinCAT: Connecting TwinCAT to Ingenia EtherCAT slave.
Double-click the slave that you want to config, and press Advanced Settings in the "EtherCAT" tab.
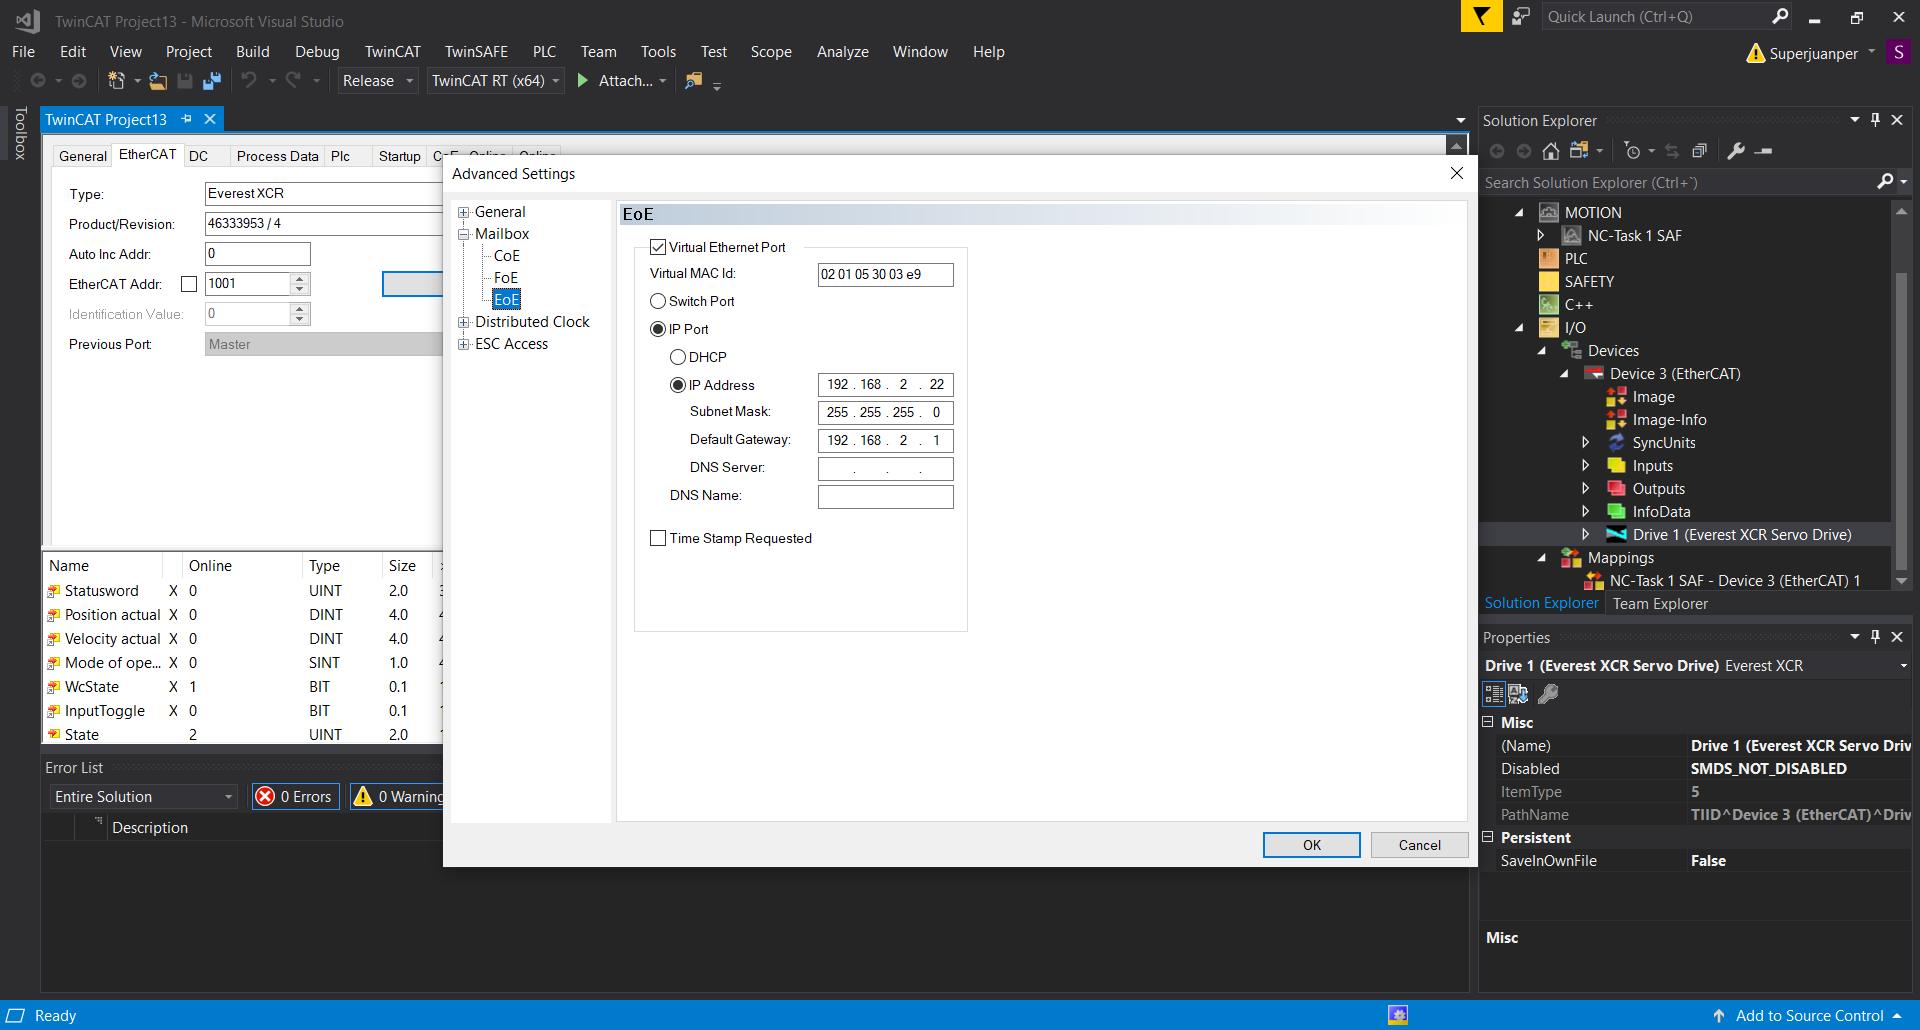
Go to "EoE" tab inside "Mailbox", and configure the IP Address that you want for the slave. Important note, it needs to be in the same domain as the IP that you configured for the Ethernet port or it will not be detected by MotionLab3. In this case we use "192.168.2.22":
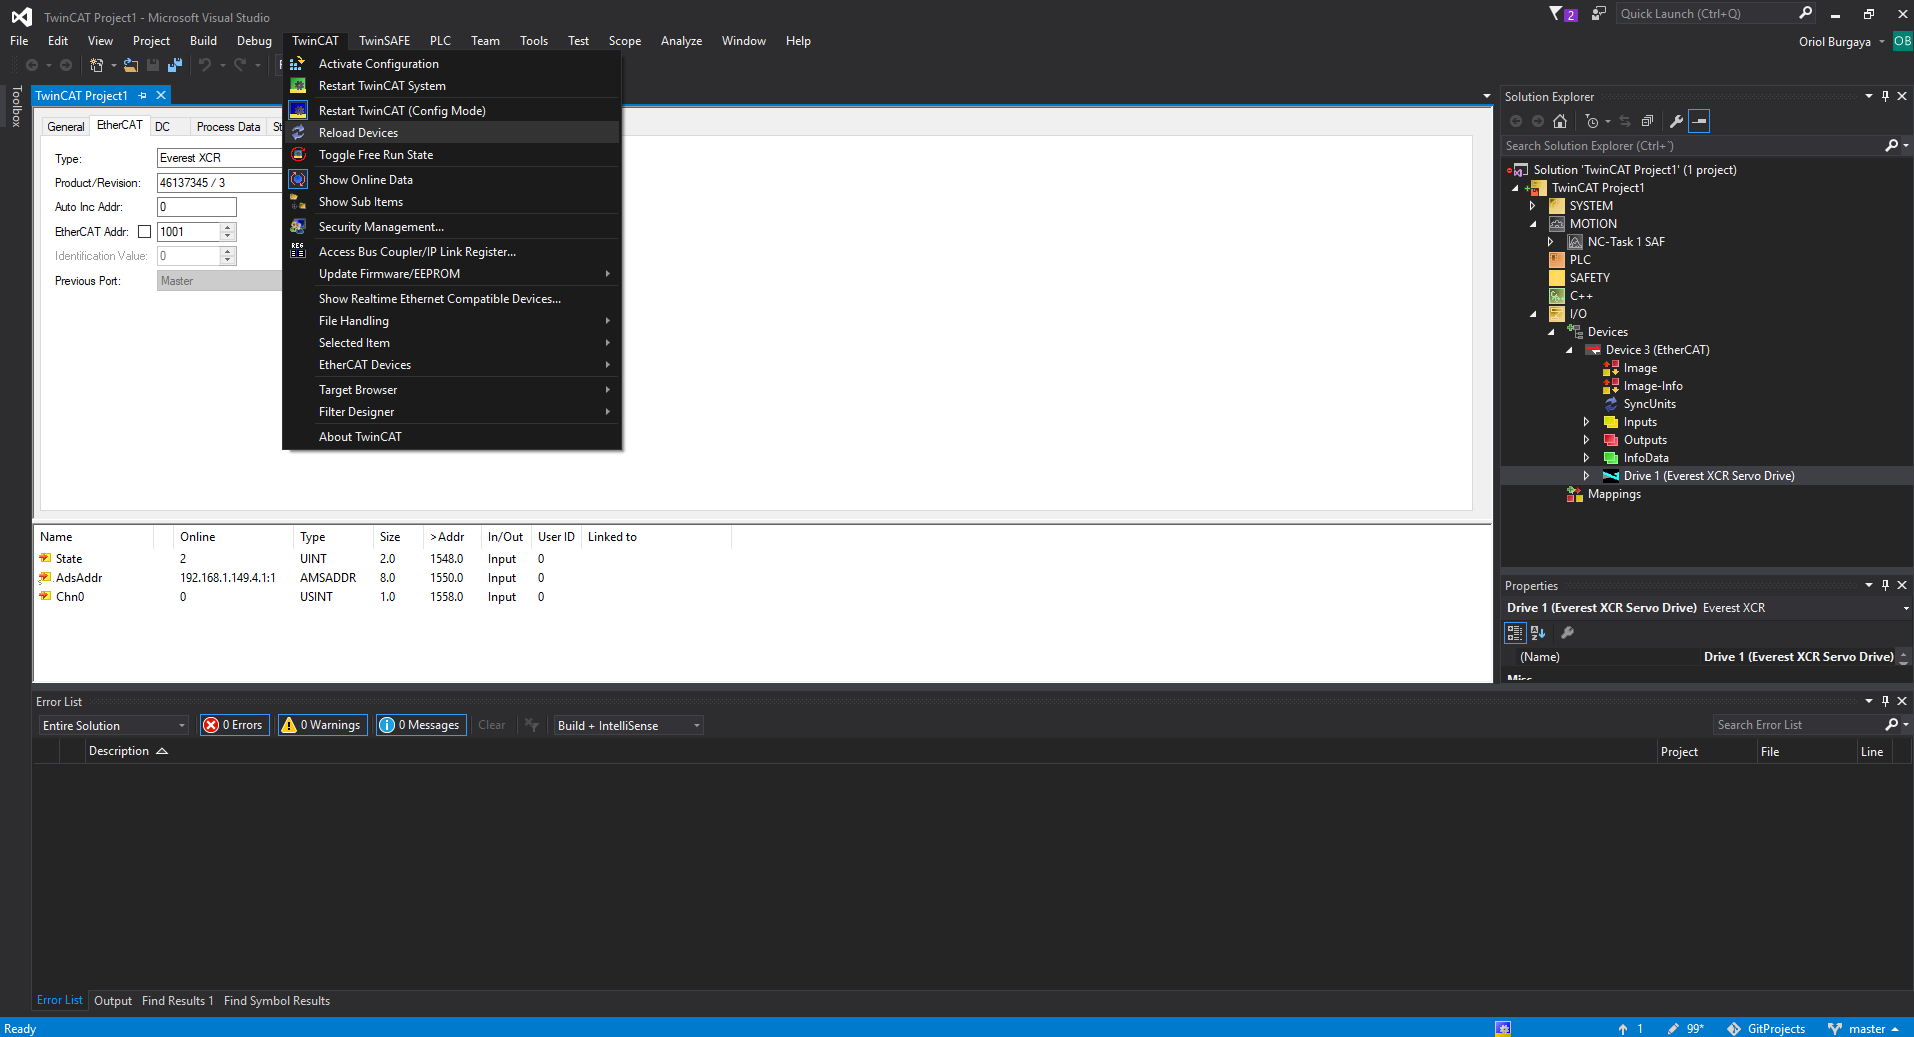
Go to "TwinCAT" menu tab, and click "Reload Devices" option.
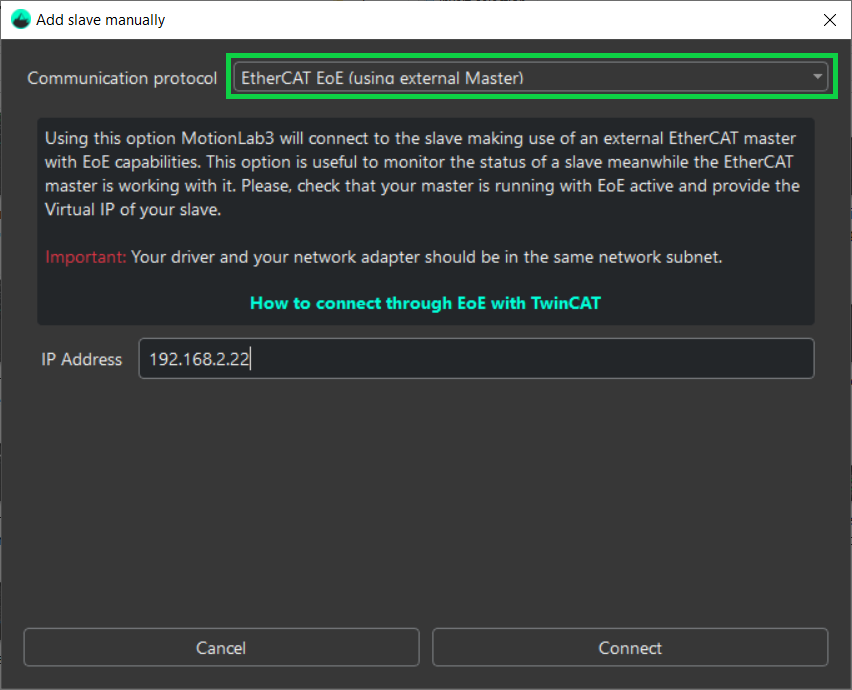
Open MotionLab3 and press the Add slave manually button:

Select the communication protocol you would like to use from the dropdown (in this case EtherCAT EoE (using external Master)):
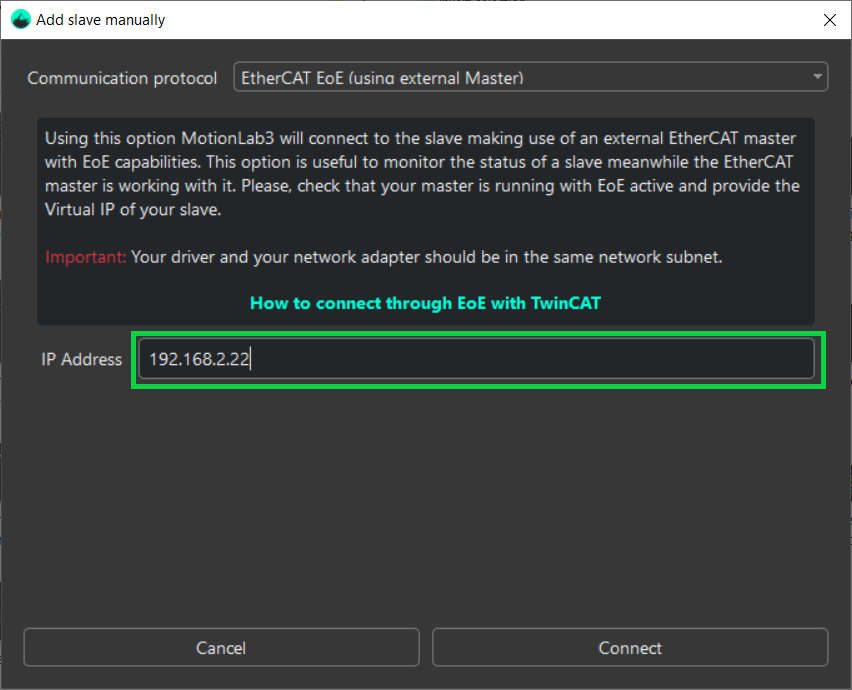
Enter the IP 192.168.2.22 (the IP address must match the one configured in TwinCAT):
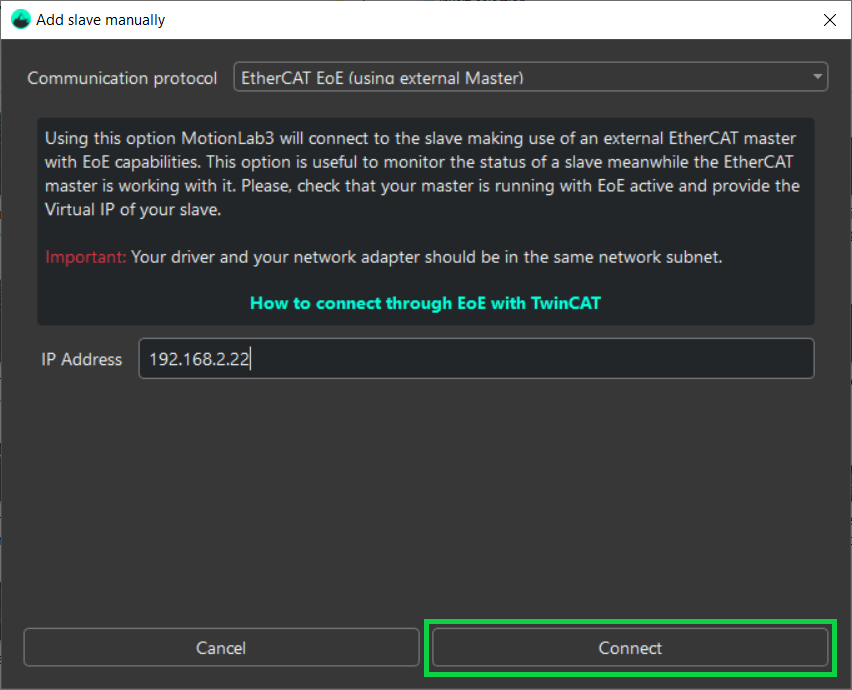
Press the Connect button:
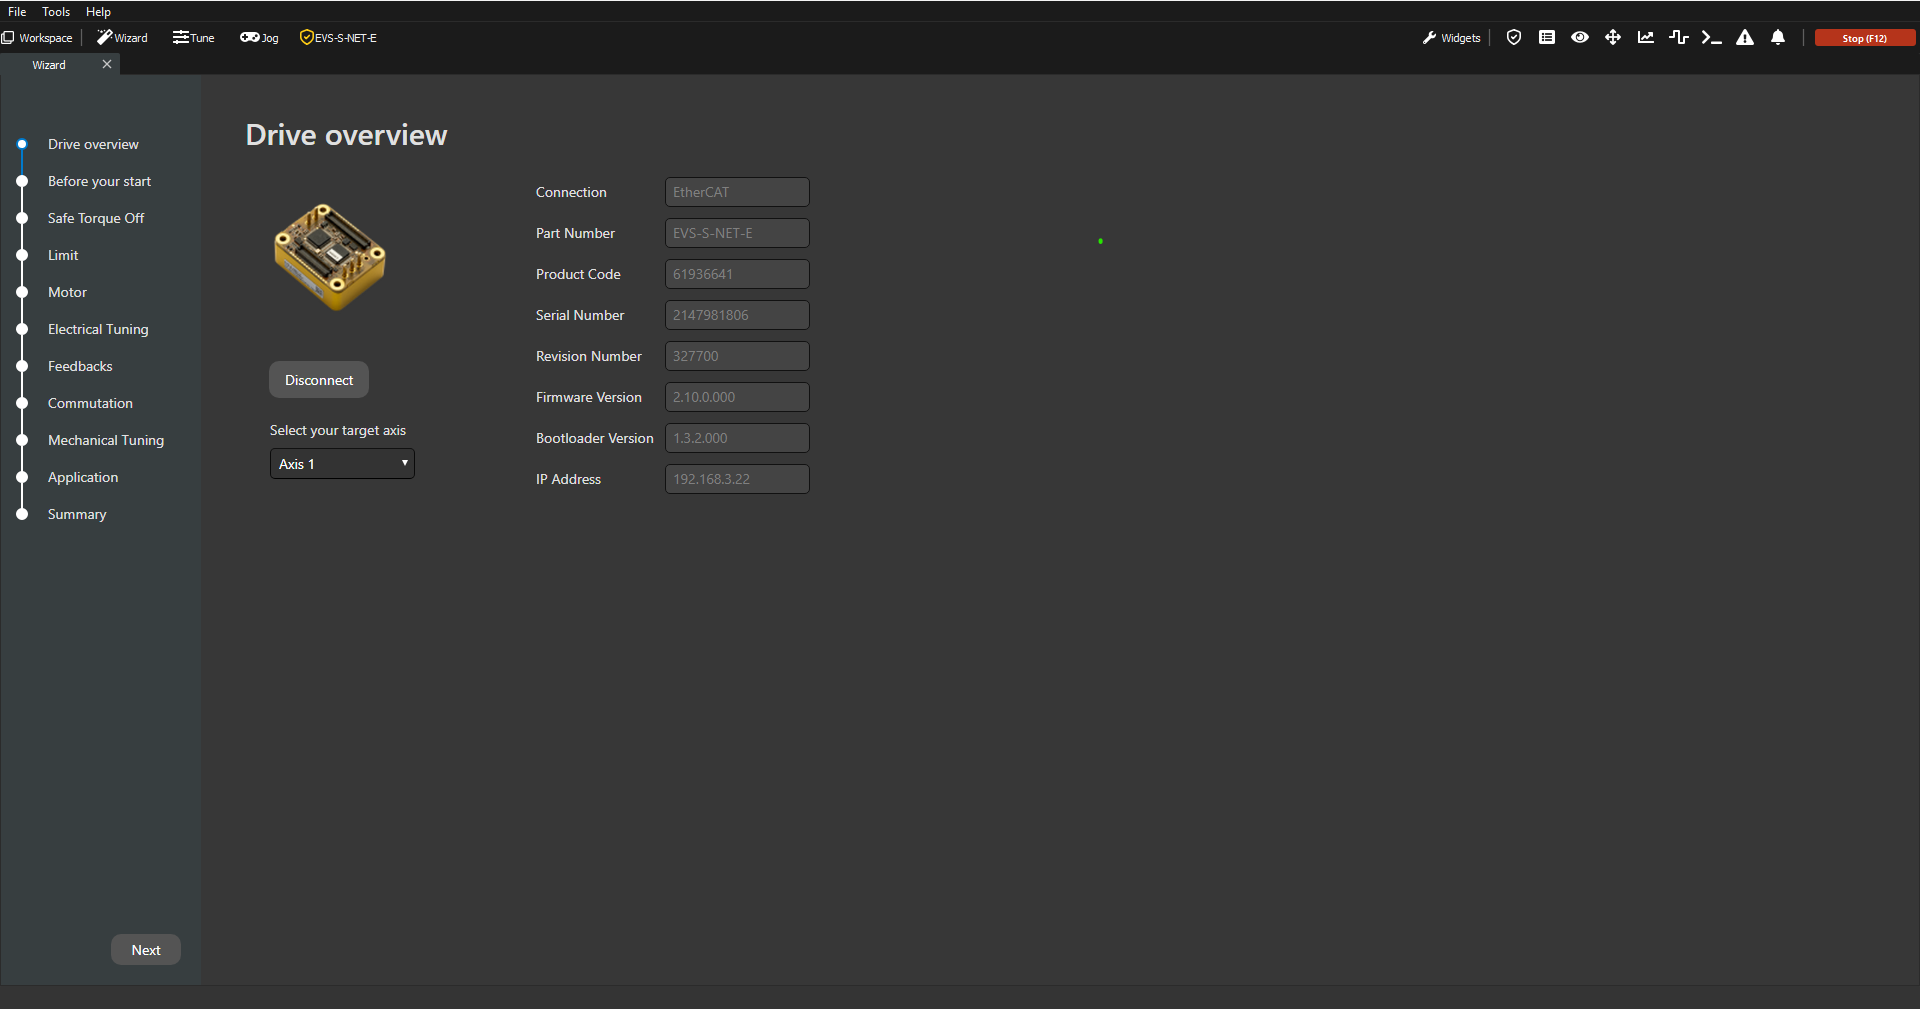
MotionLab3 will now connect you to the drive:
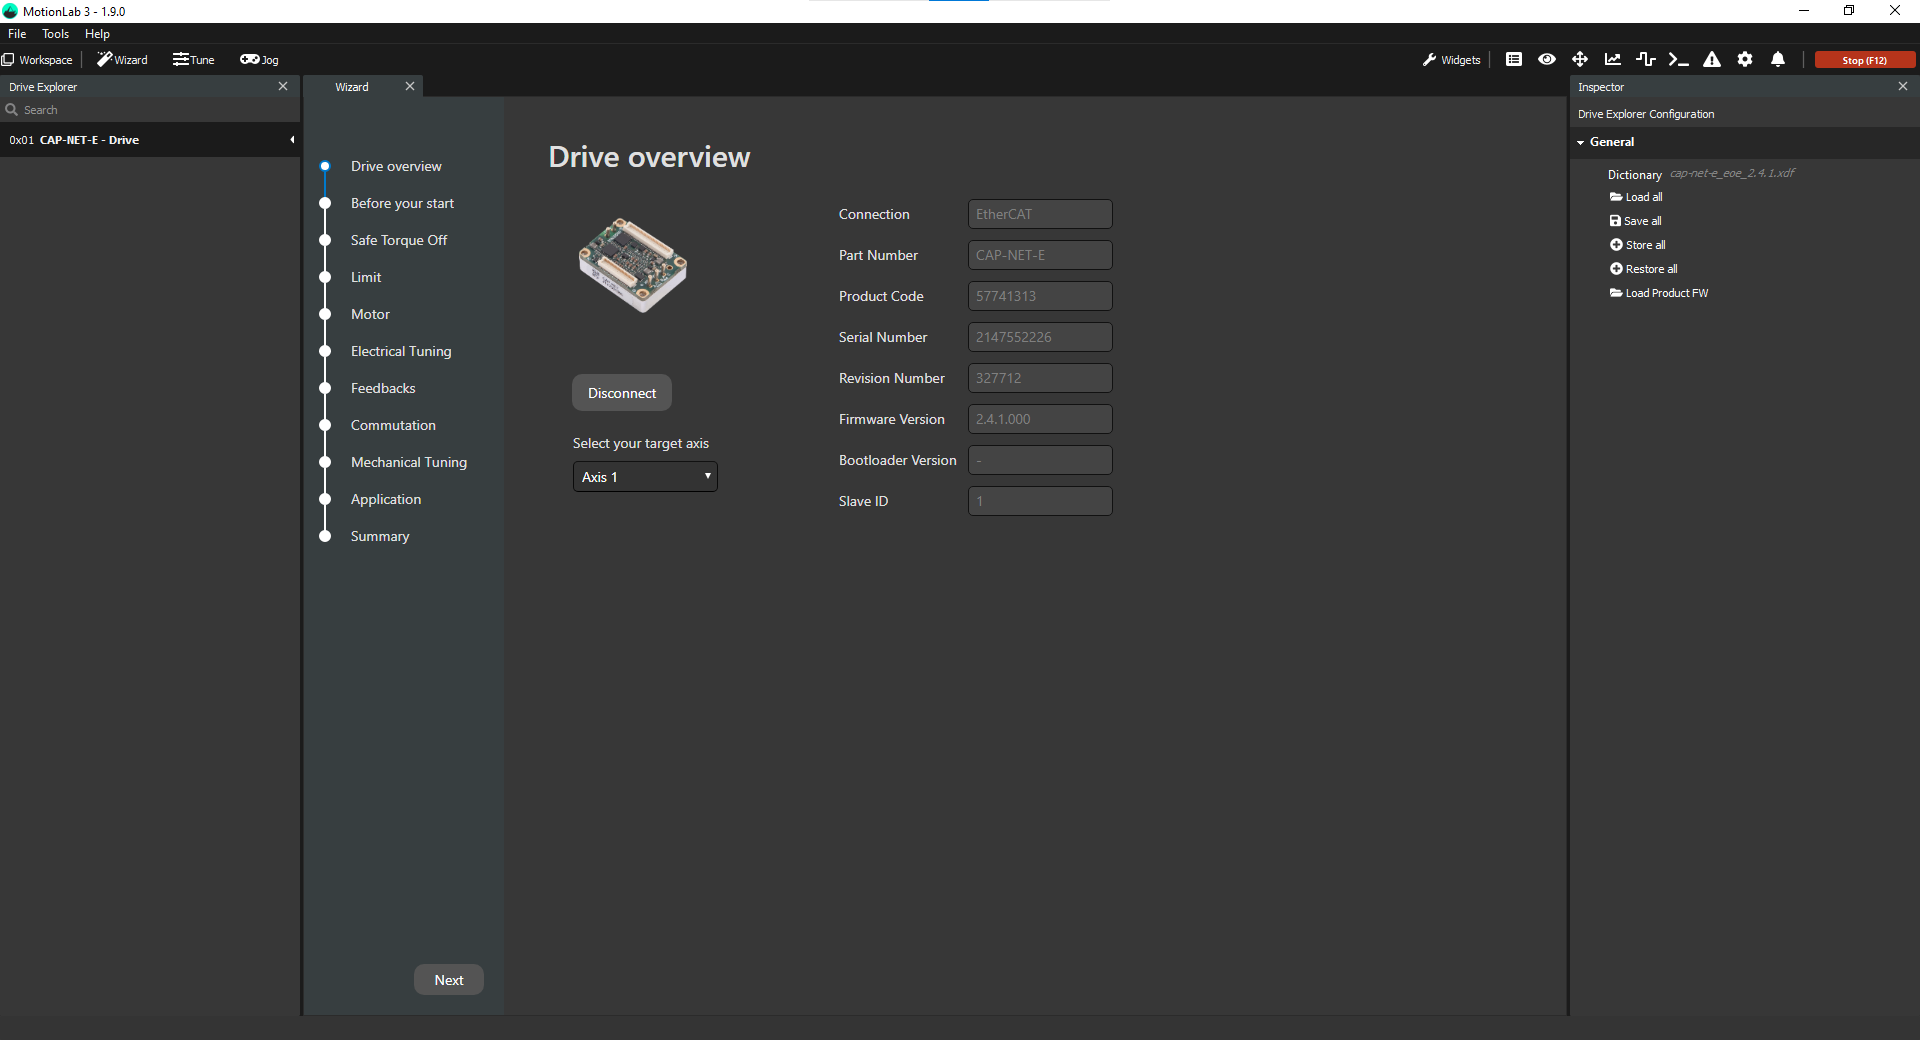
If you notice that the configuration will MotionLab3 is slower than expected, it is advisable to reduce the update rate in TwinCAT. It is advisable to start with 1ms. However, the value might differ from a PC to PC.